

About the author: Joanne Banko is a freelance sewing educator and a self proclaimed sewing cheerleader. She is a frequent contributor to Designs in Machine Embroidery magazine and author of the book Wrapped in Embroidery available at AllBrands.com. You can see Joanne’s online teaching segments broadcast on the popular PBS TV show, It’s Sew Easy, and online at www.itsseweasytv.com. Visit Joanne and read her blog posts at http://www.letsgosew.com/.
The sewing tools we have at our fingertips these days make it easy and effortless to create embellishments for garments, crafts, home decor, and more! From incredible machine features to fantastic presser feet and helpful accessories, there is so much to love about sewing these days! Beginning with this article I’d like to share a few of my favorite techniques for creating embellishments with ribbons.
Since this is my first article for the ALLBRANDS newsletter I’d thought I’d give you a bit of background. I believe I was born with sewing in my genes. You may say I inherited the “tendency” to sew but I view it as a gift from my Creator. My Grandmother and Mother were both accomplished seamstresses but ironically, I was not taught by either of them. I was the last of five children, with a long gap in between. By the time I arrived on the scene my Mom had stopped sewing. My first stitch was in a Junior High Home Economics class. I remember taking that very first stitch and was hooked from the beginning! My wonderful, wise Mother saw the spark that first stitch created and at the beginning of the following school year she offered me a choice between ready-made clothes or a new zig-zag sewing machine and fabric. I chose the machine and have been sewing ever since! Seeing my enthusiasm my Mom started to sew again herself. We had so much fun shopping for supplies and sewing together. She stitched in the living room on her machine, while I sewed on my very own machine in my bedroom. I zig-zagged my way through junior high and high school making almost all of my own clothes.
We’ve come a long way since the days when we thought an ordinary zig-zag stitch was a big deal. Now we can choose from literally hundreds of decorative stitches built-in to the sewing side of our machines. Beyond that, we can stitch multitudes of embroidery designs with “hoop” capability. Yes, sewing today is better than ever and I love to do it all… sew, embroider, quilt, and craft! In this article I’d like to share a simple technique for creating decorative ribbon using your serger and your sewing machine. Are you ready? Let’s go sew!
Here are the supplies you will need:
- Serger with rolled hem capability.
- Sewing machine with decorative stitch capability. Recommended presser feet for this project include a clear foot for decorative stitching and an adjustable blind hem foot for stitching the ribbon on your chosen item.
- Ordinary grosgrain ribbon measuring approximately 1-inch wide. Note: Cut a length of ribbon measuring twice the amount needed for your finished project so you have enough to test your rolled hem stitching and your decorative stitching.
- Serger Thread to contrast with your ribbon.
- Embroidery Thread to match your serger thread.
- Size 11 embroidery needle.
- Strips of stabilizer – Use tear away stabilizer if you don’t need reversible ribbon. Use water soluble mesh stabilizer for reversible ribbon.
- Seam sealant to treat ribbon ends.

Here is how to decorate your ribbon:
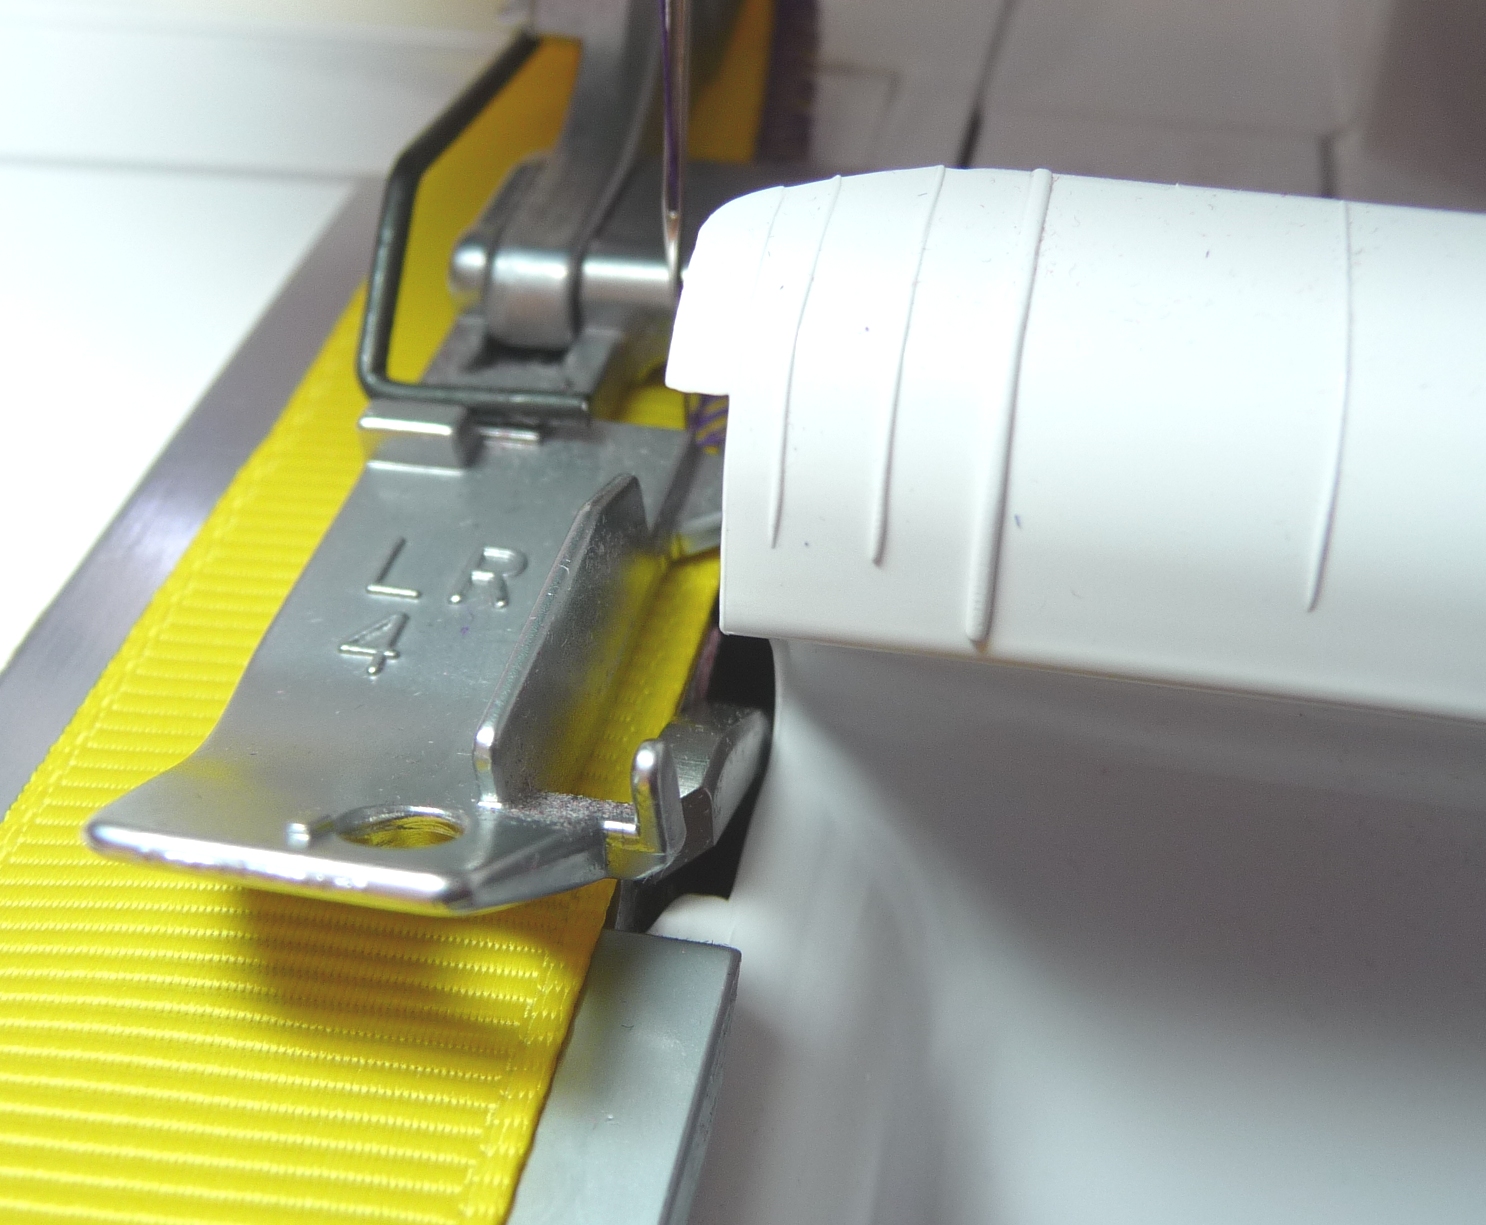
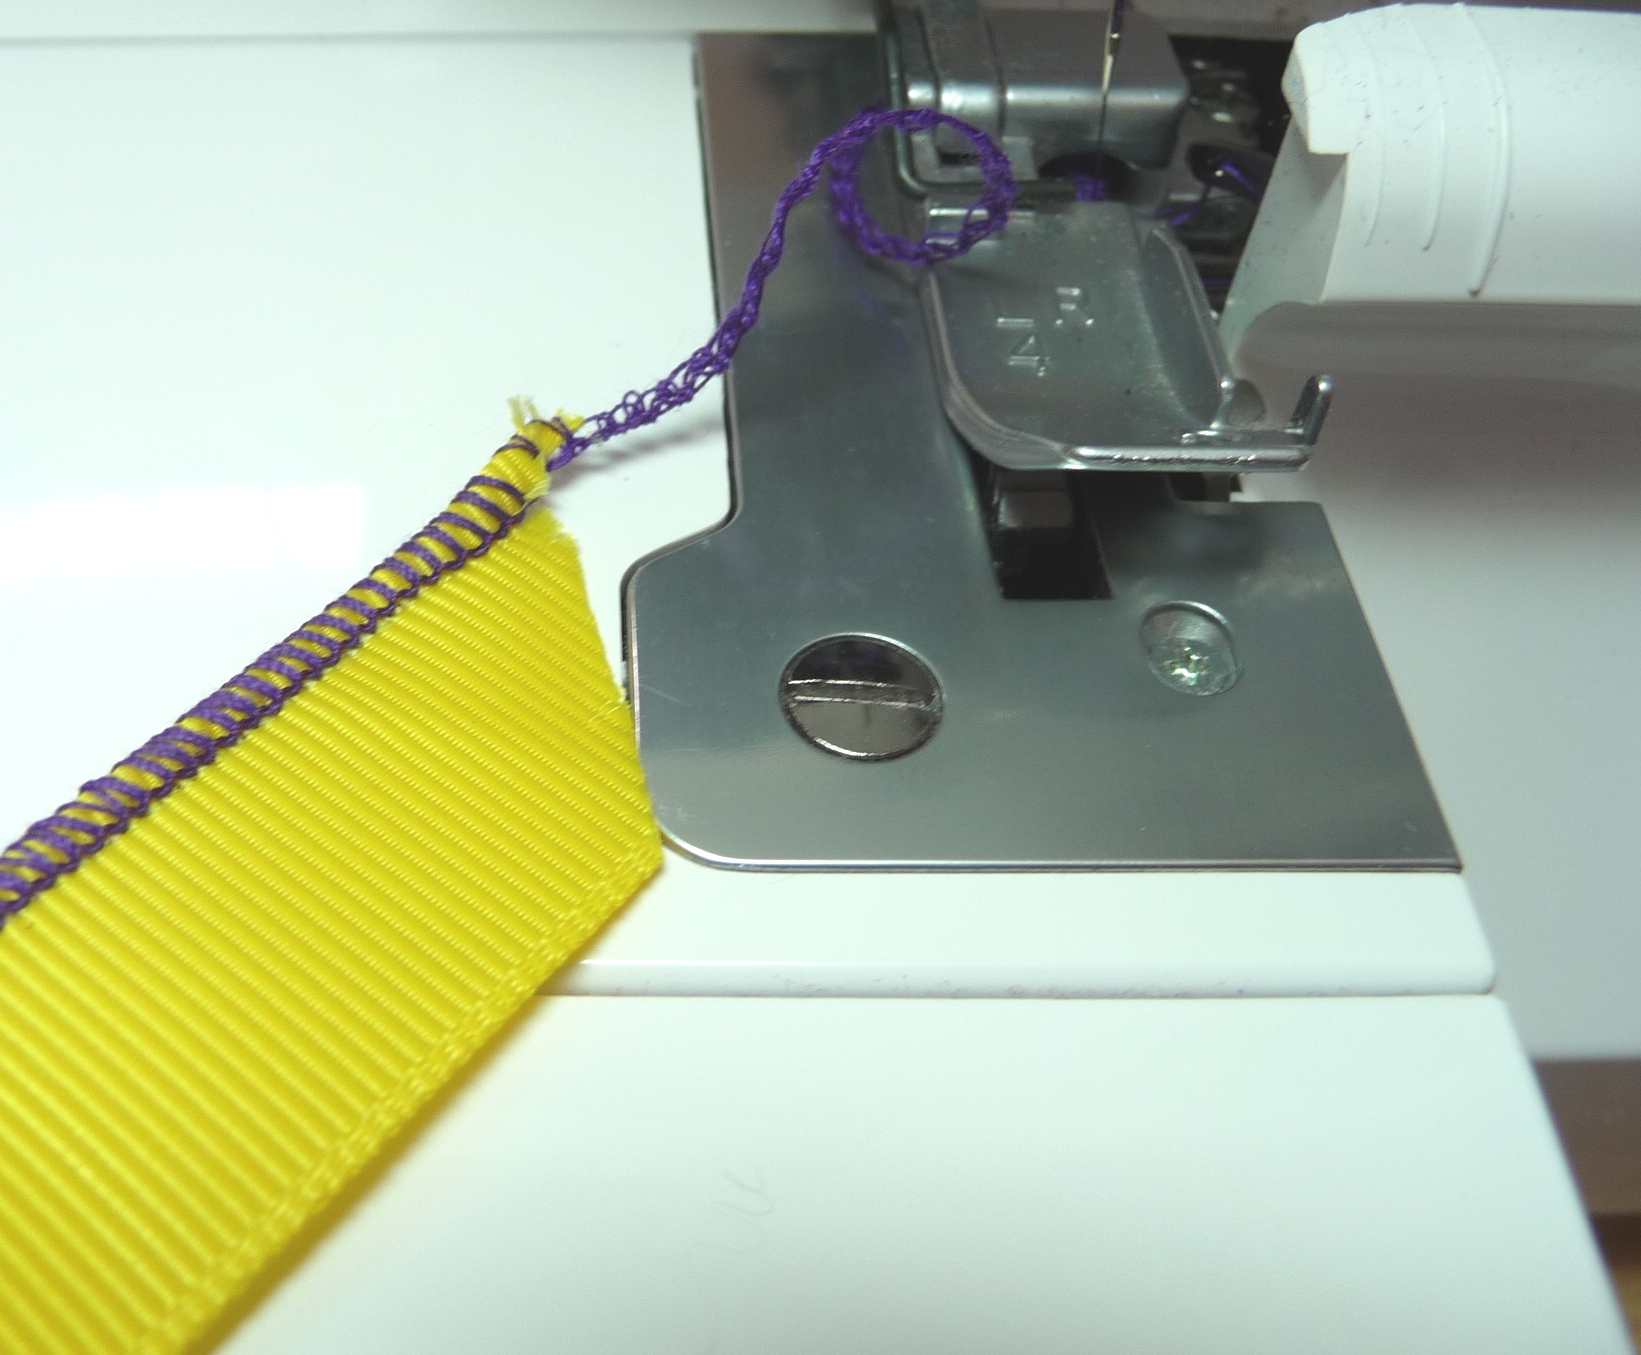
Set up your Serger for a two or three thread rolled hem.

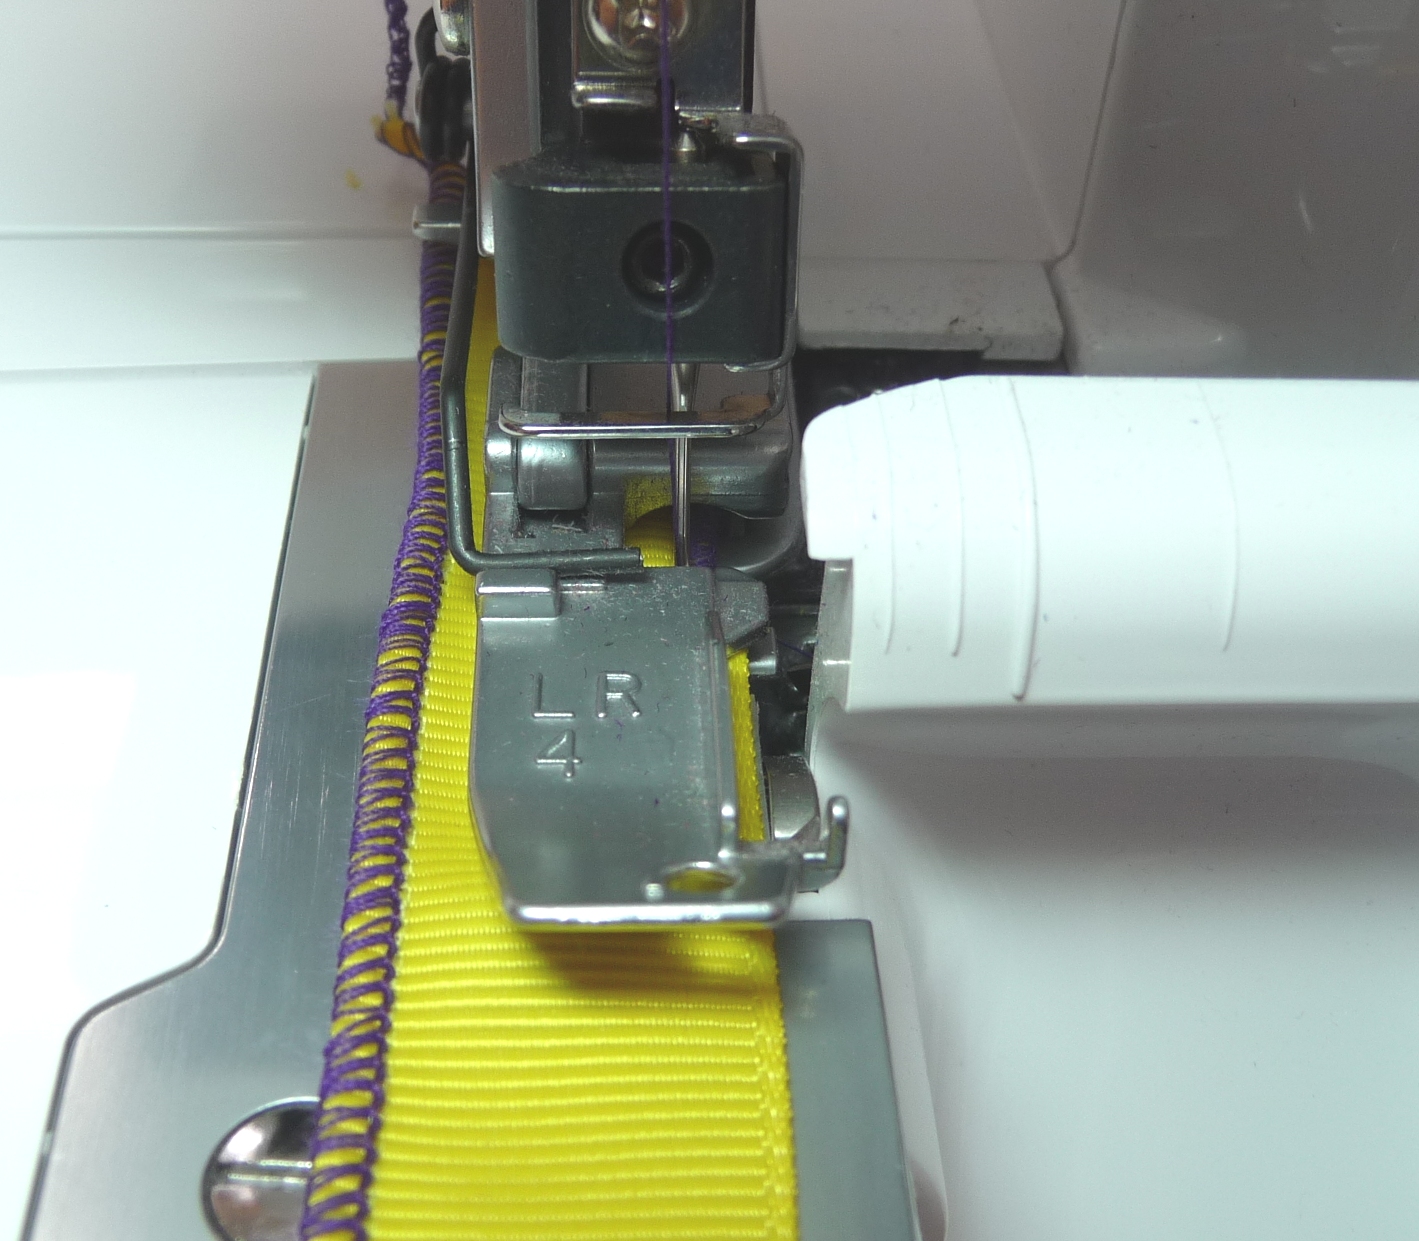
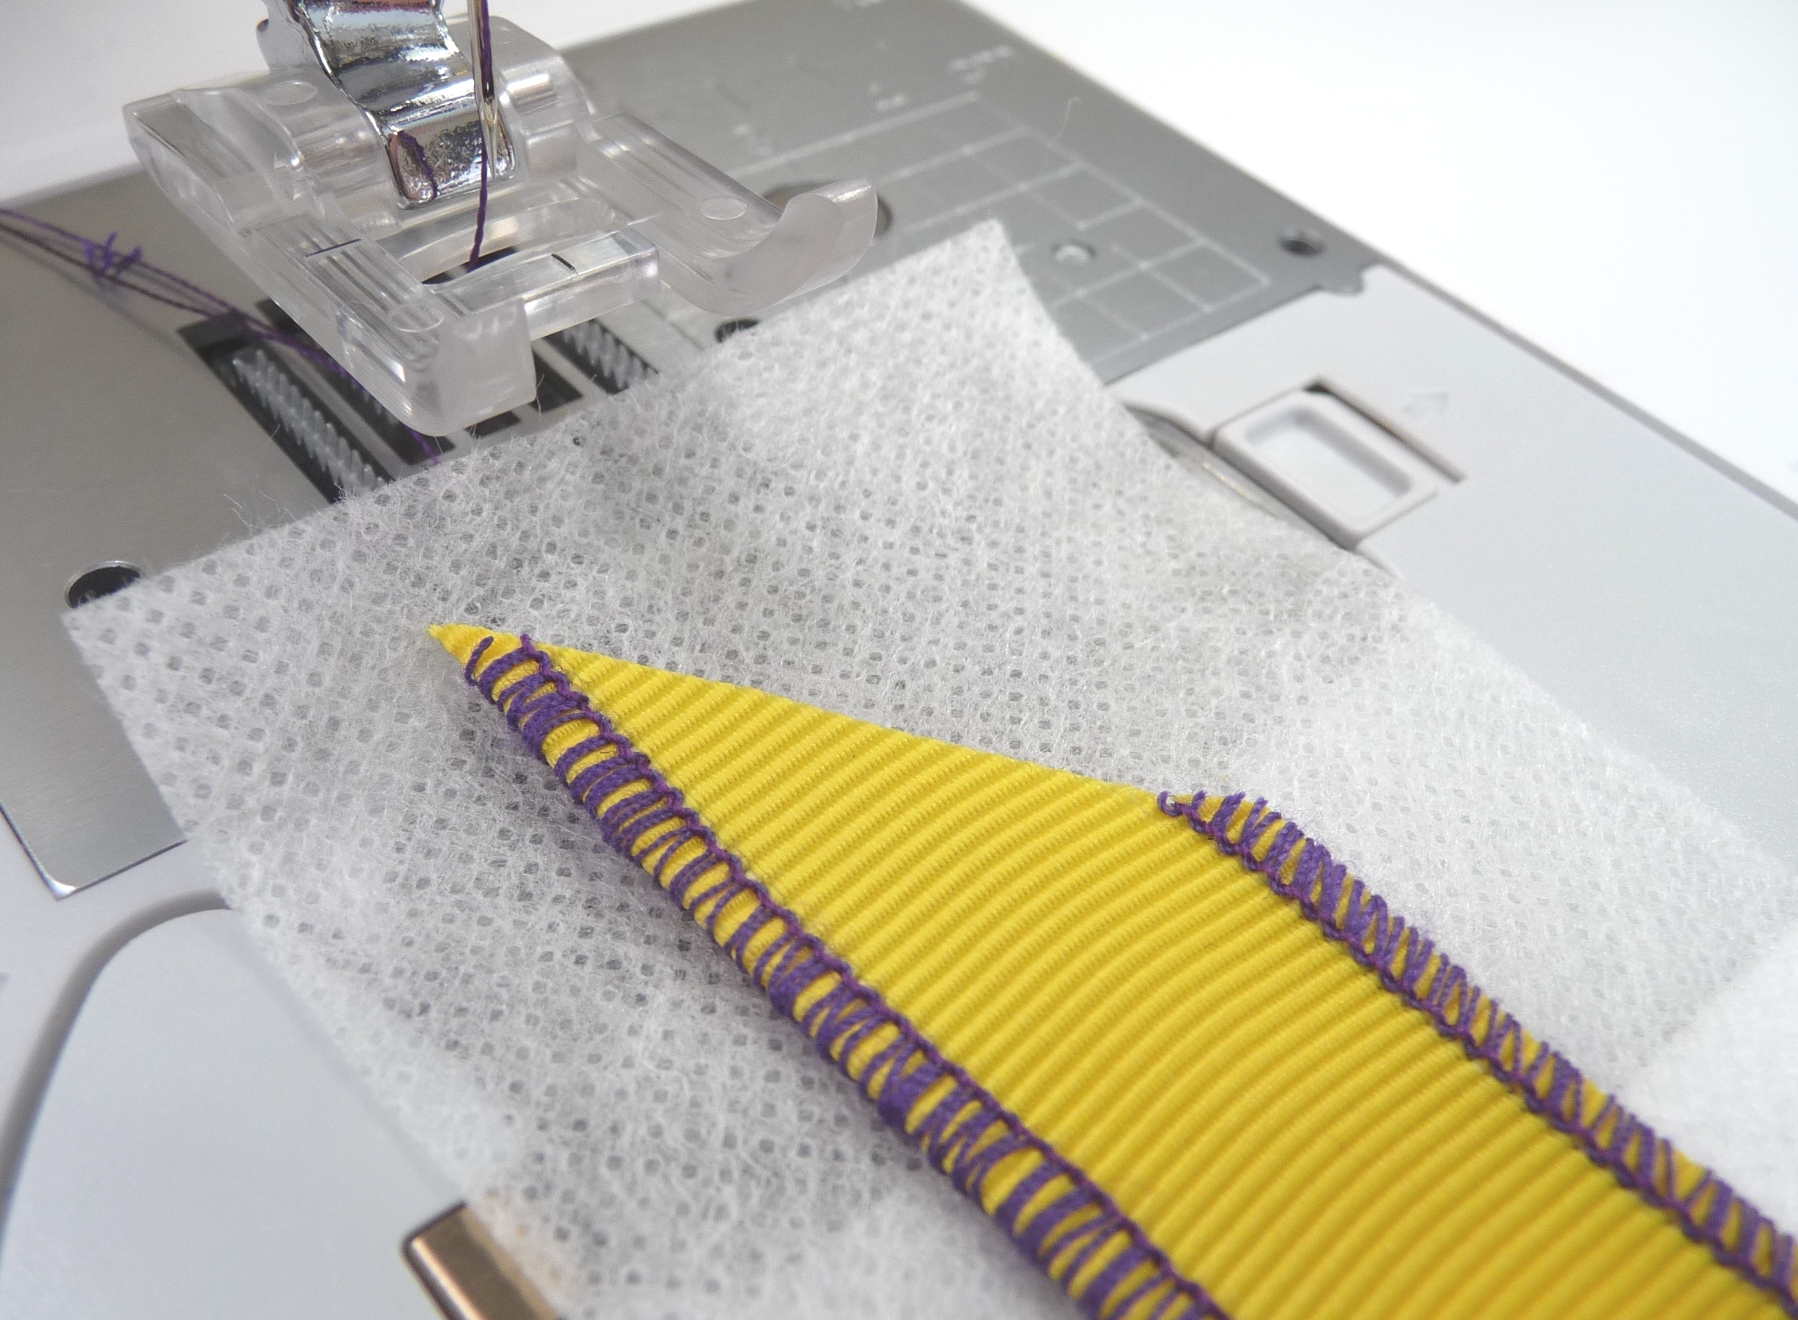
Disengage the cutting blade and serge along each finished edge of the grosgrain ribbon. Note: You are not actually rolling the edge of the ribbon. You are simply using the rolled hem stitch to accent the edge of the ribbon. When stitching, be sure to guide the ribbon evenly so that the rolled hem stitch forms right along the finished edge.
Press ribbon. I like to use Mary Ellen’s Best Press to smooth out the ribbon in preparation for decorative stitching. Set up your sewing machine for decorative stitching. Thread your machine with Embroidery Thread that matches your rolled hem, threading top and bobbin with the same thread. It is important to use a Presser Foot designed specifically for decorative sewing. In addition, you want your presser foot to be the same size, or slightly smaller than your ribbon. If your particular decorative foot is wide, then you will want to use ribbon that is slightly wider as well. Prior to stitching on the ribbon you need to cut stabilizer strips to equal twice the width of the ribbon.
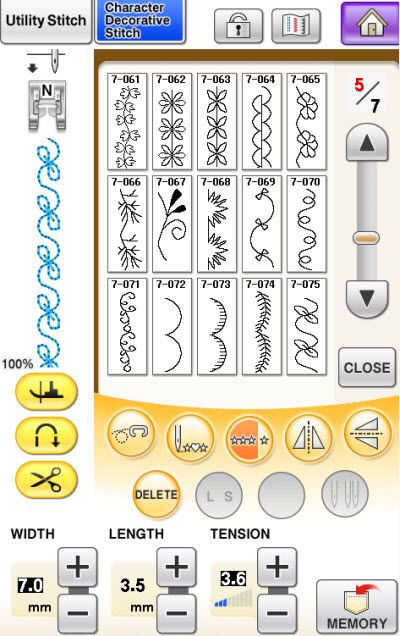
Select a decorative stitch to fit the ribbon. I used a stitch measuring 7mm wide and I increased the length of the stitch. It’s likely you have many built in stitches to choose from. I recommend testing several stitches until you find one that works well on your machine.
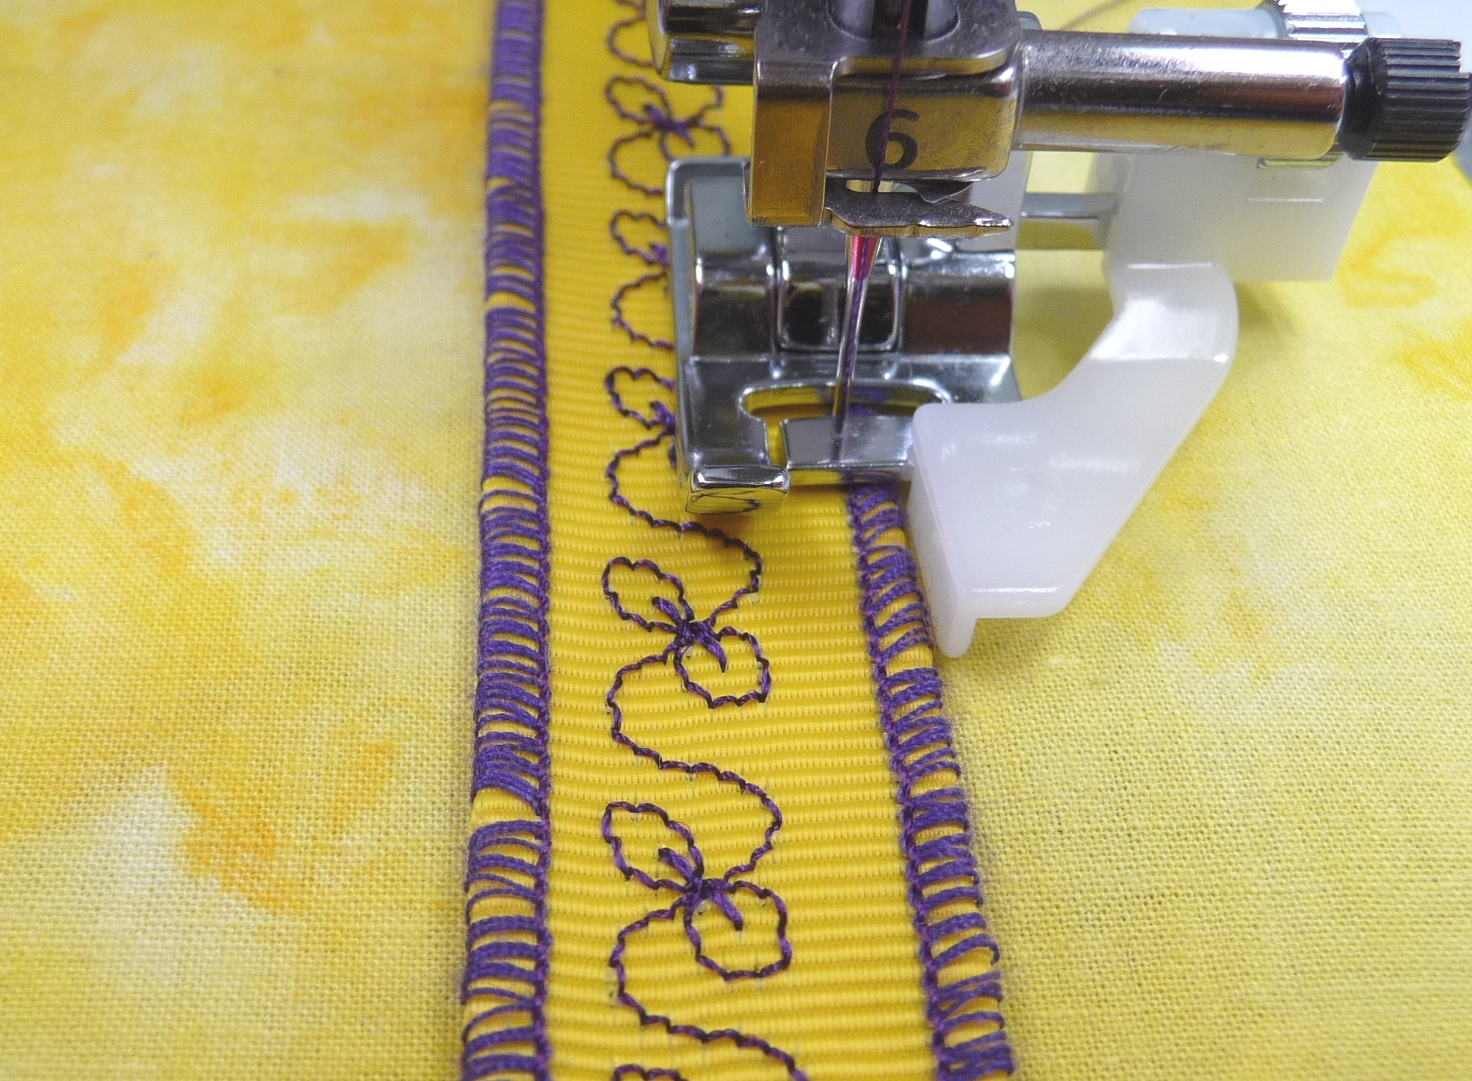
Stitch a row of decorative stitches down the center of the ribbon placing stabilizer underneath as you stitch.

Remove stabilizer according to the package directions. Trim ends at an angle and treat with seam sealant.

Attach the ribbon to your project using a straight stitch, stitching just along the edge of the rolled hem stitching. Tip: The adjustable blind hem foot is perfect for this task. Adjust the guide to line up with the edge of the ribbon, having the needle pierce along the rolled hem stitching. While stitching, keep your eye following the guide to maintain even and consistent edge-stitching.
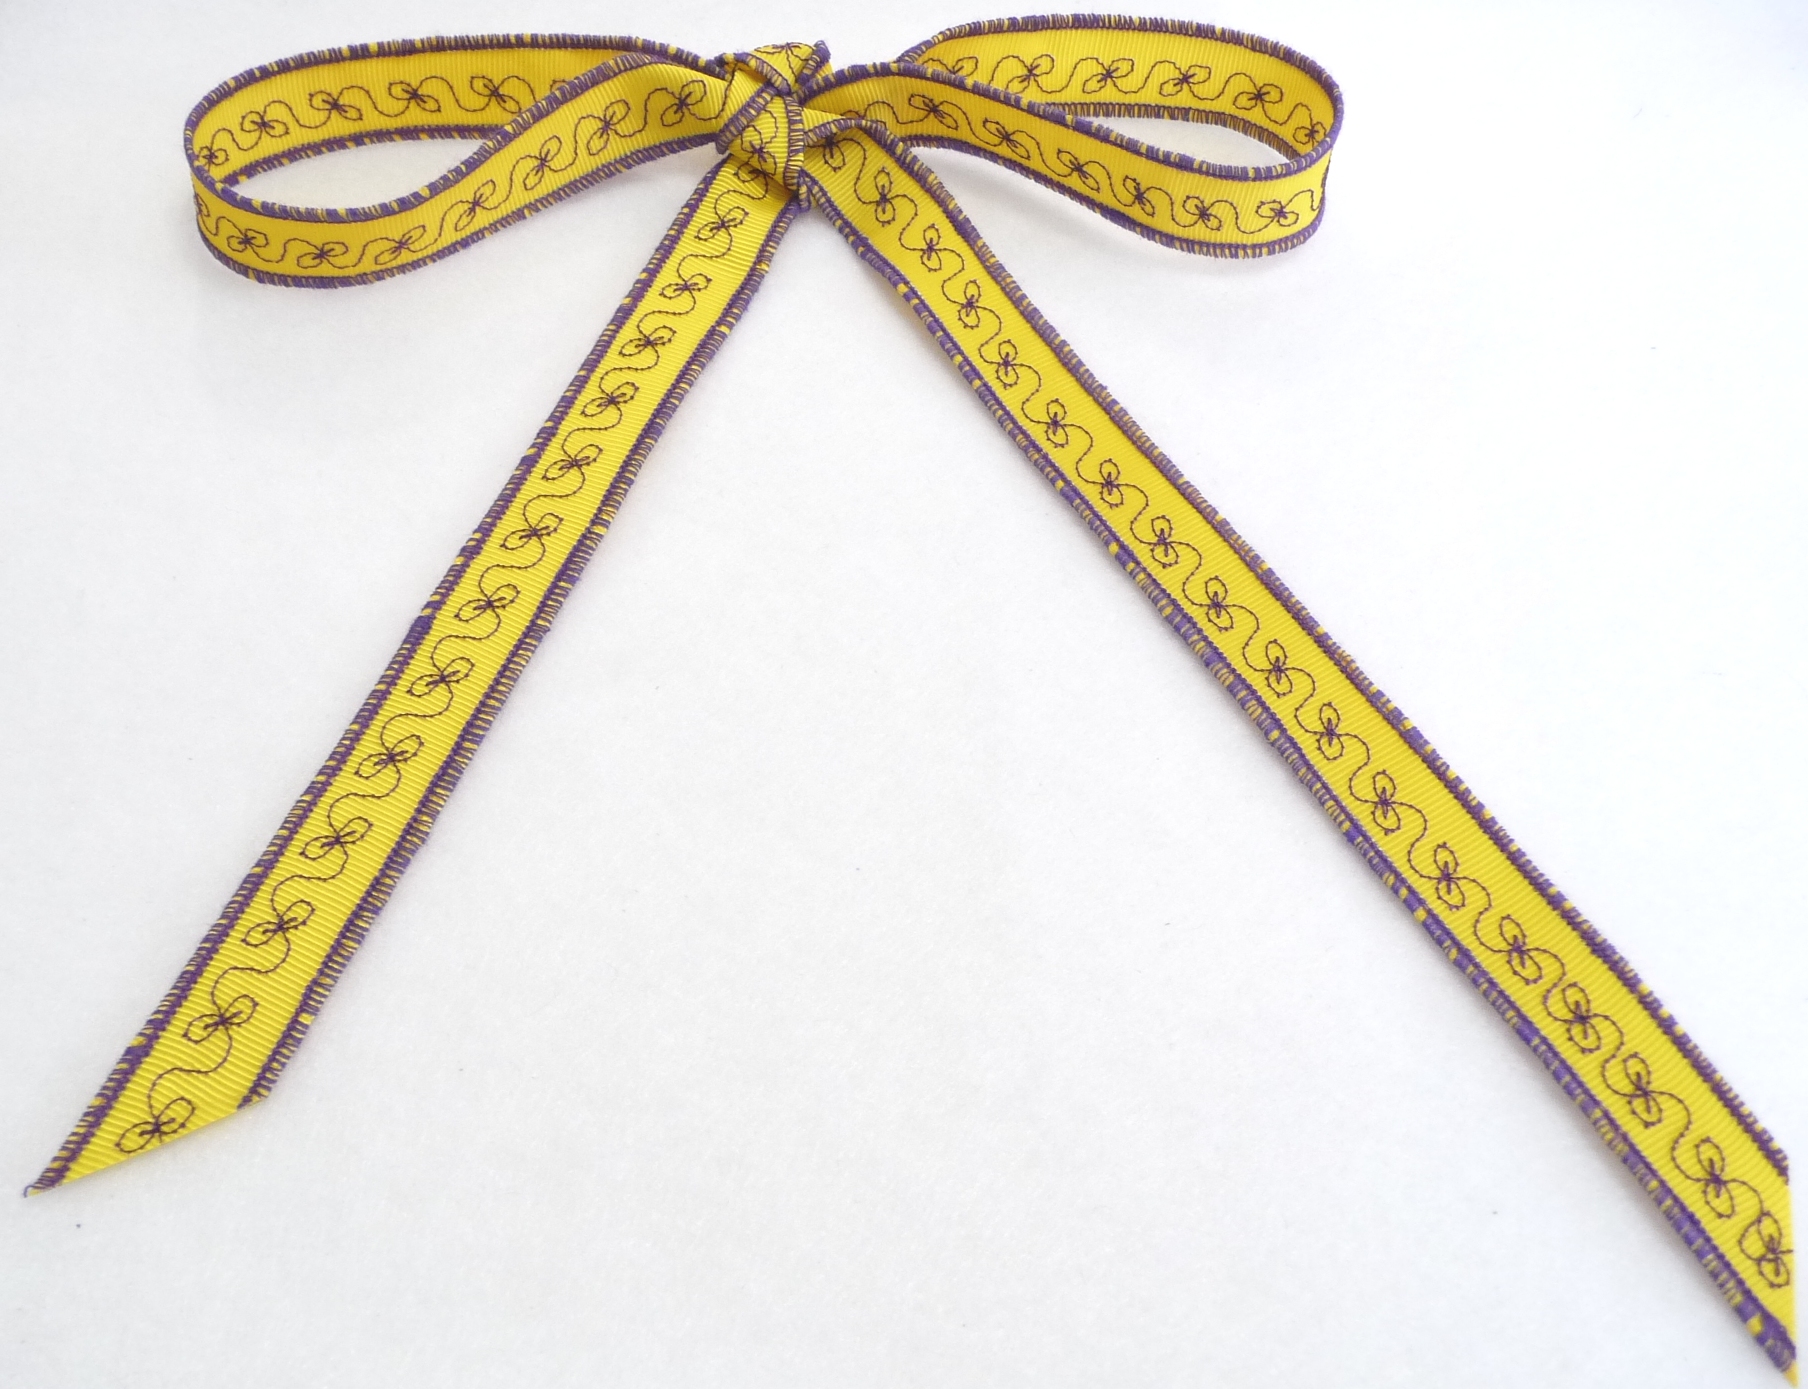
Ideas for using your ribbon: Use lengths of ribbon to trim a pillowcase, accent the hem of a little girl’s dress, decorate ready-made placemats, trim baskets and flower pots, decorate gift packages and more! Because this ribbon looks good on both the right and wrong sides, you can tie it into a bow and use it to accent any garment or craft project you like!
Next time . . . I’ll show you to use plain ribbons to enhance your embroidery designs. Until then, happy sewing from your sewing friend,
About the author: Joanne Banko is a freelance sewing educator and a self proclaimed sewing cheerleader. She is a frequent contributor to Designs in Machine Embroidery magazine and author of the book Wrapped in Embroidery available at AllBrands.com. You can see Joanne’s online teaching segments broadcast on the popular PBS TV show, It’s Sew Easy, and online at www.itsseweasytv.com. Visit Joanne and read her blog posts at http://www.letsgosew.com/.
What a great article with wonderful ideas to add a delightful touch to any project.
What a wonderful article detailing delightful ways to add pretty to any project!
I love it!! Simple and beautiful!
Very cute idea..You’ve got me thinking how I could use this!
Glad you liked the ribbon idea Sherrie! It is really fun to take simple “ingredients” like ribbon, thread, and decorative stitches and mix them together for an easy embellishment. This simple trim can dress up all kinds of pretty projects! It even makes a nice bow for a gift basket. If you have built-in 7mm lettering on your machine you could stitch a ribbon with a short message for a truly customized gift.
So what’s new about this? I’ve been doing it for years.
Wonderful tutorial for using serger and decorative machine stitches! Thank you!
Thank you so much, my husband just bought me a serger, have been sewing for many yrs. but never had one; so I know nothing and these tips and tricks are so very helpful and fun.
You will wonder how you ever did without your serger Jackie. The rolled hem alone makes it worth the price. No sewing machine stitch can come close to imitating that tiny, neat, and practical stitch. Most people think of a rolled hem for hemming of course, but this project shows that the rolled hem stitch can be purely decorative too!
ahhh, things we never think of until someone else shows us!
Sometimes it’s the simple things that add the punch line to a project. Grosgrain ribbon is widely available, comes in many colors and is inexpensive, making it fun and easy to experiment with!
I used a similar technique and my embroidery functions to embroider my daughter’s soccer team name, each girl’s name and number on crossgrain ribbon and used to create headbands for them. Simple, fun, and the girls loved them!
Love your new blogg and my sewing instructor suggested I check Allbrands facebook page out and now I have a blogg to keep me flowing with new ideas!
Thank you very much Cindy! So glad that you like our blog. We have more interesting and inspiring things coming soon! Stay tuned.
The Allbrands.com Team