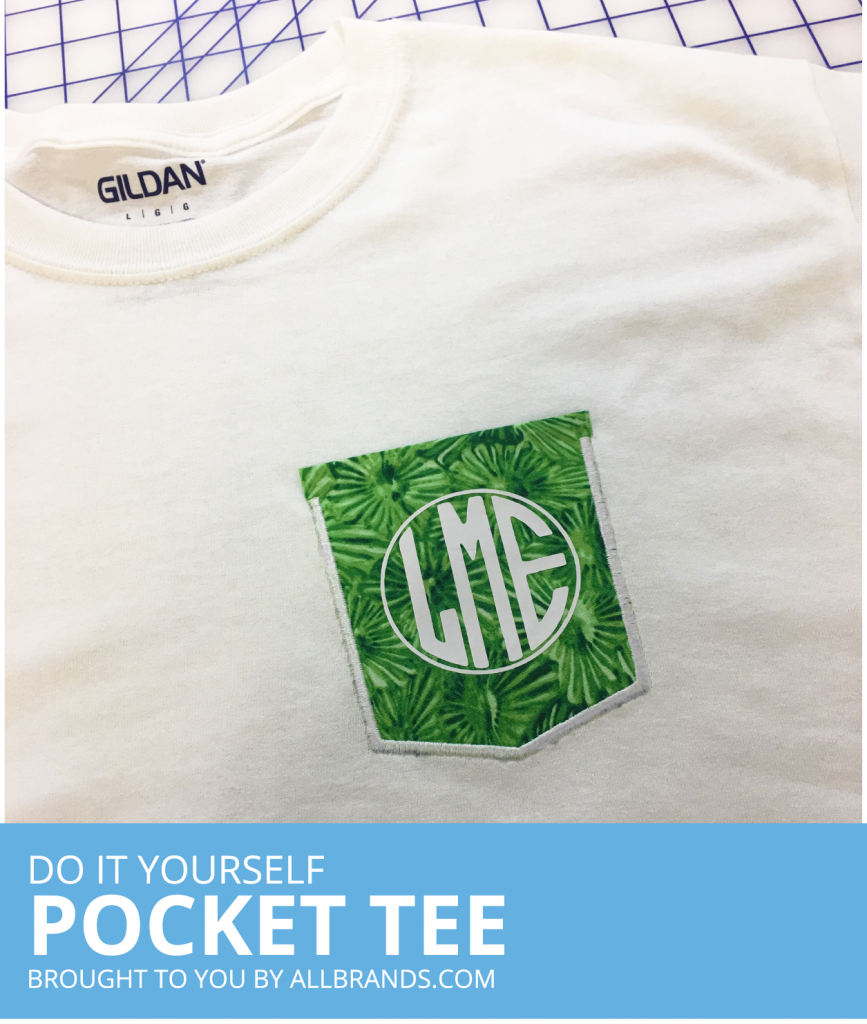
Do-it-Yourself Pocket Tee

Click here to watch the full tutorial!

Summer t-shirt season is upon us! Here’s a super cute tutorial for a monogrammed pocket tee! Whether it’s for you or a gift for a friend, these cute and comfy shirts are a summer essential!

What You Need:

  • a plain t-shirt
  • a fat quarter of fabric
  • thread
  • heat transfer vinyl
  • the design of your choice, printed in black & white.
    • (we suggest keeping it to 3″ x 3″)
  • Iron
  • Brother Scan-n-Cut 2
  • USB capable embroidery machine


Step by Step Instructions:

Preparing your design

    1. Printed to scale, place your design in the scanning mat. Scan.
    2. Select desired outline setting
    3. In the initial edit screen, crop out excess white space around your design. Save.
    4. Locate your saved design.
    5. Select the button in the top left.
    6. Select the button with the 3 red squares on it.
    7. Select the right button on the pop up screen. Select OK.
    8. Select the bottom middle button to complete grouping. Select OK.
    9. Select the top left button.
    10. Select the button with the square and two arrows on it.
    11. Select the mirror button *DON’T FORGET TO MIRROR!*

Cutting your design

    1. Set your blade depth to 1.5
    2. Set your cut speed & pressure to 1
      1. Every machine is different, so the settings needed on your machine may slightly vary from the ones we used!
    3. Place vinyl on the cutting mat, shiny side down!
    4. Do a test cut using one of the simple shapes built into the machine.
      1. Colored vinyl should peel off, leaving the clear backing intact with the rest of the sheet! It shouldn’t cut through the whole sheet.
    5. Take vinyl, place shiny side down.
    6. With your desired design selected, load mat into the machine. Cut.
    7. Unload mat, cut loosely around the edge of the design

Pocket

    1. Cut a 5”x5” square out of your desired cotton fabric
    2. On an iron safe surface, iron on fusible backing
    3. Fold over the top of your pocket. Press with iron.
    4. Hoop your t-shirt with stabilizer.
    5. Thread your machine.
    6. Locate your desired pocket applique file, begin
      1. The next few steps may vary depending on your file set up!
    7. After the preliminary stitch, place the pocket fabric using the stitch as a guide
    8. Continue the applique process.
    9. Trim excess as closely to the stitch as possible.
    10. Start the final step, trim any more excess upon completion
    11. Unhoop, and trim away any excess stabilizer

Vinyl application

    1. Peel off excess vinyl, leaving your full design on the clear layer.
    2. Place.
    3. Using a presser cloth (we just used our excess pocket fabric), press on using an iron – and i mean really press it!
    4. Peel off clear backing, and you’re done!

Express Yourself with Machine Embroidery and Say it with Stitches!

Hello to all my Allbrands friends!

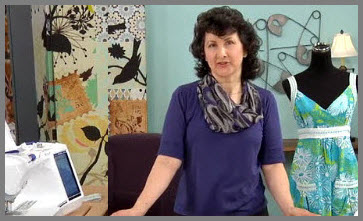
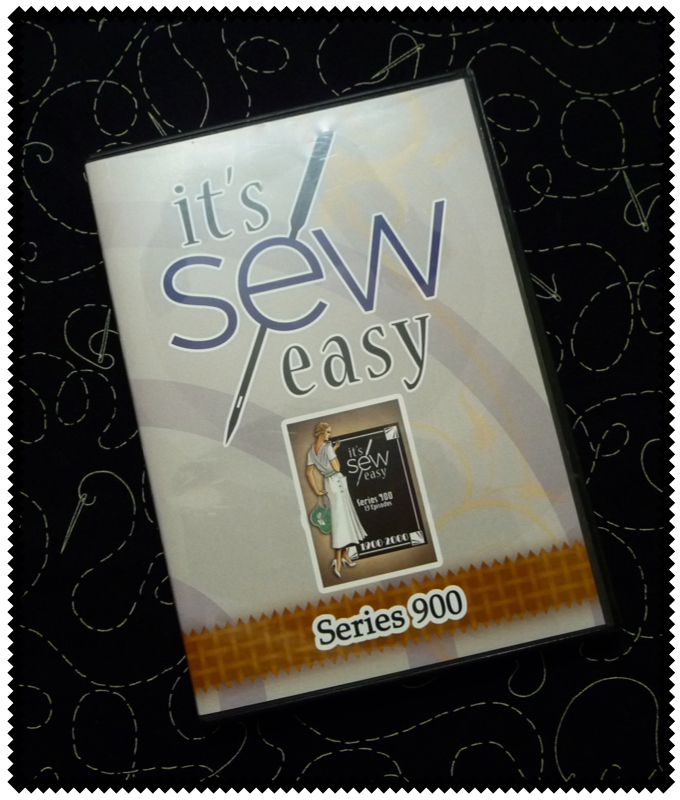
Today we’re talking T-shirts! It seems almost everyone, everywhere loves to wear the quintessential Tee, from babies and children to teens, tweens, Grandmas, Grandpas, and just about everyone else on planet earth!!! Are you interested in embroidering on T-shirts? Watch It’s Sew Easy TV, Episode #910 this weekend on your local Louisiana Public Broadcasting station and you’ll see the show where I talk all about T-shirts.

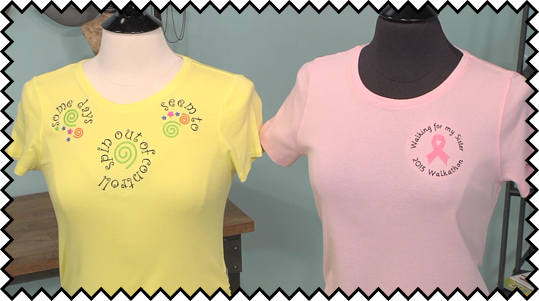
image1_allbrandsblog_9_24_15

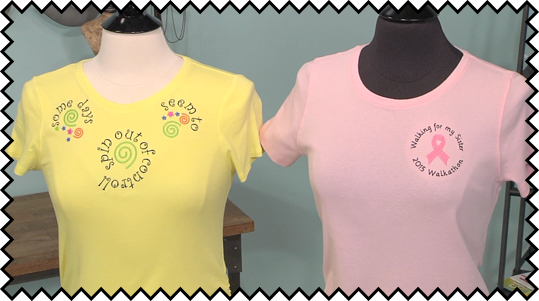
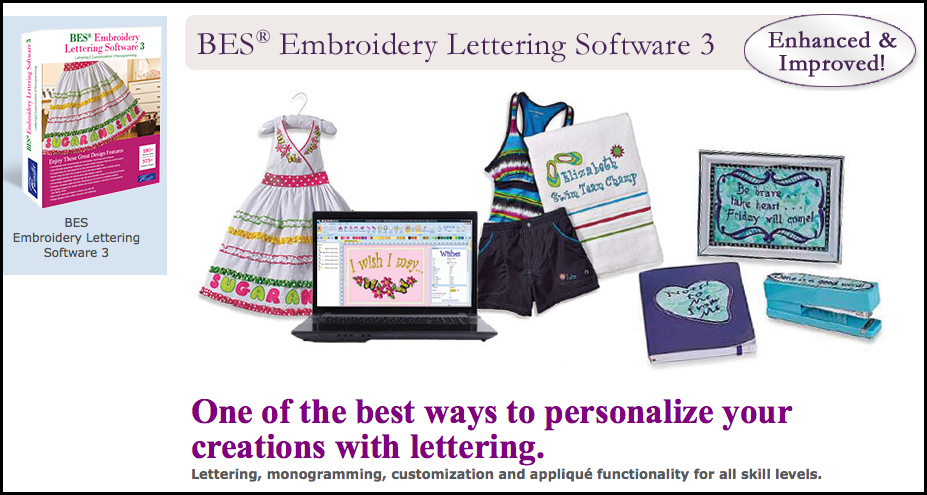
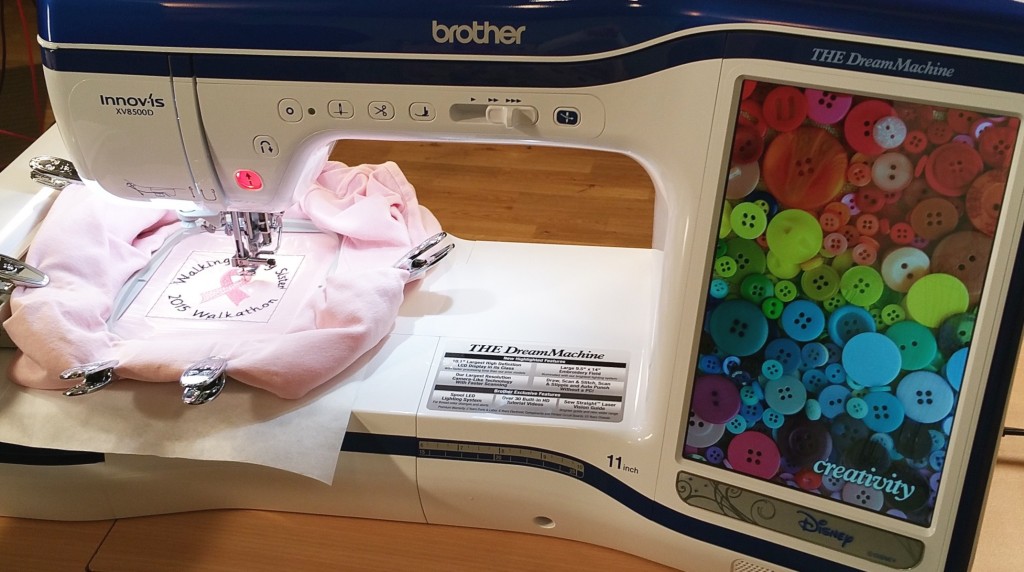
You’ll find out how to create a custom design with easy to use multi format BES3 Lettering and Customization Software to make your T-shirt really special. You’ll also get tips for stabilizing knits and ideas for making sure every t-shirt embroidery design is just right before pressing the start button on your embroidery machine.

image2_allbrandsblog_9_24_15

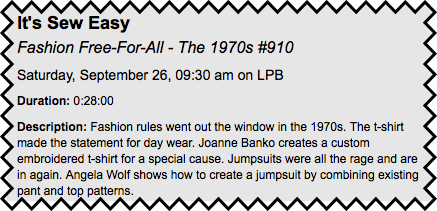
In show #910 It’s Sew Easy TV continues their trip through the decades of fashion. The theme for this episode was the disco dancing seventies. Kind of a crazy fashion era but certainly one where T-shirts became mainstream and found their way into everyone’s wardrobe. The history of t-shirts is an interesting subject. While T-Shirts were worn well before the 1970’s, in previous decades they were mostly white and still generally regarded as “undershirts.” That changed dramatically by the 1970’s. With the explosion of color and new ink products suitable for printing on garments, T-shirts became commonplace both as a fashion statement, and a form of self-expression.

image3_allbrandsblog_9_24_15

Today’s T-shirts range from casual to elegant with styling options that make them one of the most popular outerwear items of all time. Modern embroidery machines along with Lettering and Customization software make it easy and fun to embellish ordinary T’s and personalize them to suit the style and taste of all ages and various interests. Embroidered lettering is attractive and durable. It’s easy to transform a T-Shirt with exciting designs, added expressions, names, and monograms. With embroidery capability you can indeed Say It with Stitches!

image4_allbrandsblog_9_24_15

The featured pink Tee on the show has a very personal and special meaning. I embroidered it for my sister who is a survivor and wears the pink ribbon as reminder of the precious gift of life and the success of restored health. Perhaps you might want to embroider the pink ribbon for someone you care about. You’ll find it available as a Free download from the Brother sews website. CLICK HERE for the Brother version of this pink and powerful emblem.

image5_allbrandsblog_9_24_15

As always, you can visit the itsseweasytv.com project section and find a link to instructions for this episode and many more. I hope you enjoy the show! It’s scheduled to air Saturday September 26th at 9:30 am. Visit lpb.org for more details. CLICK HERE to search for PBS stations all over the country.

Talk to you again soon. Until then, Happy Sewing from your sewing friend,

JoanneBanko_photo

JoanneBanko_signature

P.S. Will I get the chance to see you in Baton Rouge? I hope so! I’ll be teaching along with Deborah Jones and Louis Carney for the big bash known as Bayou Embroidery University. CLICK HERE for more details. Looking forward to seeing you there so we can talk sewing and embroidery live and in person!

Joanne Banko is a freelance sewing educator and a self-proclaimed sewing cheerleader. You can see Joanne’s online teaching segments broadcast on the popular PBS TV show, It’s Sew Easy, and online at www.itsseweasytv.com. She is a frequent contributor to Designs in Machine Embroidery magazine and author of the book Wrapped in Embroidery. The book is available at AllBrands.com. Visit Joanne at her Sewing and Embroidery website, www.letsgosew.com.


Pretty Piping Projects, plus 1950’s fashions for today!

Hello to all my Allbrands friends!

IMAGE1_ALLBRANDSBLOG_9_11_15

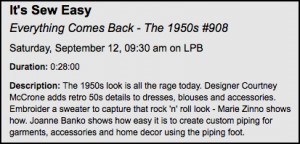
I’m here to encourage you to set aside time to enjoy the It’s Sew Easy TV show this weekend. It’s Sew Easy TV, Episode #908 airs on your local Louisiana Public Broadcasting station Saturday September 11th at 9:30 am. Visit lpb.org for more details. CLICK HERE to search for PBS stations all over the country.

IMAGE2_ALLBRANDSBLOG_9_11_15


I suggest you make yourself comfortable and watch as It’s Sew Easy TV continues to trace fashion and sewing throughout the 20th century. The focus of this series is transforming time-honored techniques into trends for today’s lifestyle.

IMAGE3_ALLBRANDSBLOG_9_11_15

The title of this show is Everything Comes Back and the featured projects are modern interpretations of 1950’s styles. Watch this show and I promise you’ll learn tips and techniques to make your sewing and embroidery easier and more rewarding!


First off, Courtney McCrone shows off sweet dresses and blouses from her feminine line of fashions. She presents a fun & fast fashion show of her original garment designs. She also demonstrates some little sewing details that make perfect accents for modern day fashions and crafts.


Next up, my friend Marie Zinno dresses up a sweater with freestanding floral appliques. You’ll love her simple and straightforward instructions for creating freestanding flowers and embellishing a cardigan sweater with embroidery and hot fix pearls. Marie is a professional embroidery expert and she loves to share her knowledge of the craft.

IMAGE4_ALLBRANDSBLOG_9_11_15

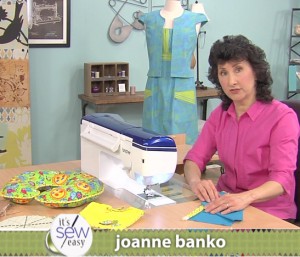
You’ll see my short segment last. The featured technique is Pretty Piping for garments, accessories, and home décor. I had to pack a lot of information into just three and a half minutes! See how easy it is to use a Piping Foot for both pre-purchased and custom crafted piping. Learn how to use this foot for sewing piping and take your personal sewing projects from so-so to stupendous!!! The experts at ALLBRANDS.COM can help you find the right piping foot for your machine model.


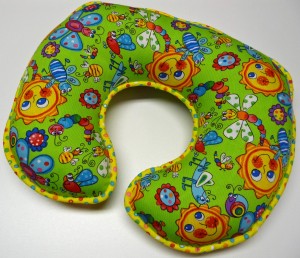
Visit the itsseweasytv.com project section and find a link to instructions for the crescent shaped baby “boppie” pillow seen on the show. You’ll see a few more sample items with piped accents. Check out my list below. I’ve included links to Brothersews.com where you’ll find complete instructions for these projects.

IMAGE5_ALLBRANDSBLOG_9_11_15

Crescent Shaped Pillow for Baby


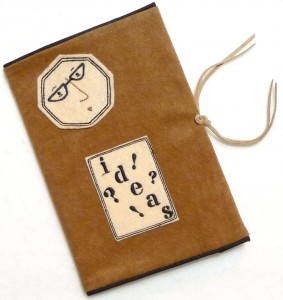
IMAGE6_ALLBRANDSBLOG_9_11_15 Notebook Cover for Home or Office


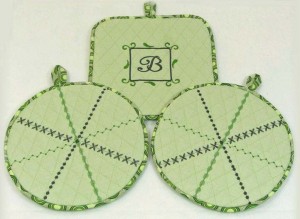
IMAGE7_ALLBRANDSBLOG_9_11_15 Piped Potholders


IMAGE8_ALLBRANDSBLOG_9_11_15

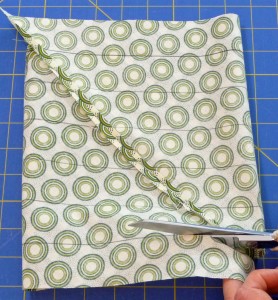
I had a lot of fun making the piped potholder set. As a bonus, the instructions for this project show you how to cut lots of piping strips from just a little bit of fabric. Which project is your favorite? I’d love to hear your thoughts and comments!

Talk to you again soon. Until then, I wish you Happy Sewing!


JoanneBanko_photo

JoanneBanko_signature

Joanne Banko is a freelance sewing educator and a self-proclaimed sewing cheerleader. You can see Joanne’s online teaching segments broadcast on the popular PBS TV show, It’s Sew Easy, and online at www.itsseweasytv.com. She is a frequent contributor to Designs in Machine Embroidery magazine and author of the book Wrapped in Embroidery. The book is available at AllBrands.com. Visit Joanne at her Sewing and Embroidery website, www.letsgosew.com.

It’s Sew Easy – Crazy for Couching

Hello to all my Allbrands friends!

image1_allbrandsblog_9_5_15

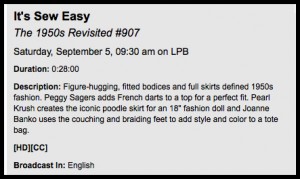
Are you interested in watching another great sewing show this weekend on Louisiana Public Broadcasting station? It’s Sew Easy TV, Episode #907 airs on your local Louisiana Public Broadcasting station Saturday September 5th at 9:30 am. Visit lpb.org for more details. Of course many other PBS stations around the country carry this show as well. You can CLICK HERE to search for PBS stations all over the country.

The theme for this show is a Flashback to the 1950’s with tips and techniques for contemporary sewing enthusiasts. You’ll learn from Peggy Sagers how darts make a difference and flatter every figure with great fit. Next up you’ll be smitten with details found on darling little doll clothes when you see Pearl Krush make some eye catching small size poodle skirts.

image2_allbrandsblog_9_5_15

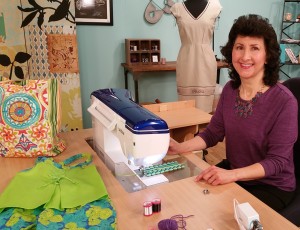
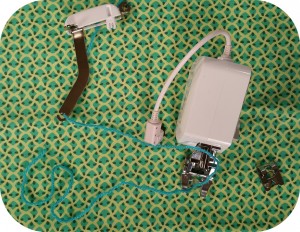
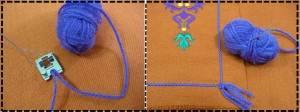
Last but not least, if you’re crazy for couching I think you’ll enjoy my short segment featuring couched accents stitched with specialty accessory feet. You’ll find that couching is a technique offering lots of style with very little little effort. Chances are you have some assorted supplies for couching already in your stash. Just add an accessory foot suited for your machine to attach cords, yarn, and narrow braids with straight or decorative stitches that skip from side to side. You’ll see some examples of accessory attachments made specifically for couching below.

image3_allbrandsblog_9_5_15

Your friends at www.allbrands.com can show you all the options available for your own personal sewing machine. There are many to choose from.

image4_allbrandsblog_9_5_15

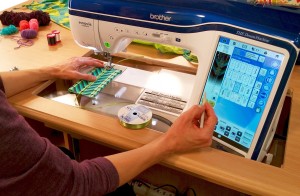
The proper accessory foot lets you swirl and twirl across your fabric.  Sure, you can stick with straight lines too! Whatever you choose to do, these attachments allow for free form stitchery or precisely placed perpendicular lines.  Take a look at how Brother Innoveye® technology assists in aligning trim as you prepare to stitch.

image5_allbrandsblog_9_5_15

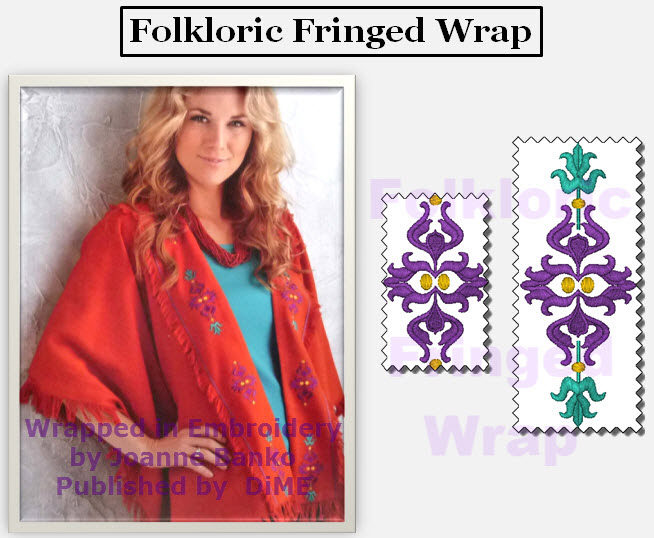
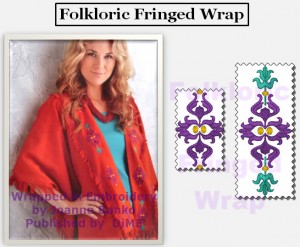
This is truly one of my all time favorite embellishment techniques. I used the braiding foot to add a little punch of purple to my Folkloric Fringed Wrap. Here’s a little tip for you, dental floss threaders work great for feeding trim into a braiding foot. Start with a bit of trim in and under the foot before you attach it to the machine. Smooth the tail at the back end and then make certain the trim flows freely through the guide.


image6_allbrandsblog_9_5_15

image7_allbrandsblog_9_5_15

I’ll warn you . . . once you get started with this type of surface embellishment it’s hard to stop. Before you know it you may have covered most of your entire fabric surface. But hey, that’s okay! Now you have an original work of art designed by YOU!

I hope you enjoy the show. If you have any questions or comments feel free to contact me. I’d love to hear your sewing success stories and help you with your sewing challenges as well.

Till we talk again I wish you Happy Sewing!

JoanneBanko_signature JoanneBanko_photo

Joanne Banko is a freelance sewing educator and a self-proclaimed sewing cheerleader. You can see Joanne’s online teaching segments broadcast on the popular PBS TV show, It’s Sew Easy, and online at www.itsseweasytv.com. She is a frequent contributor to Designs in Machine Embroidery magazine and author of the book Wrapped in Embroidery. The book is available at AllBrands.com.


FANCY FOOTWORK WITH THE 3 SLOT CORDING FOOT

Hello Allbrands.com friends! Are you interested in learning how to do some Fancy Footwork with your sewing machine?  As many of you already know, specialty presser feet can make or break a carefully crafted sewing project. While some feet are strictly utilitarian there are many more that are designed for fancywork and fun!

studioimage1

During a recent short segment on It’s Sew Easy TV I showed how to use the Three Slot Cording Foot for easy embellishment techniques. You can use this foot to perk up plain garments, add accents to home décor, and much, much, more! See how I used this foot to add pretty pink trim to a sundress for a baby girl.  CLICK HERE to read more on my personal blog.

I’ll talk to you again soon. Until then I wish you Happy Sewing!


JoanneBanko_photo JoanneBanko_signatureJoanne Banko is a freelance sewing educator and a self-proclaimed sewing cheerleader. You can see Joanne’s online teaching segments broadcast on the popular PBS TV show, It’s Sew Easy, and online at www.itsseweasytv.com. She is a frequent contributor to Designs in Machine Embroidery magazine and author of the book Wrapped in Embroidery. The book is available at AllBrands.com. CLICK HERE for a preview. You can visit Joanne at www.letsgosew.com.

Dress Up with Decorative Stitches – Joanne Banko

Dress Up with Decorative Stitches – Part Three of Easy Embellishments

by Joanne Banko

JoanneBanko


 Let’s Get Started

Image1_meanddress

Today I’d like to share some embellishment techniques I used for a group of dresses featured on the popular PBS TV show, It’s Sew Easy. This informative sewing show is produced by KS Productions Inc. and airs all over the country. Check local PBS listings for show times in your area. Designers and teachers involved in every aspect of the sewing and embroidery industry are featured on this show. It’s Sew Easy will help you enhance your sewing skills and have more fun in your own sewing space!

In addition to watching the PBS TV show, you can view segments on itsseweasytv.com. Each week a new episode is uploaded and remains online for a full week. Visit the site this Friday, May 16, 2014 you will see me demonstrate decorative techniques for dresses on Episode 608, titled Classic Use of Ribbons and TrimsJoin the website and you’ll gain access to the entire archive of free project downloads, which includes valuable tips and a helpful supply list for the dresses seen on episode 608.

You’ll get lots of information and inspiration by watching the show but in this post I’d like to share some additional insider tips, techniques, and ideas with my Allbrands blog friends.
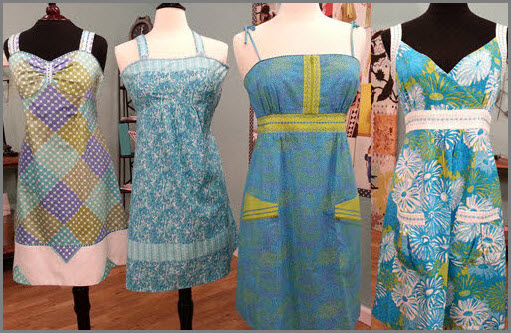
Image2_fourdresses

I love to sew garments and I had a lot of fun creating each of these dresses “from scratch.” Using a couple simply styled sundress patterns as my starting point, I added contrasting fabric bands in strategic places on four different dresses. Dress patterns are abundant right now so you’re sure to find something that suits your taste. Of course these same ideas will work for dresses with sleeves as well as many other garments.
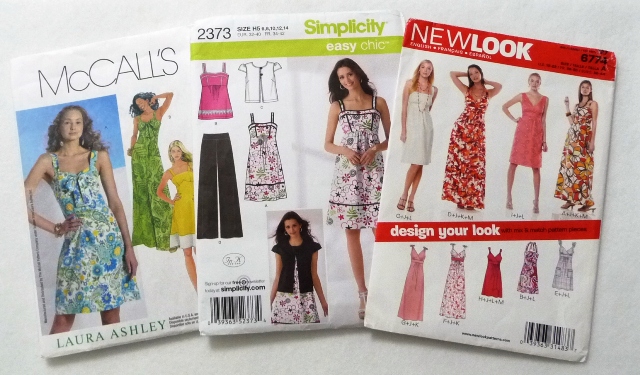
Image3_patterns

Deciding where to add decorative dress bands is up to you. You may find dress patterns that already include a separate pattern for a band at the waist, hemline, etc. In addition, pocket tops, sundress straps, and bodice bands are perfect places for rows of decorative stitching. Feel free to add bands of fabric in other areas too! If you have a favorite pattern without a separate pattern piece, it’s easy to add a band by drawing a line, cutting the pattern, and adding seam allowance to each cut edge. When you sew the pieces back together you’ll end up with the same size piece you started with. You can cut apart most any pattern piece as long as you remember to add appropriate seam allowance. I like to trace the original pattern onto paper or tracing cloth, draw lines for placement of contrasting pieces, and then trace off new patterns to use for cutting my fabric. Consider inserting zippers for a fun and functional accent. I took a plain pocket piece and did just that for one of my sundresses.
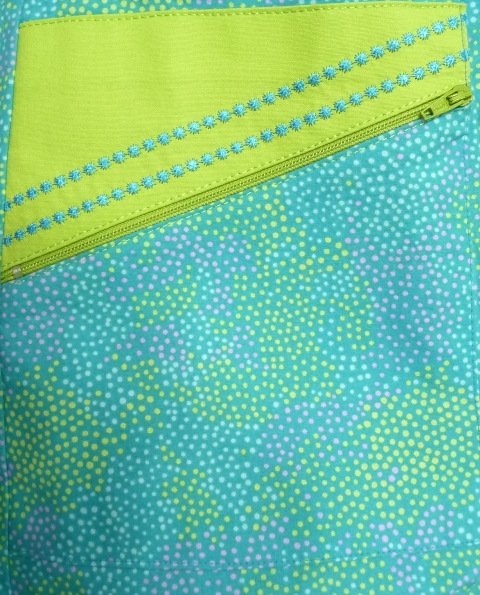
Image4_pocket

In the show I talk about preparing your pattern and your fabric for the decorative stitching. In most cases I stitched multiple rows of decorative prior to constructing the garment. Ribbons add to the mix of dress embellishments. Decorative stitches combined with ribbons create a colorful, coordinated look.  I used decorative stitches on ordinary ribbons in a recent blog for Allbrands. I invite you to CLICK HERE and read this post for a few additional basic ribbon stitching tips, including some needle, thread, and stabilizer guidelines.

To add ribbon to the sundress straps I placed my ribbon on top of the fabric piece and stitched through all the layers, anchoring the ribbon in place as I added the decorative stitches. Sundress straps become a focal point on the garment with a decorative ribbon stitched down the center. By repeating the technique on the bodice and the banded hem this dress gets a designer style touch that makes it unique. For the banded hem and the bodice I chose to stitch the ribbon separately on a base of stabilizer. Then I used a fine fusible webbing to attach the ribbon to the dress.
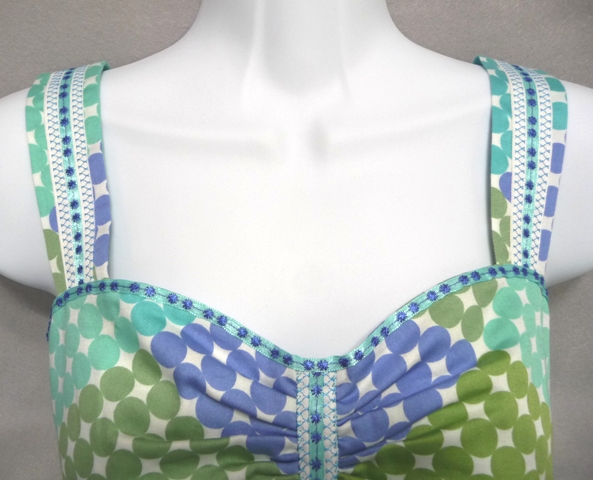
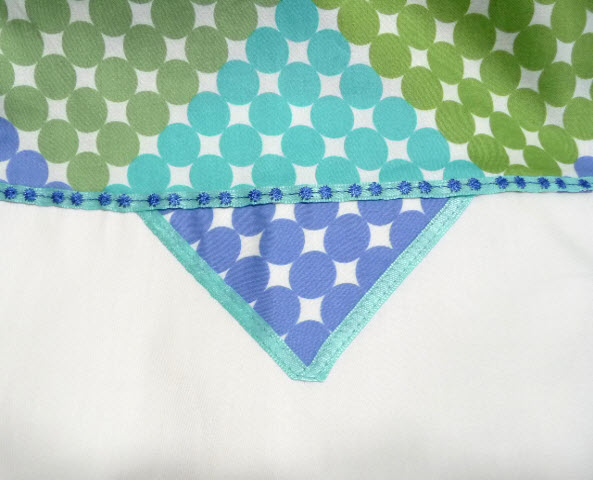
Image5_dress1bodiceImage6_dress1hem

On another dress I selected a sheer ribbon and sewed a light weight decorative stitch down the center. To stitch on this soft sheer ribbon I opted for a light weight fibrous type of water soluble stabilizer, instead of my usual tear away stabilizer. I use this type whenever I need stabilizer to totally disappear when I’m finished. For added stability I layered a strip of stabilizer over the top and bottom of the ribbon. After washing out the stabilizer I used a narrow zig-zag stitch to attach the ribbon to the upper embellished band. I had a bit of leftover ribbon so I gathered the edge of two small pieces and formed little rosettes to decorate the straps. The resulting trim is subtle but pretty.
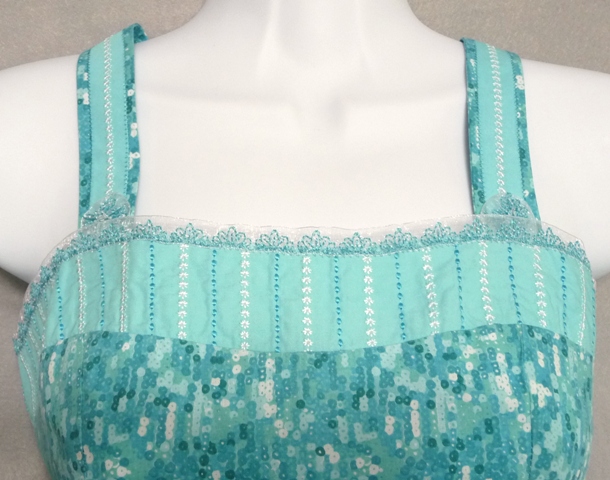
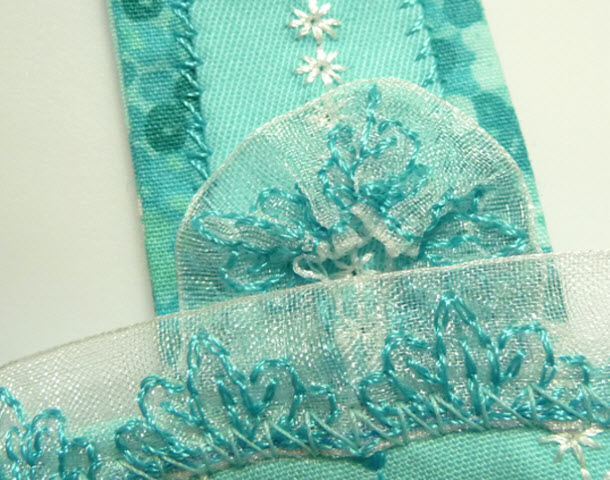
Image7_dress2bodiceImage8_rosetteWhile creating the dresses I had fun playing with different decorative stitches. Some of the bands feature candlewick style stitches. You may have a stitch like this built in to your machine. Candlewick stitches are usually defined as a stitch that resembles a hand sewn French knot, or a little star like stitch that produces a heavy bump, almost like a bead. The dress in the photo above has alternating rows of the French knot style stitch, shown in turquoise thread. My zippered pocket shows an example of the star style candlewick stitch on the lime green accent piece. There are quite a few variations of this stitch found on different machines. It is likely you’ll need a Candlewicking presser foot to successfully sew these bulky stitches. This foot has a deep groove running the full length of the foot, gliding over the bumps formed by candlewick stitches.
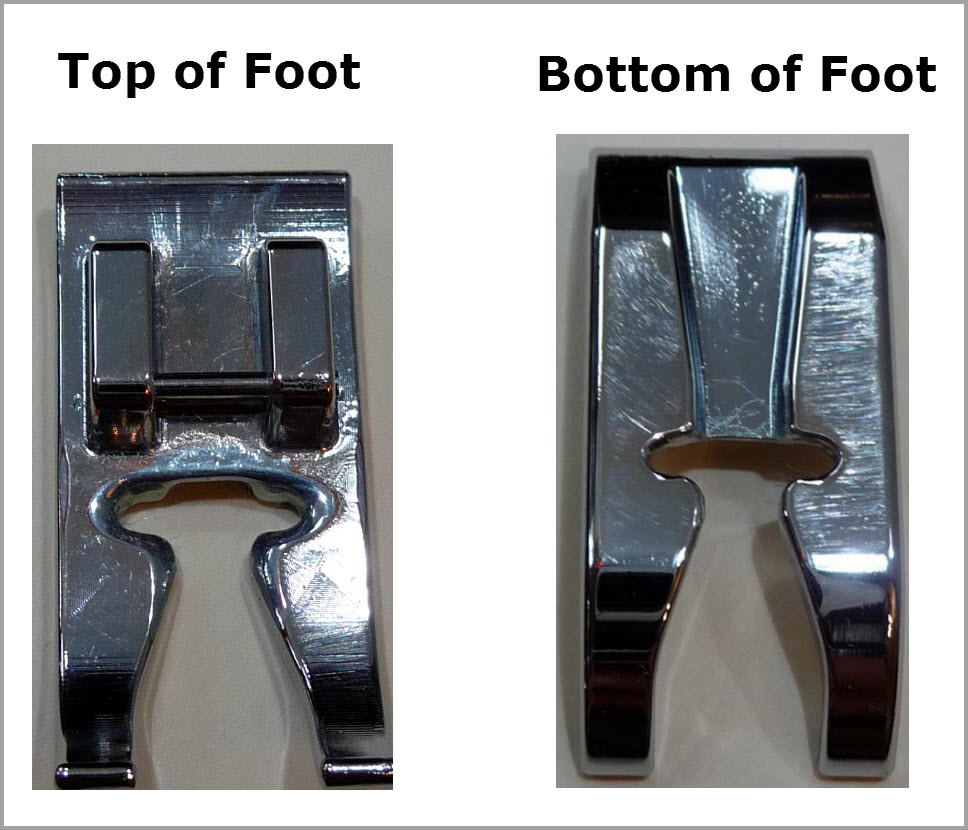
Image9_candlewickfoot

If you have a Brother Model machine with the My Custom Stitch™ feature you can create candlewick stitches right on the screen of the machine. It’s a simple matter of plotting stitch points along a special gridline. These stitch points then serve as coordinates telling the machine how to form the stitch. There is an entire book aptly titled My Custom Stitch™ written to guide you in creating your own special stitches. CLICK HERE to research Brother Model machines that include the My Custom Stitch™ feature. On this same page you will find a link from Allbrands to the Brother Design Studio where you will discover many free My Custom Stitch™ design coordinates, including the French knot style candlewick stitch. Follow the path outlined below to locate this stitch, along with many more My Custom Stitch™ coordinates available from Brother.

Image10_mycustomstitchmap

These dresses are perfect for making use of the many decorative stitches available for your particular machine. To use decorative stitches to the fullest, I encourage you to consider making a sampler of the stitches built in to your machine. If you add a new My Custom Stitch™ to your repertoire you will want to stitch a sample of that stitch too. To make your sampler, select a firm woven fabric in a light color, adding medium weight fusible interfacing to the wrong side. Place an additional layer of tear away underneath. Use contrasting thread to sew out each stitch in your entire stitch menu, from beginning to end. I’m sure you’ll see many stitches that are far more beautiful in thread than they are on the screen of your machine or printed in the instruction manual. Keep your sampler handy and it will inspire you to use those pretty stitches more often. I hope these ideas empower you with motivation to make your own summer sundress or apply these decorative techniques to other garments and crafts.

For those of you have been following this series you may recall that last time I said I would talk about embellishing ribbons with bobbin work decorative stitching. Bobbin Work stitchery isyet another of my all time favorite embellishment techniques. I promise to cover that subject next time as I finish up this series. Until then, happy sewing from your sewing friend,

 

JoanneBanko

JoanneBanko_signature

About the author: Joanne Banko is a freelance sewing educator and a self proclaimed sewing cheerleader. You can see Joanne’s online teaching segments broadcast on the popular PBS TV show, It’s Sew Easy, and online at www.itsseweasytv.com. She is a frequent contributor to Designs in Machine Embroidery magazine and author of the book Wrapped in Embroidery. The book is available at AllBrands.com. CLICK HERE for a preview. Visit Joanne at http://www.letsgosew.com/.
 

Part Two of Easy Embellishments

Part Two of Easy Embellishments

by Joanne Banko

JoanneBanko

 Let’s Get Started!

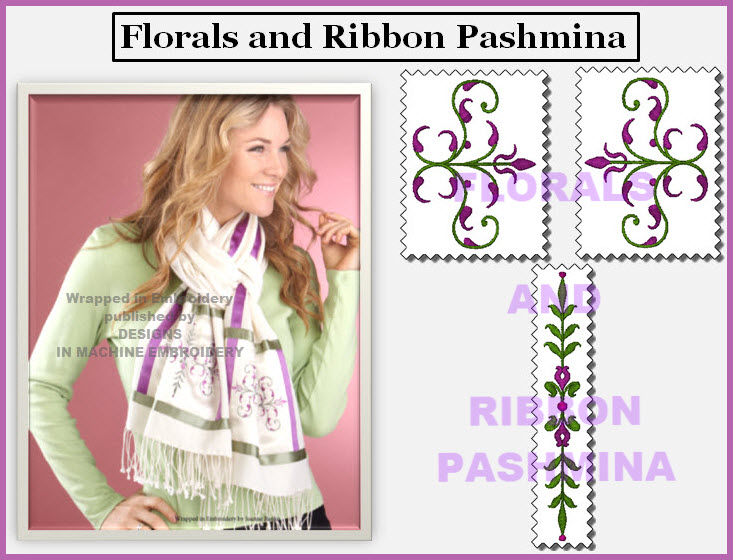
Image1_FloralsandRibbonPashmina

Those of us who are hooked on machine embroidery know the excitement of watching an embroidery design take shape on a plain and ordinary piece of fabric. Whether it is a t-shirt, sweatshirt, or a towel, the addition of a machine embroidered motif turns plain into pretty and blank into beautiful. Simply select your embroidery design, choose your color scheme, hoop it up, and press the start button. In mere minutes you can transform ordinary into extraordinary! As a machine embroidery enthusiast I have certainly done my share of T-shirts and towels and I’ve embroidered on just about anything that I can get inside the embroidery hoop.

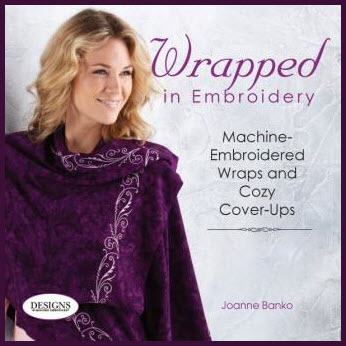
Awhile ago I started collecting pashmina scarves and discovered their versatility. They are as practical as they are elegant. Wear one as a shawl for warmth and good looks or as a chic oversized scarf. I began to envision classic embroidery designs stitched on a variety of pashmina wraps. Hence my book titled Wrapped in Embroidery began to take shape.

Image2_Wrapped_Cover_Front

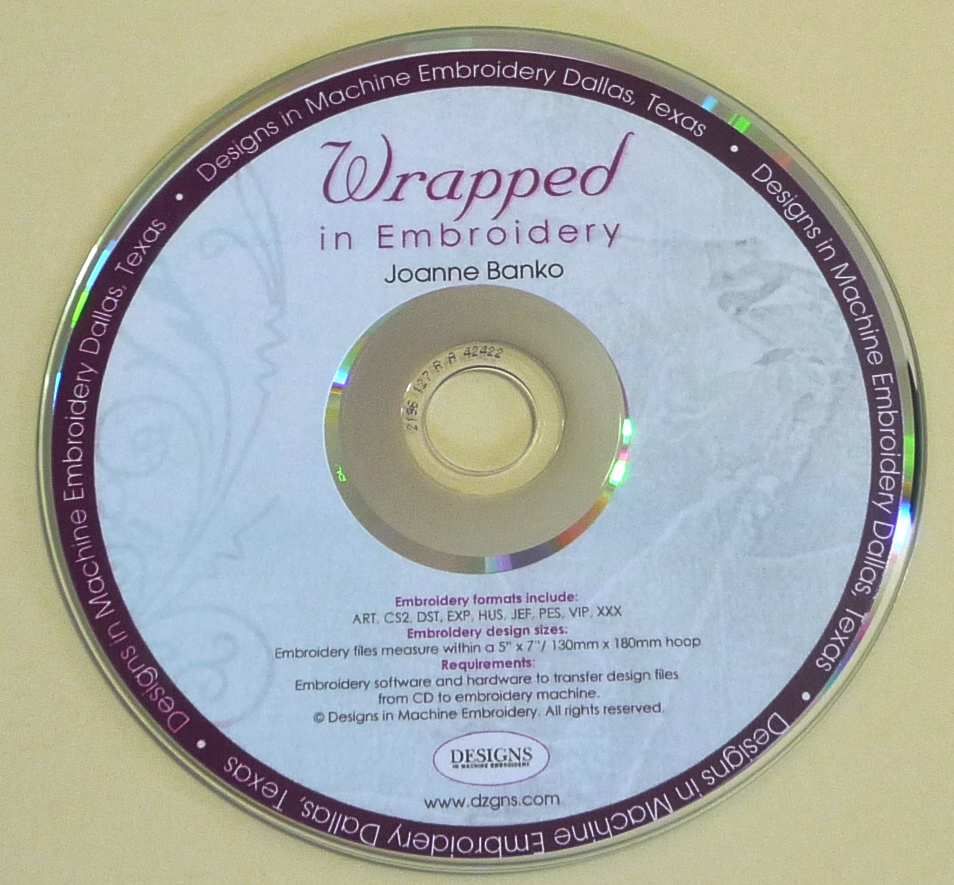
By the time I was finished I had designed a total of nine wraps and cozy cover ups to wear for a variety of both dressy and casual occasions. Wrapped in Embroidery includes embroidery designs, detailed instructions, and a complete supply list for decorating each of the nine wraps. Readers will find six embroidered wraps sewn from scratch and three ready-made pashmina wraps decorated with embroidered bands. I choose silk dupioni for the embroidered bands on two of the wraps but the ivory wrap you see at the top of the page features synthetic crepe back satin as the background for the embroidery designs. Both fabrics work equally well and you can use either one as the base for your embroidery. The book provides specifics for working with these fabrics and you’ll even find a bonus tutorial for pre-treating silk dupioni on the included CD. The embroidered bands on each of the three pashmina wraps feature color matched ribbons used to tie together the embroidery motifs and enhance the overall color scheme.

Image3_CD

Framing embroidery designs with ribbons has become a favorite technique of mine and I thought you might like to give it a try. This is a simple technique you can use for many different embroidery projects. It’s especially effective when you are embroidering on a flat, plain piece of fabric. Think about using this idea to frame the design on the center of a pillow top, create borders and bands on home décor items such as table toppers and curtain valances, decorate hemlines on skirts and dresses, and just about anything else you can imagine! Here are a few tips and ideas meant to inspire you to embellish your embroidery with ribbons.

Planning is the key to any successful embroidery project. Here are some basic guidelines to get you started:

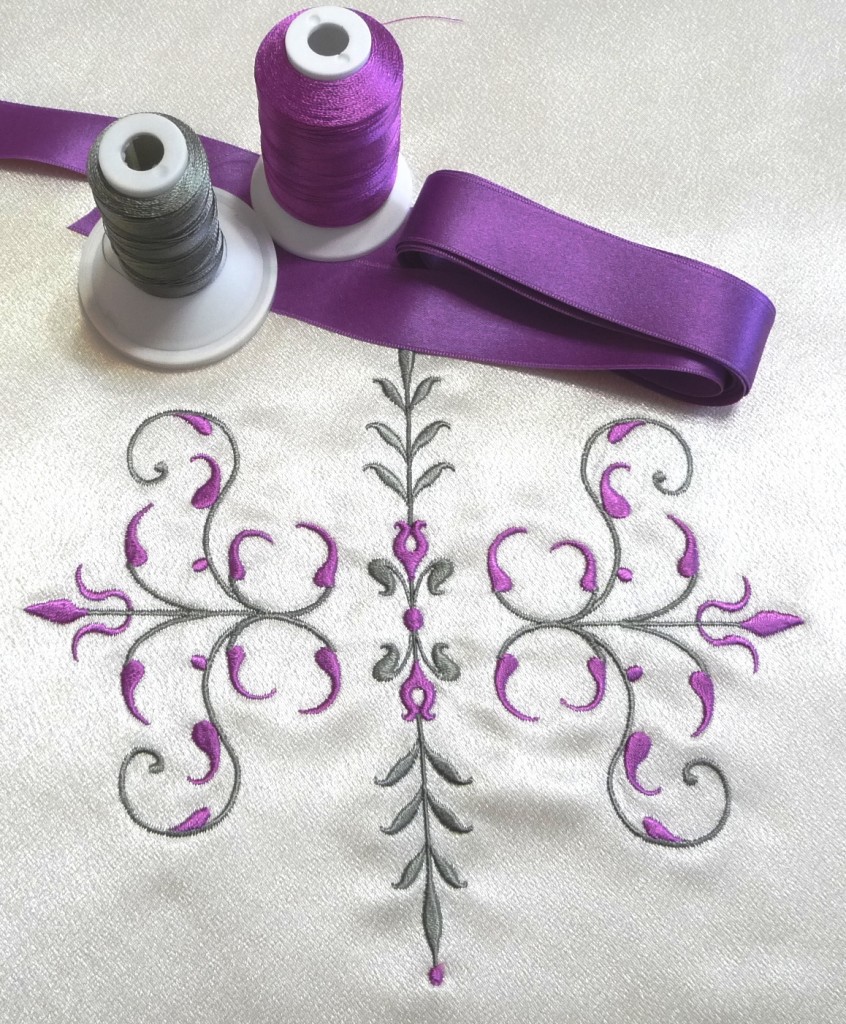
Image4_RibbonsandThread

  1.  Select your ribbon first and then plan the embroidery design colors around your ribbon color. Ribbon colors are limited when compared to the availability of thread colors. Shop with your ribbon in hand and match your thread as closely as possible.
  2. I usually use machine embroidery thread in the top and bobbin for sewing the ribbon. If you are torn between choosing thread slightly lighter or slightly darker than your ribbon, go for the darker shade.
  3. I have used both wide ribbons and skinny ribbons, silk ribbons and synthetic ribbons. Synthetic ribbon is less expensive and readily available and silk ribbon is soft and luxurious. Match the laundering requirements of your fabric and your trims making sure they are compatible.
  4. If your fabric is soft you may need to use a lightweight removable stabilizer to support the fabric as you attach the ribbons. I usually place a strip of light-weight tear away on the wrong side of the fabric.
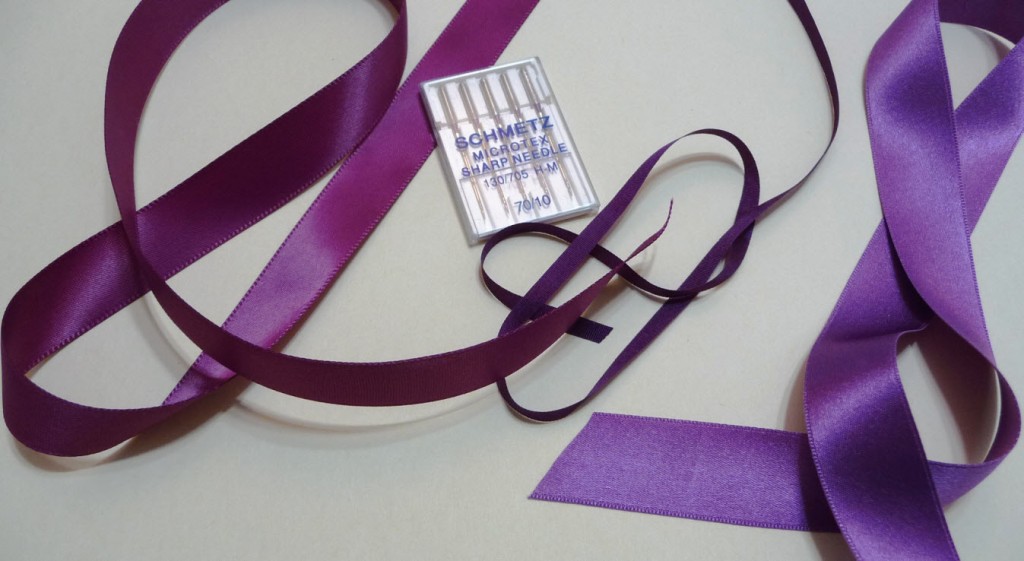
  5. I recommend a fine, sharp sewing machine needle, such as the size 10 Microtex needles found in this Schmetz assortment.

Image5_RibbonsandNeedles

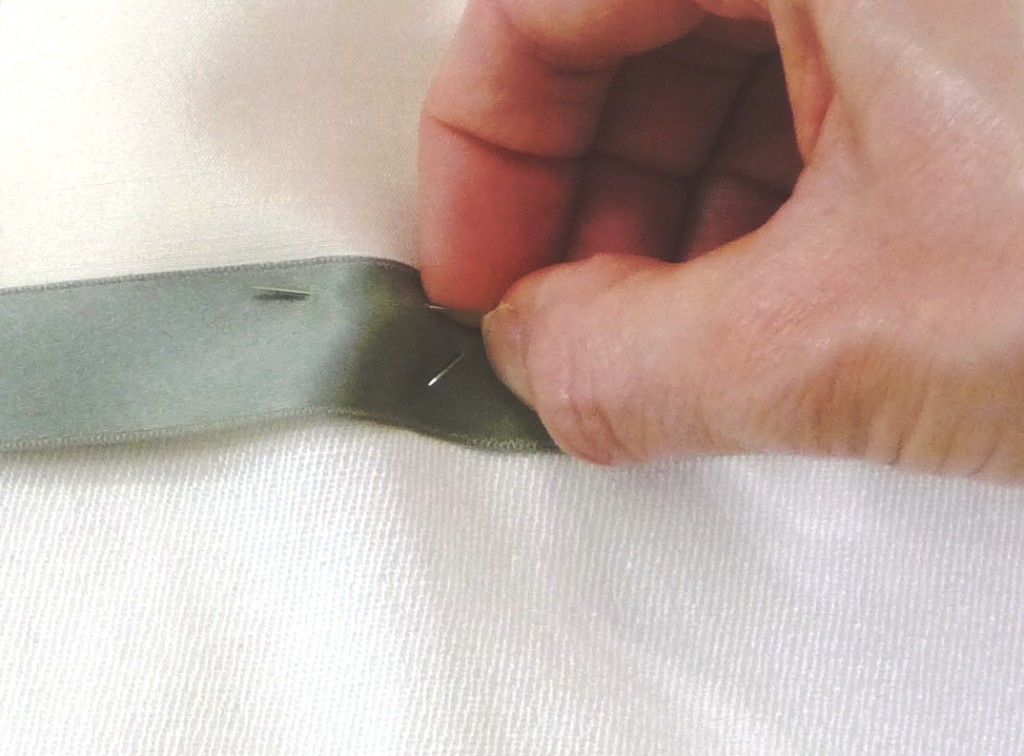
With the basics behind us, let’s go sew! Below you will find some techniques for sewing wide and narrow ribbons using special accessory feet to make the task easier and more accurate. For the wide ribbons I prefer to stitch very close to the edge. My secret for keeping the ribbons in place while machine stitching is simple. I hand-baste the ribbon in place prior to stitching by machine.

Image6_Basting

I know many of us have abandoned hand sewing techniques in favorite of quick stitching by machine. However, “there is a time and a place to baste”. For me it actually saves time because skipping this step inevitably means I will waste time ripping and re-stitching when my ribbon slips out of position. Yet another advantage to hand basting is the fact that pins are removed prior to machine stitching the ribbons in place. Pins serve a valuable purpose for securing layers together but when sewing trims they seem to get in my way and distort the smooth lines of the ribbon. So, for me the steps are simple. Pin ribbon in place, hand baste, remove pins, and then machine stitch close to the ribbon edges to secure ribbons to fabric.

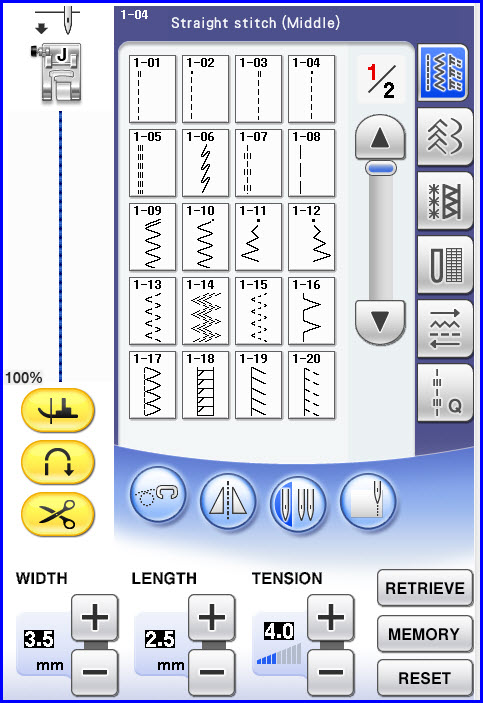
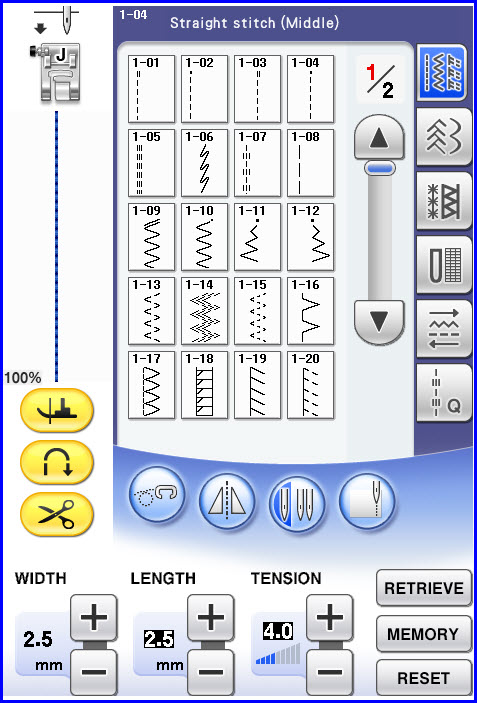
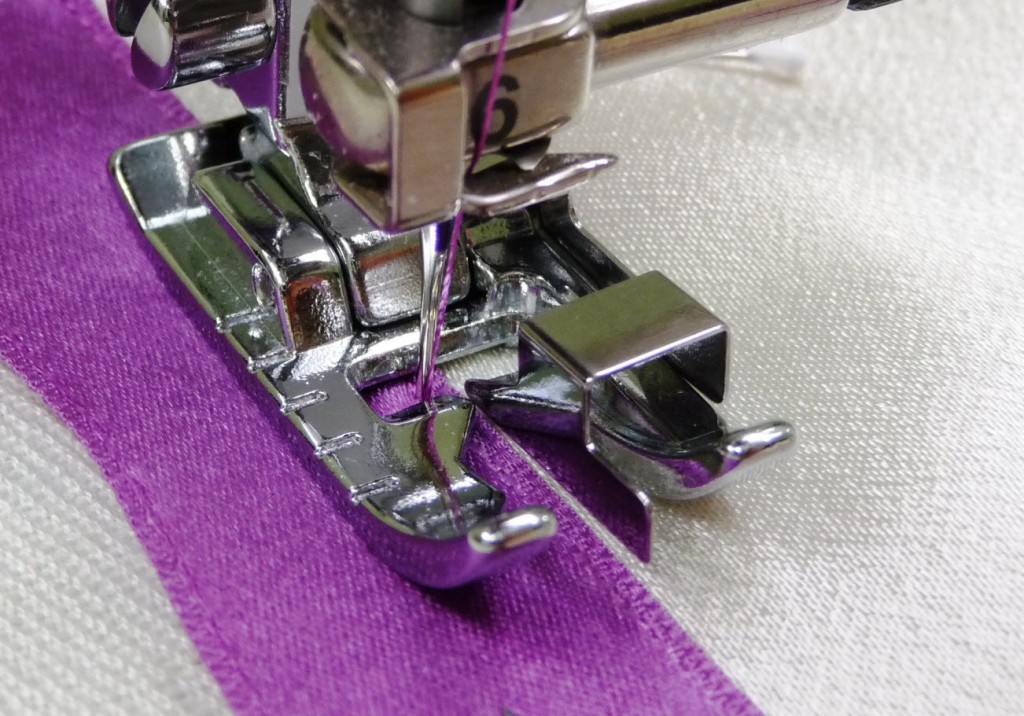
How do you edge-stitch ribbons really close while maintaining an even line for stitching? The Edge Joining Foot is the perfect solution. In combination with the ability to move the needle position for a straight stitch you can send the needle to the precise spot you need to achieve even edge-stitching. Begin with the needle in the center (width 3.5), and then line up the blade on the foot with the edge of the ribbon. Next, move the needle to the left using the stitch width key. I used a setting of 2.5.

Image7_Straight stitch1Image8_StraightStitch2

With the proper setting your needle will pierce the ribbon at the very edge. If you begin to watch the needle as you stitch, you will likely start to waver. Be sure to keep your eye following the blade and the ribbon edge as you stitch.

Image9_Edgefoot1

Image10_Edgefoot2

Image11_ClassicBandedandRibbonedPashmina

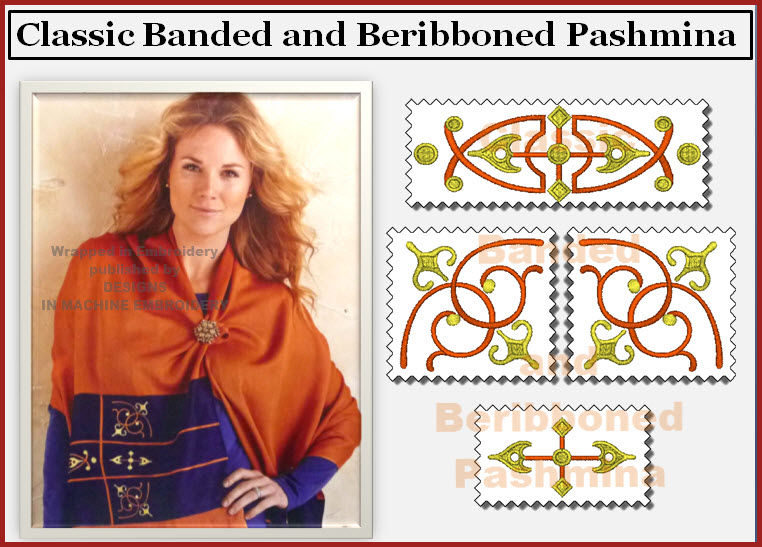
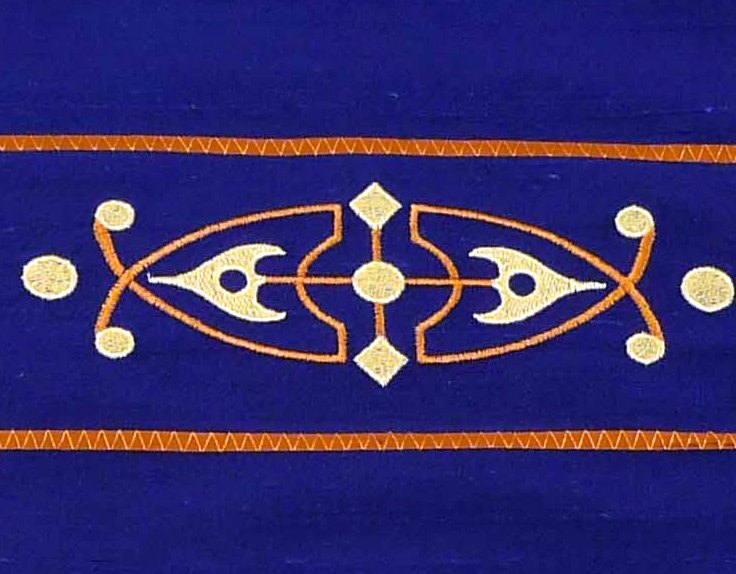
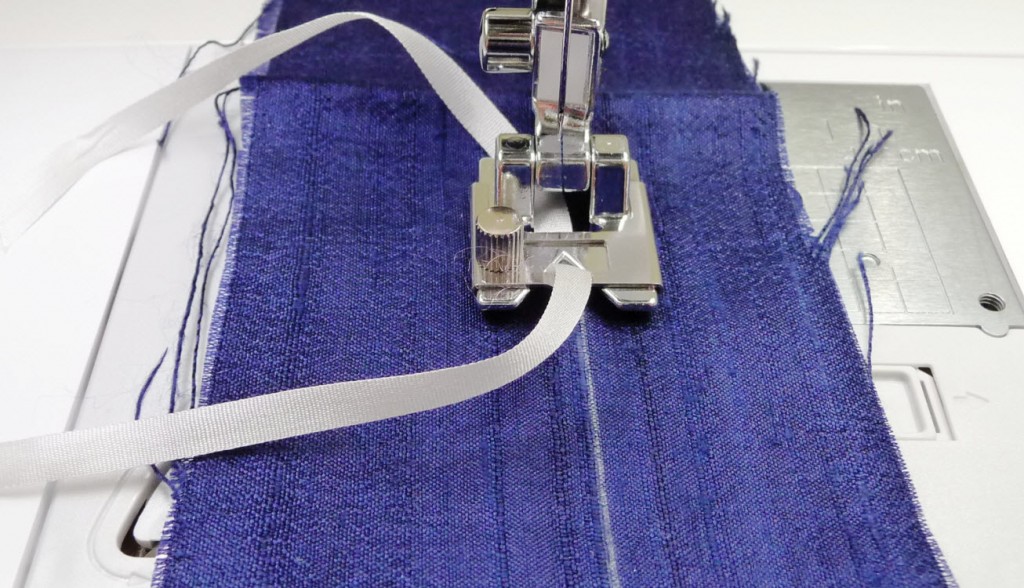
For my Classic Banded and Beribboned Pashmina I accented the embroidery with a narrow ribbon trim, specifically 4mm silk ribbon. I found that a Braiding Foot is perfect for attaching this narrow ribbon.

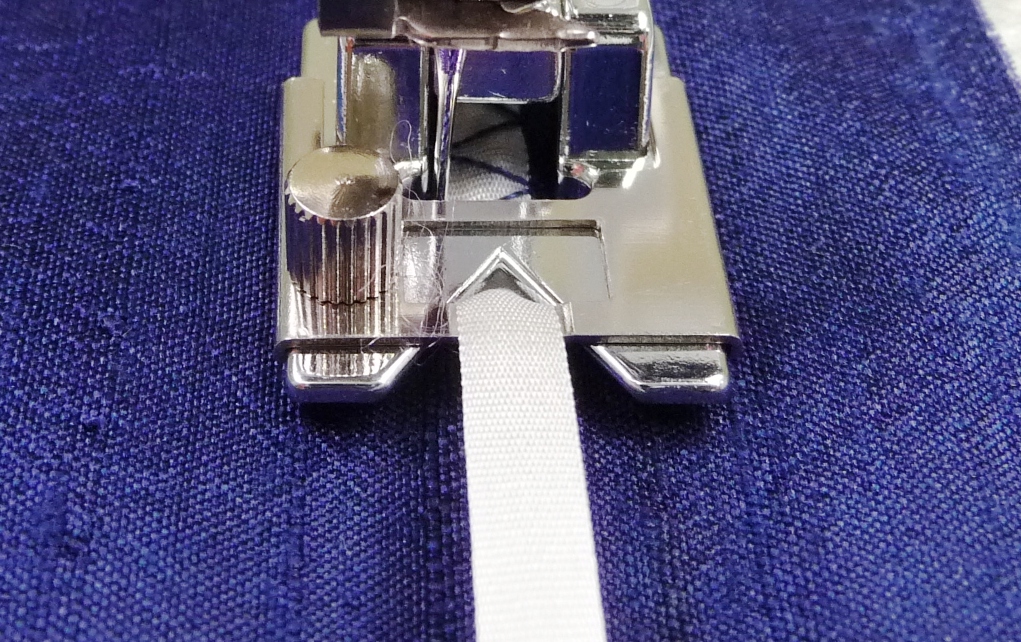
Image12_narrowribbononpashmina

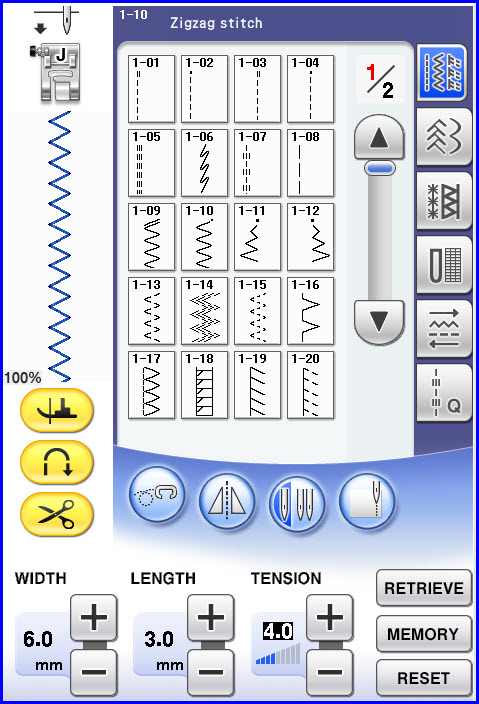
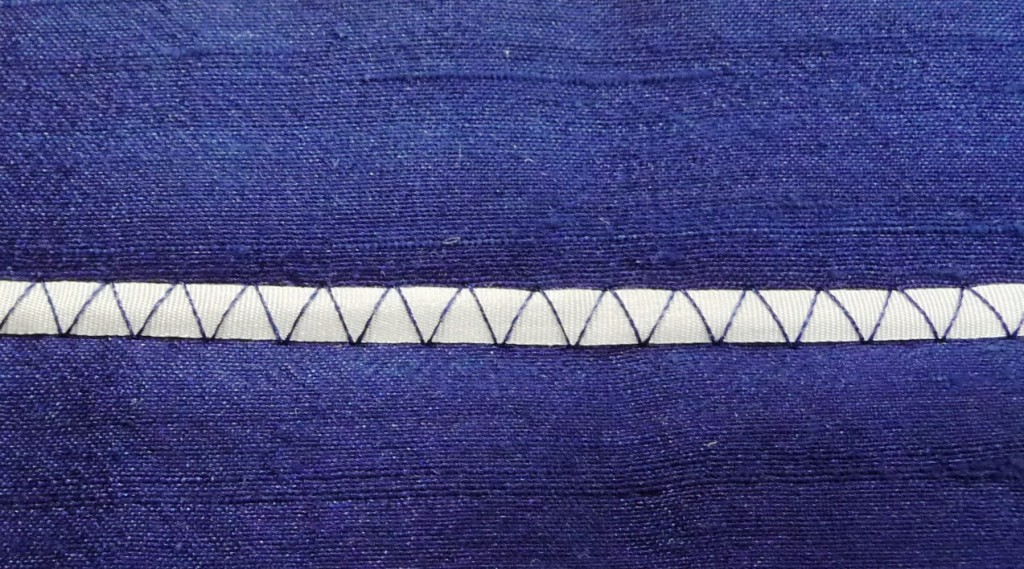
The braiding foot I used is adjustable, allowing you to change the size of the opening to accommodate variations in narrow trims. One trick for using this foot is to insert your ribbon into the foot before attaching it to the machine. Pull a small tail of ribbon behind the foot and then guide your trim over any marked positioning lines you have made on your fabric. To anchor the ribbon I like to use a standard zig-zag stitch, setting the zig-zag width so the stitch skips just over the right and left side of the ribbon.

Image13_zigzagstitch

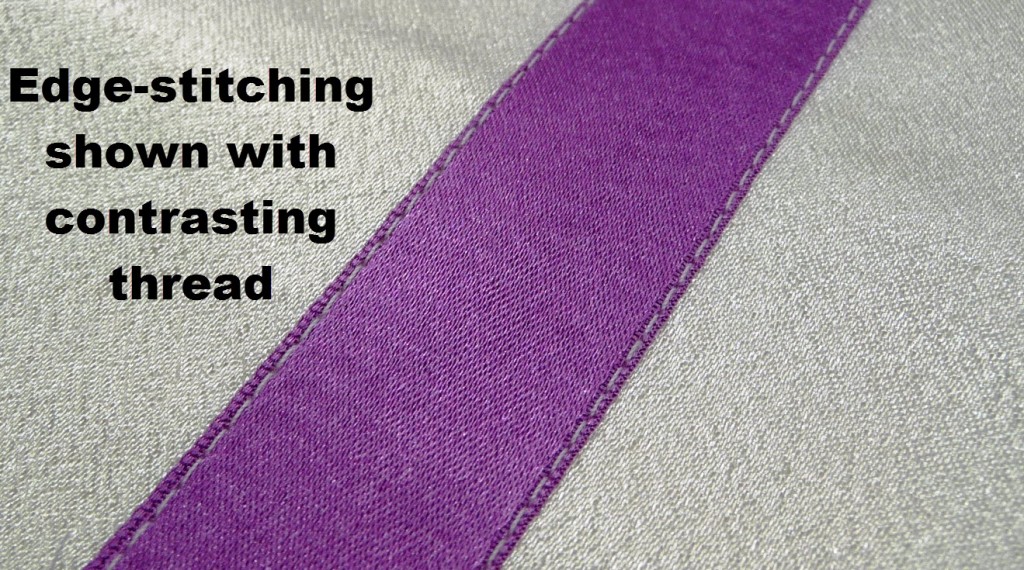
Remember, “to test is best.” I like to work out the settings with scraps before plunging into stitching on my project. The photos below show the ribbon stitched with contrasting thread so you can see the stitches. Usually I match my thread to the ribbon so the look is subtle and understated.

Image14_narrow1Image15_narrow2Image16_narrow3

If you like the idea of framing your embroidery with ribbons, next time you envision a single design or a group of designs on a fabric band, think about outlining or dividing the designs with narrow or wide ribbon. You can tie together the color scheme of your embroidery threads to your chosen ribbons for a color coordinated combination that accents your embroidery with style!

Next time . . . We’ll explore embellishing ribbons with bobbin work decorative stitching. Until then, happy sewing from your sewing friend,


JoanneBanko

JoanneBanko_signature

About the author: Joanne Banko is a freelance sewing educator and a self proclaimed sewing cheerleader. You can see Joanne’s online teaching segments broadcast on the popular PBS TV show, It’s Sew Easy, and online at www.itsseweasytv.com. She is a frequent contributor to Designs in Machine Embroidery magazine and author of the book Wrapped in Embroidery. The book is available at AllBrands.com. CLICK HERE for a preview. Visit Joanne and read her blog posts at http://www.letsgosew.com/.
 

HOW TO MAKE 8 HALF-SQUARE TRIANGLES

AllBrands_Blog_Post_img01

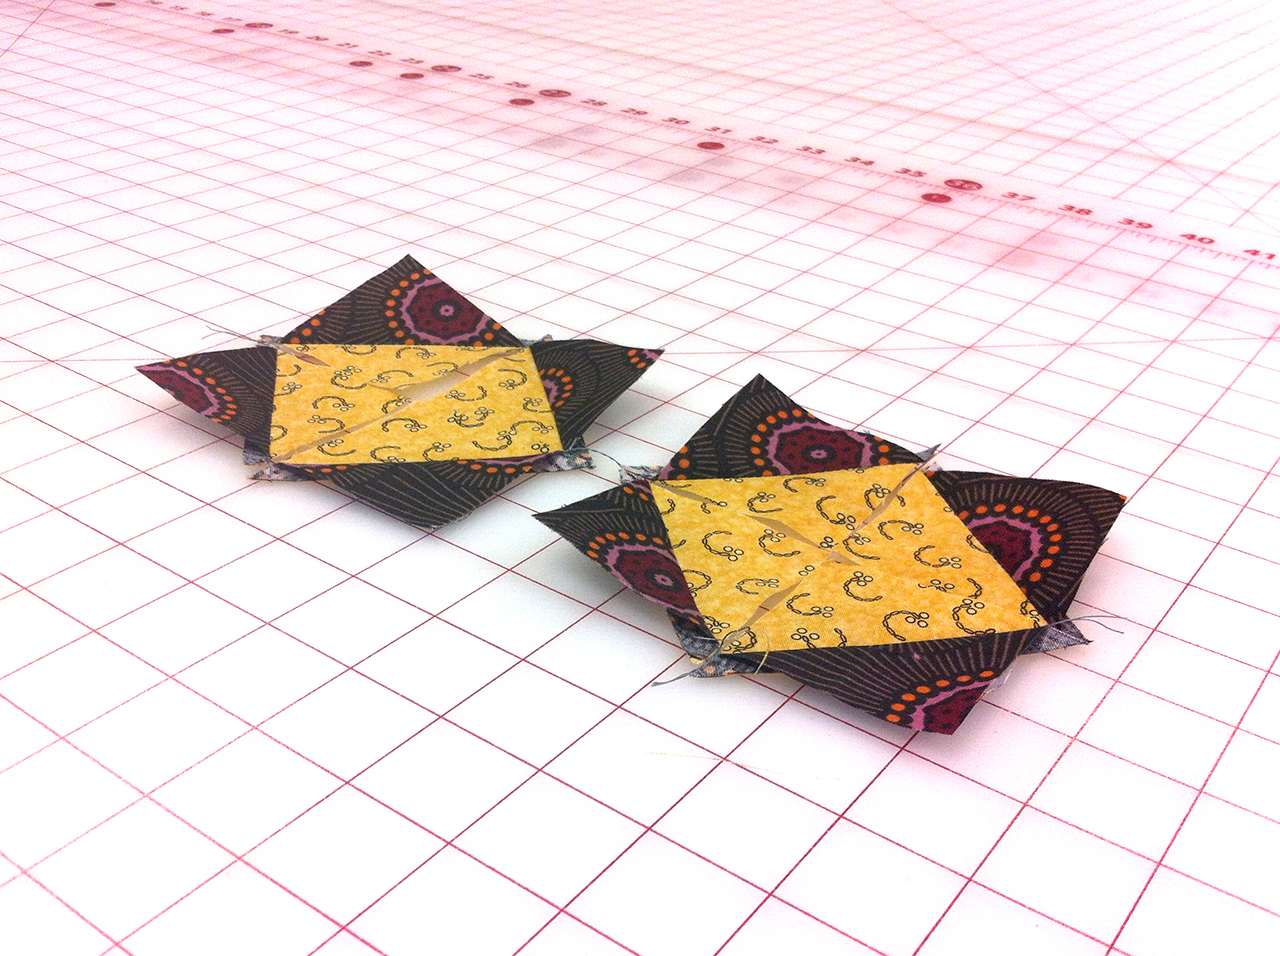
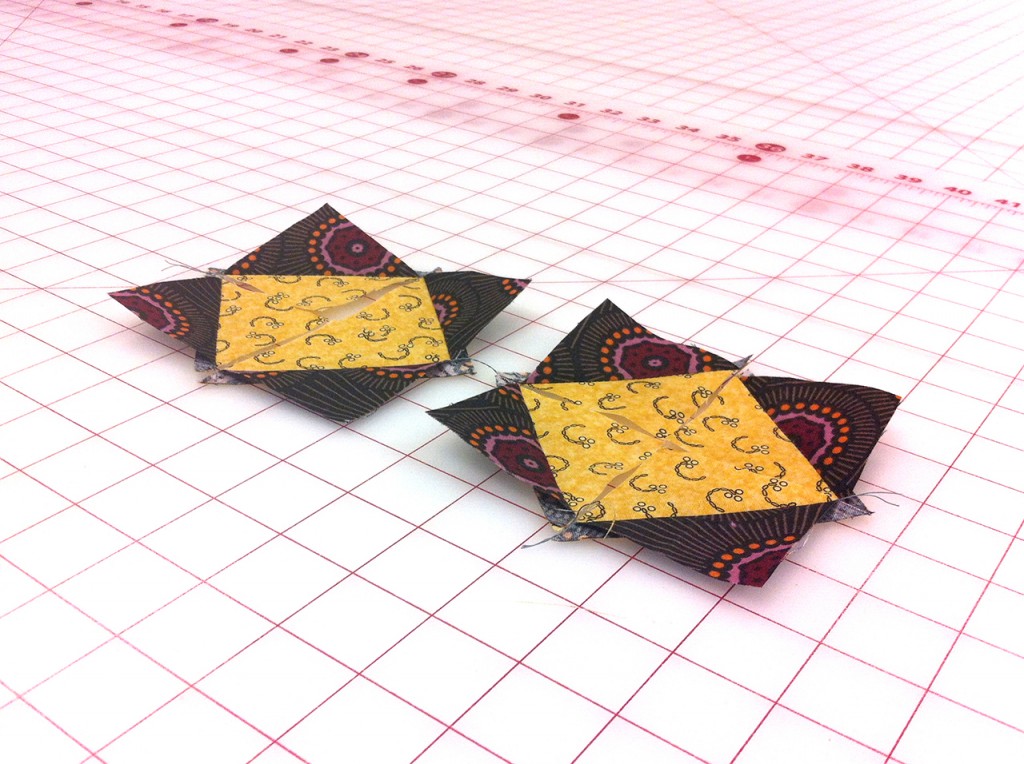
In this tutorial we’ll show you an easy way to make 8 half square triangles at once. The cool thing about this method in comparison to the 4 at a time method is that the bias is where it’s supposed to be. Plus, your final edges are on the straight of grain.

Good ole math! Start with 5” squares and the half-square triangles are a bit over 2” and will end up being 1 1/2” once in the quilt. About 1” will be loss using this method.

AllBrands_Blog_Post_03112014_img02

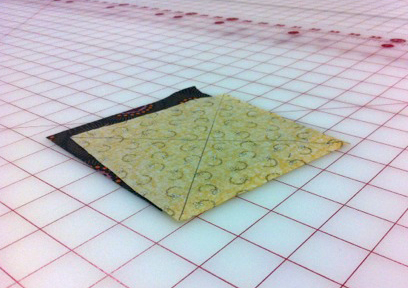
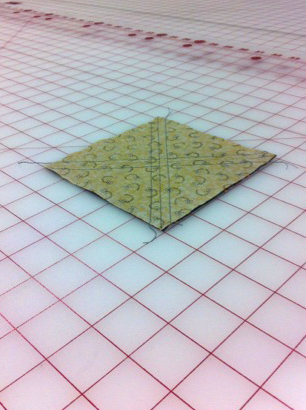
Simply place two squares right side together and draw two lines diagonally on one of them like in the example above. Next sew 1/4” on both sides of each line, that’s four seams total.

AllBrands_Blog_Post_03112014_img03

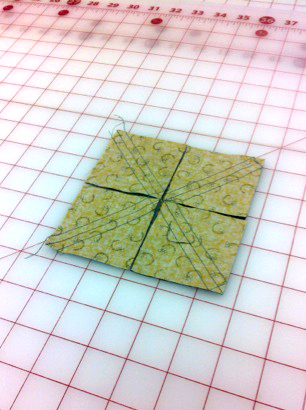
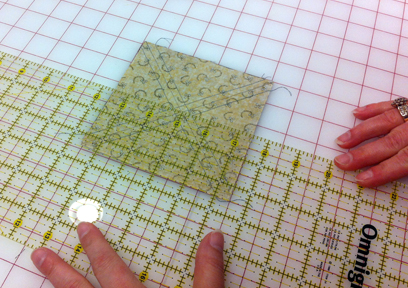
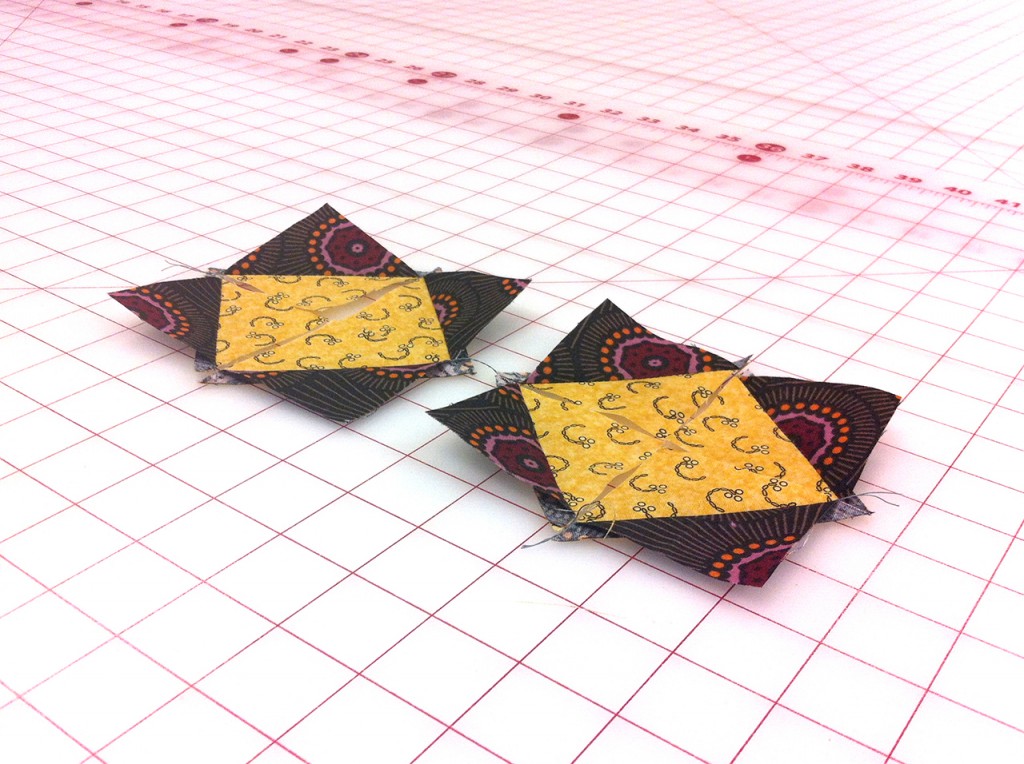
Now, use the center line as a guide to cut a horizontal and vertical line.

AllBrands_Blog_Post_03112014_img04

AllBrands_Blog_Post_03112014_img07

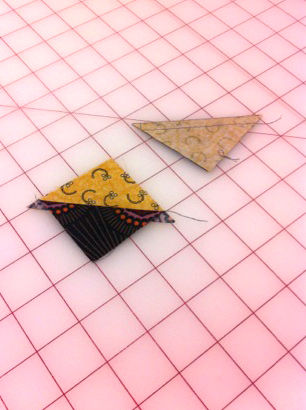
Cut along the pencil lines and there you have it, a half-square triangle.

AllBrands_Blog_Post_03112014_img06

All there is left to do is trim to size if needed.

AllBrands_Blog_Postimg08

Stay tuned for more great tutorials, tips and tricks from AllBrands.com!

logo_sig

Easy Embellishments with Ordinary Ribbons- Part One

JoanneBanko

JoanneBanko_signature

About the author: Joanne Banko is a freelance sewing educator and a self proclaimed sewing cheerleader. She is a frequent contributor to Designs in Machine Embroidery magazine and author of the book Wrapped in Embroidery available at AllBrands.com. You can see Joanne’s online teaching segments broadcast on the popular PBS TV show, It’s Sew Easy, and online at www.itsseweasytv.com. Visit Joanne and read her blog posts at http://www.letsgosew.com/.
 

The sewing tools we have at our fingertips these days make it easy and effortless to create embellishments for garments, crafts, home decor, and more! From incredible machine features to fantastic presser feet and helpful accessories, there is so much to love about sewing these days! Beginning with this article I’d like to share a few of my favorite techniques for creating embellishments with ribbons.

Since this is my first article for the ALLBRANDS newsletter I’d thought I’d give you a bit of background. I believe I was born with sewing in my genes. You may say I inherited the “tendency” to sew but I view it as a gift from my Creator. My Grandmother and Mother were both accomplished seamstresses but ironically, I was not taught by either of them. I was the last of five children, with a long gap in between. By the time I arrived on the scene my Mom had stopped sewing. My first stitch was in a Junior High Home Economics class. I remember taking that very first stitch and was hooked from the beginning! My wonderful, wise Mother saw the spark that first stitch created and at the beginning of the following school year she offered me a choice between ready-made clothes or a new zig-zag sewing machine and fabric. I chose the machine and have been sewing ever since!  Seeing my enthusiasm my Mom started to sew again herself. We had so much fun shopping for supplies and sewing together. She stitched in the living room on her machine, while I sewed on my very own machine in my bedroom. I zig-zagged my way through junior high and high school making almost all of my own clothes.

We’ve come a long way since the days when we thought an ordinary zig-zag stitch was a big deal. Now we can choose from literally hundreds of decorative stitches built-in to the sewing side of our machines. Beyond that, we can stitch multitudes of embroidery designs with “hoop” capability. Yes, sewing today is better than ever and I love to do it all… sew, embroider, quilt, and craft! In this article I’d like to share a simple technique for creating decorative ribbon using your serger and your sewing machine. Are you ready? Let’s go sew!

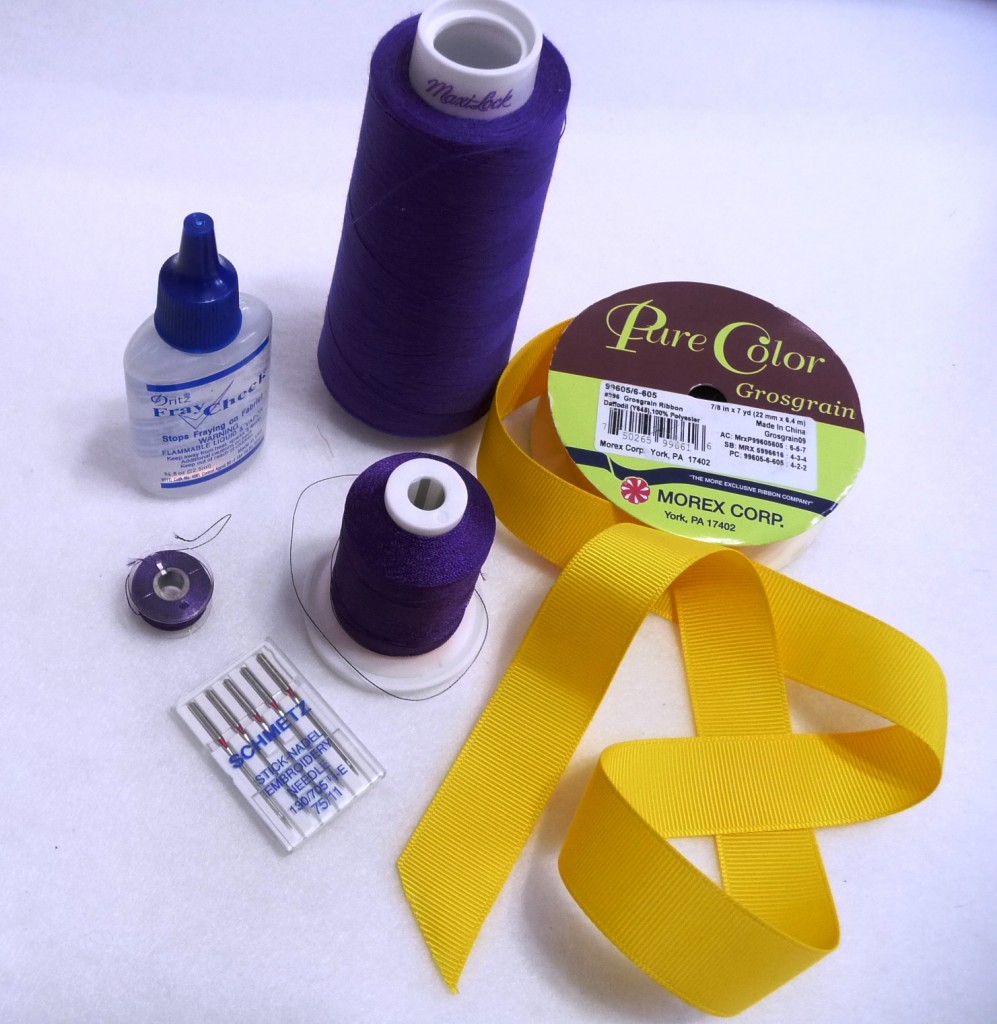
Here are the supplies you will need:
  1. Serger with rolled hem capability.
  2. Sewing machine with decorative stitch capability. Recommended presser feet for this project include a clear foot for decorative stitching and an adjustable blind hem foot for stitching the ribbon on your chosen item.
  3. Ordinary grosgrain ribbon measuring approximately 1-inch wide. Note: Cut a length of ribbon measuring twice the amount needed for your finished project so you have enough to test your rolled hem stitching and your decorative stitching.
  4. Serger Thread to contrast with your ribbon.
  5. Embroidery Thread to match your serger thread.
  6. Size 11 embroidery needle.
  7. Strips of stabilizer – Use tear away stabilizer if you don’t need reversible ribbon. Use water soluble mesh stabilizer for reversible ribbon.
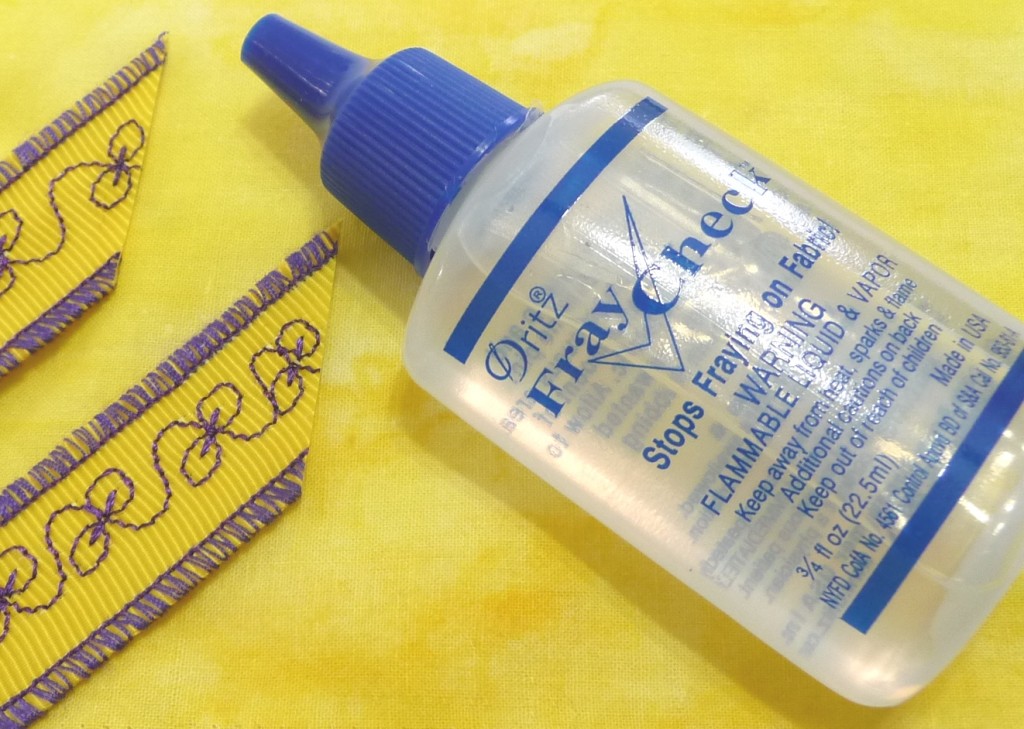
  8. Seam sealant to treat ribbon ends.

No1_Notions

 Here is how to decorate your ribbon:

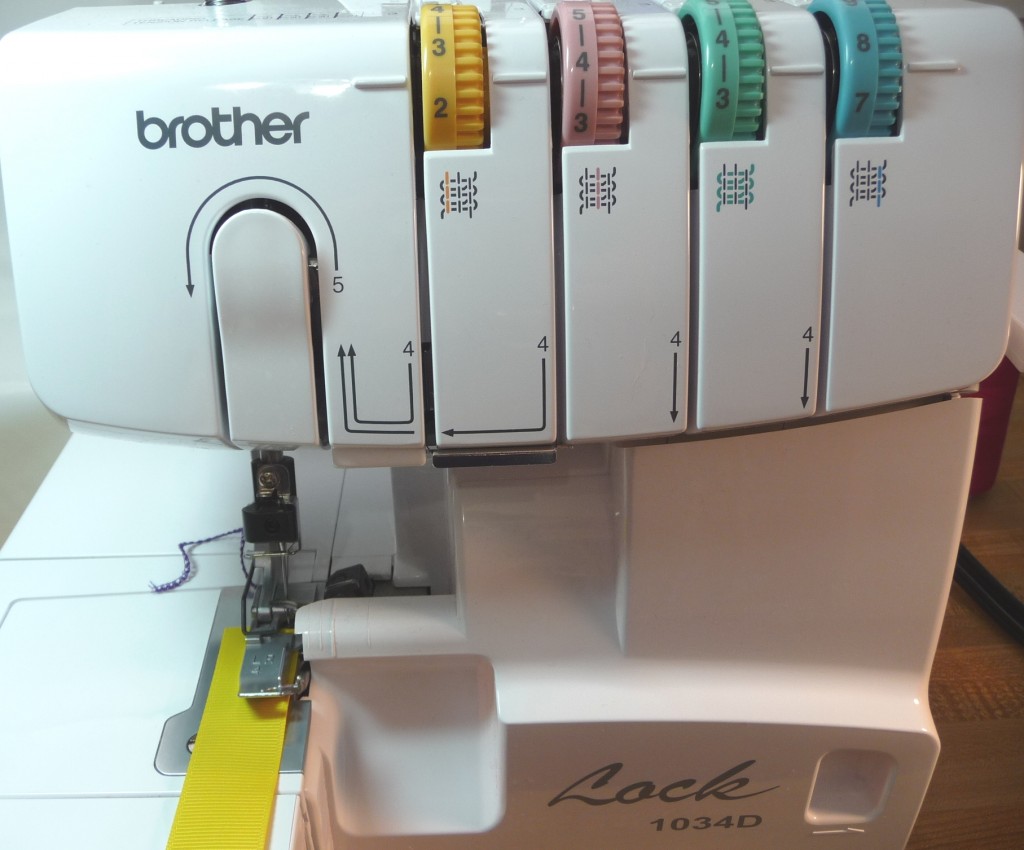
Set up your Serger for a two or three thread rolled hem.

No2_sergersetup

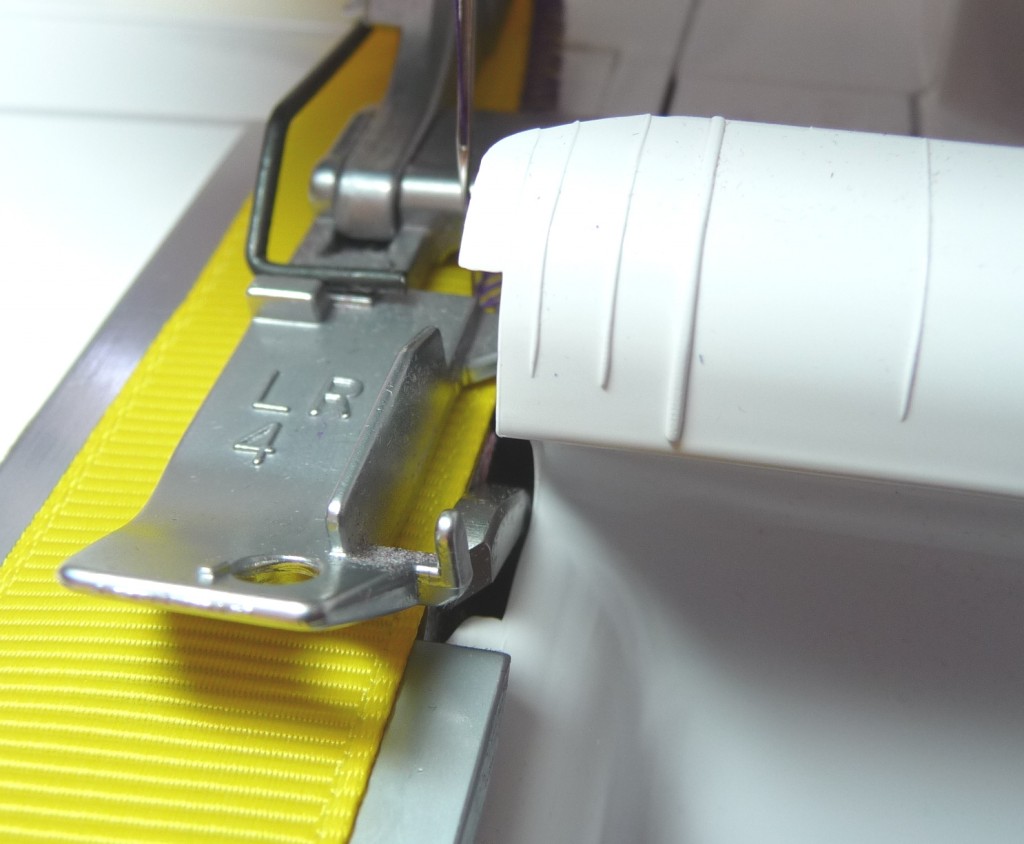
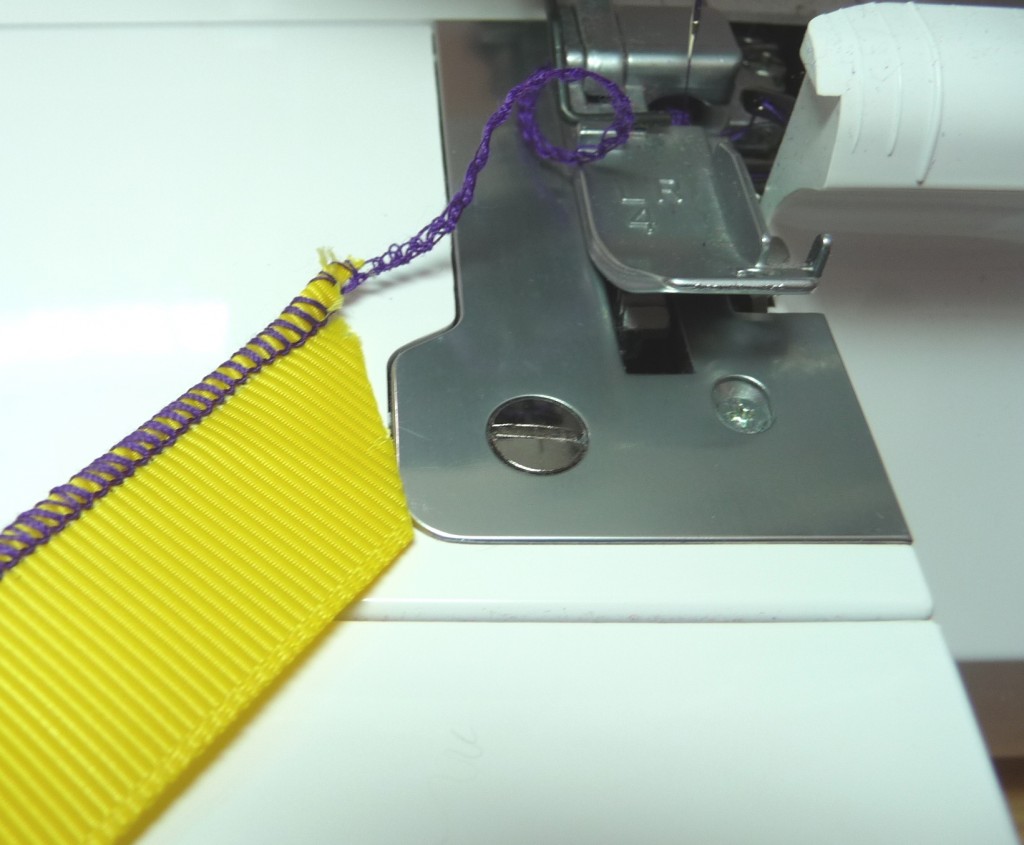
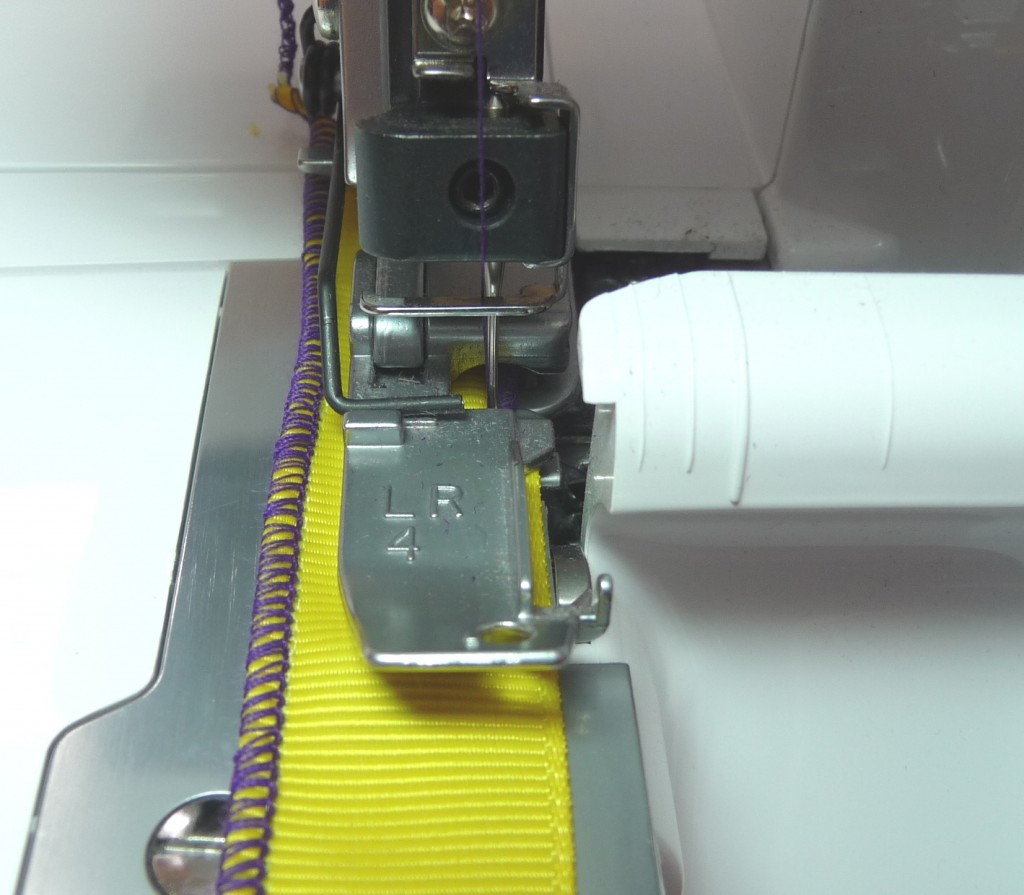
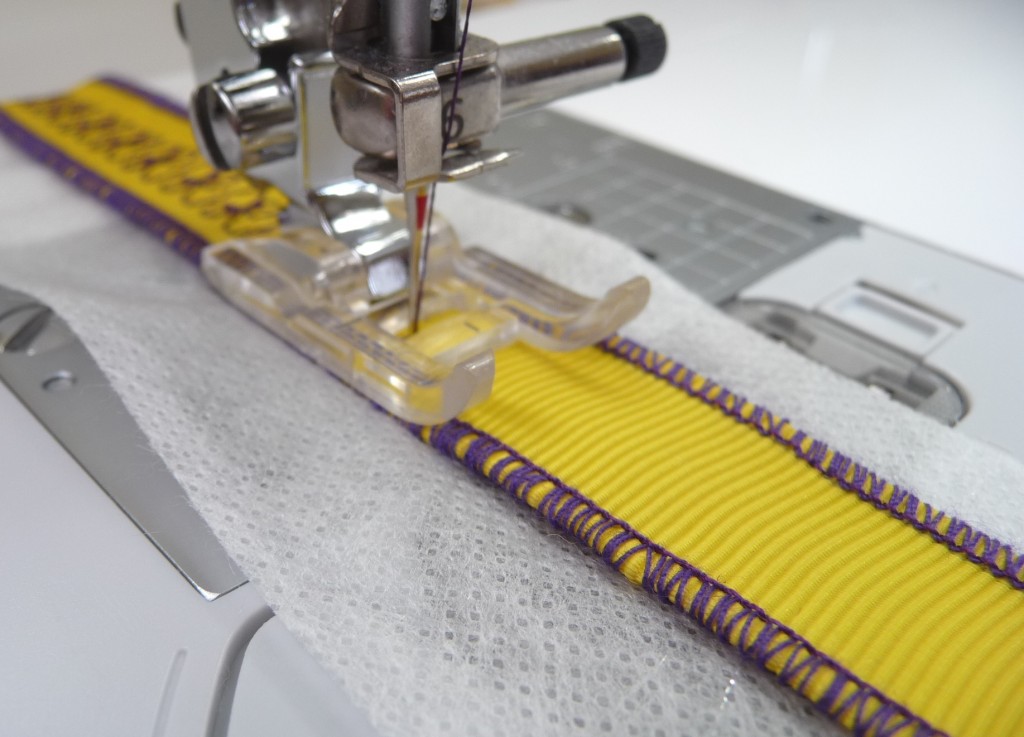
Disengage the cutting blade and serge along each finished edge of the grosgrain ribbon. Note: You are not actually rolling the edge of the ribbon. You are simply using the rolled hem stitch to accent the edge of the ribbon. When stitching, be sure to guide the ribbon evenly so that the rolled hem stitch forms right along the finished edge.

No3_sergersetupOne

No4_sergersetupTwo

No5_sergersetupThree

Press ribbon. I like to use Mary Ellen’s Best Press to smooth out the ribbon in preparation for decorative stitching. Set up your sewing machine for decorative stitching. Thread your machine with Embroidery Thread that matches your rolled hem, threading top and bobbin with the same thread. It is important to use a Presser Foot designed specifically for decorative sewing. In addition, you want your presser foot to be the same size, or slightly smaller than your ribbon. If your particular decorative foot is wide, then you will want to use ribbon that is slightly wider as well. Prior to stitching on the ribbon you need to cut stabilizer strips to equal twice the width of the ribbon.

No6_decorativestepOne

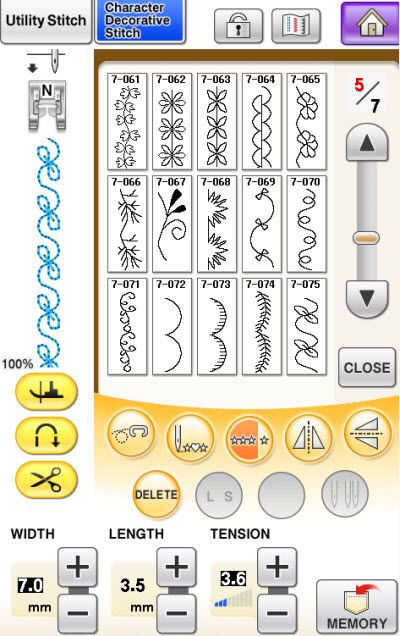
Select a decorative stitch to fit the ribbon. I used a stitch measuring 7mm wide and I increased the length of the stitch. It’s likely you have many built in stitches to choose from. I recommend testing several stitches until you find one that works well on your machine.

No6B_decorativeStitchMenu


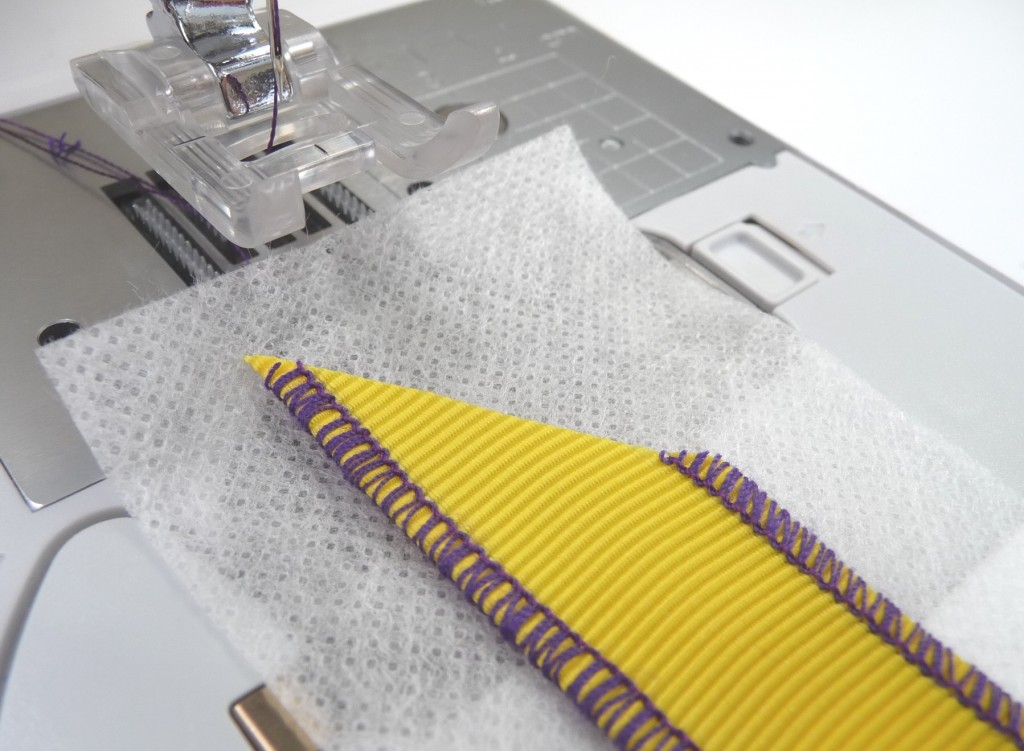
Stitch a row of decorative stitches down the center of the ribbon placing stabilizer underneath as you stitch.

No7_decorativestepTwo

Remove stabilizer according to the package directions. Trim ends at an angle and treat with seam sealant.

No8_seamSealant

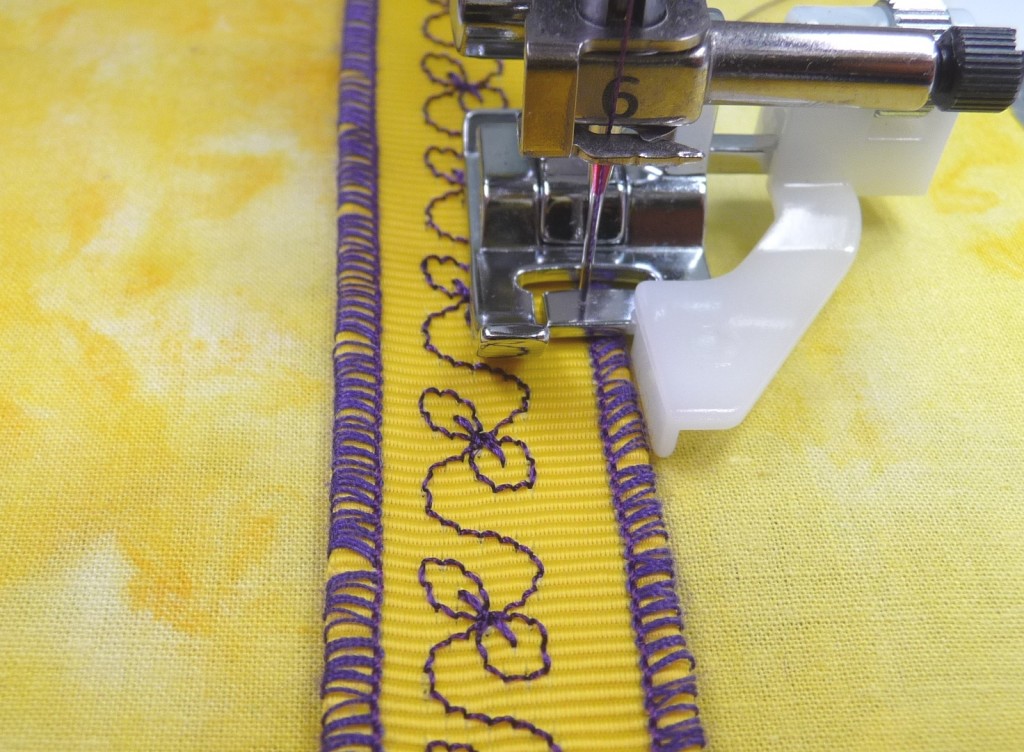
Attach the ribbon to your project using a straight stitch, stitching just along the edge of the rolled hem stitching. Tip: The adjustable blind hem foot is perfect for this task. Adjust the guide to line up with the edge of the ribbon, having the needle pierce along the rolled hem stitching. While stitching, keep your eye following the guide to maintain even and consistent edge-stitching.

No9_edgestitching

Ideas for using your ribbon: Use lengths of ribbon to trim a pillowcase, accent the hem of a little girl’s dress, decorate ready-made placemats, trim baskets and flower pots, decorate gift packages and more! Because this ribbon looks good on both the right and wrong sides, you can tie it into a bow and use it to accent any garment or craft project you like!

No10_finalpic

Next time . . . I’ll show you to use plain ribbons to enhance your embroidery designs. Until then, happy sewing from your sewing friend,

JoanneBanko

JoanneBanko_signature

About the author: Joanne Banko is a freelance sewing educator and a self proclaimed sewing cheerleader. She is a frequent contributor to Designs in Machine Embroidery magazine and author of the book Wrapped in Embroidery available at AllBrands.com. You can see Joanne’s online teaching segments broadcast on the popular PBS TV show, It’s Sew Easy, and online at www.itsseweasytv.com. Visit Joanne and read her blog posts at http://www.letsgosew.com/.