
Check it out everyone! We’ve made some renovations to our Baton Rouge store. Inside our classroom we’ve installed these cabinets! Come by and check it out! Interested in classes?
Author: Allbrands
Jenny Haskins Touch of Magic Tour
Check out our latest promo for our Jenny Haskins Touch of Magic Tour Event. Registration is now open. This event will sell out! For more information visit: Allbrands.com/Jenny Haskins
Anita Goodesign Event Highlight Video
Check out this highlight video from the Anita Goodesign event. It was a blast and thank you to everyone who came out and partied with us! We hope to see you at the next event!
![]()
Allbrands Baton Rouge Store Renovations
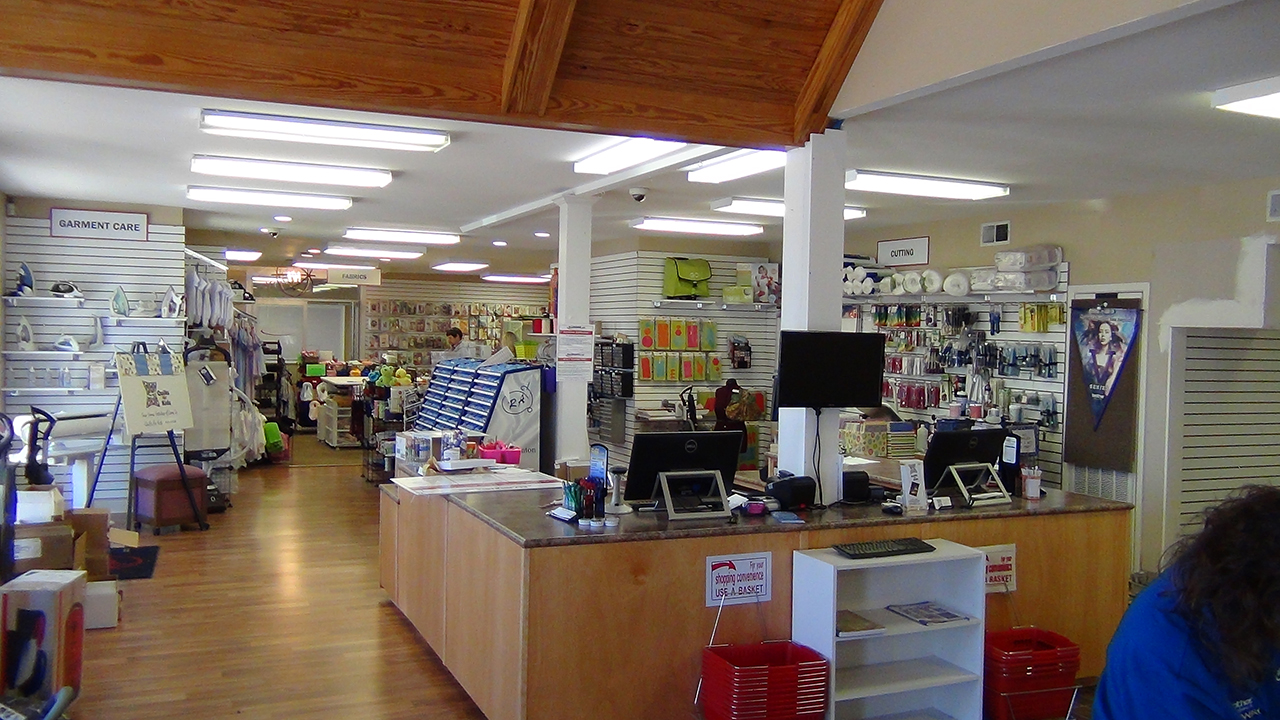
We are busy upgrading all of our store locations. Check out the latest upgrades going on in the Baton Rouge Store! Come by and check it our for yourself!
Scan N Cut Fun
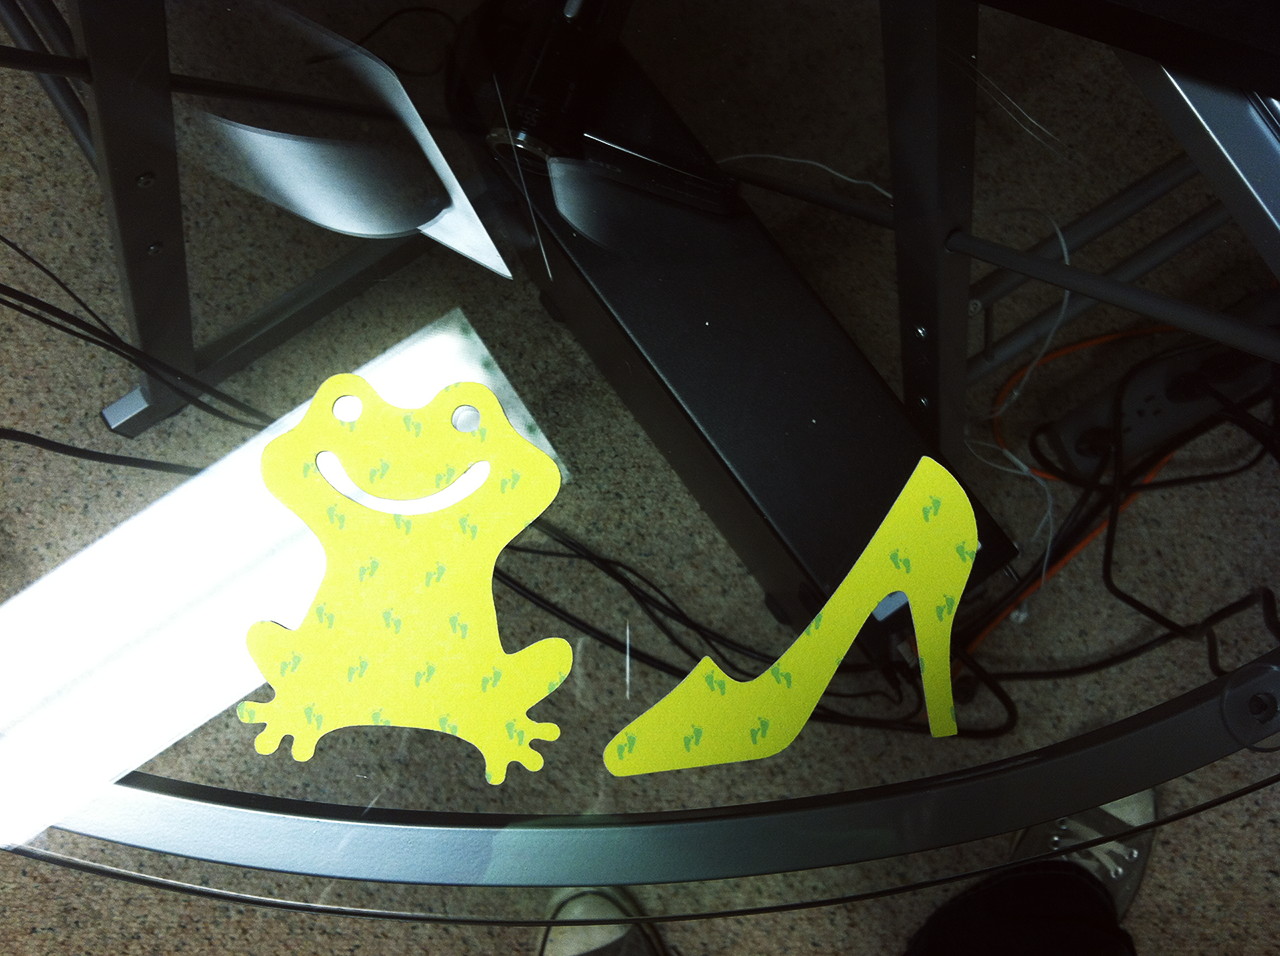
Hello Everyone!
Today in the retail store, one of our Web Application Developers got a first hand view of how the Scan N Cut works. She was in absolute awe at what the machine could do. Take a look at what was made today. What do you like to create?
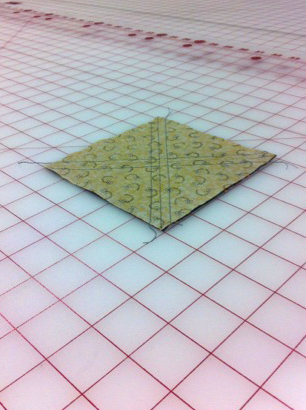
HOW TO MAKE 8 HALF-SQUARE TRIANGLES
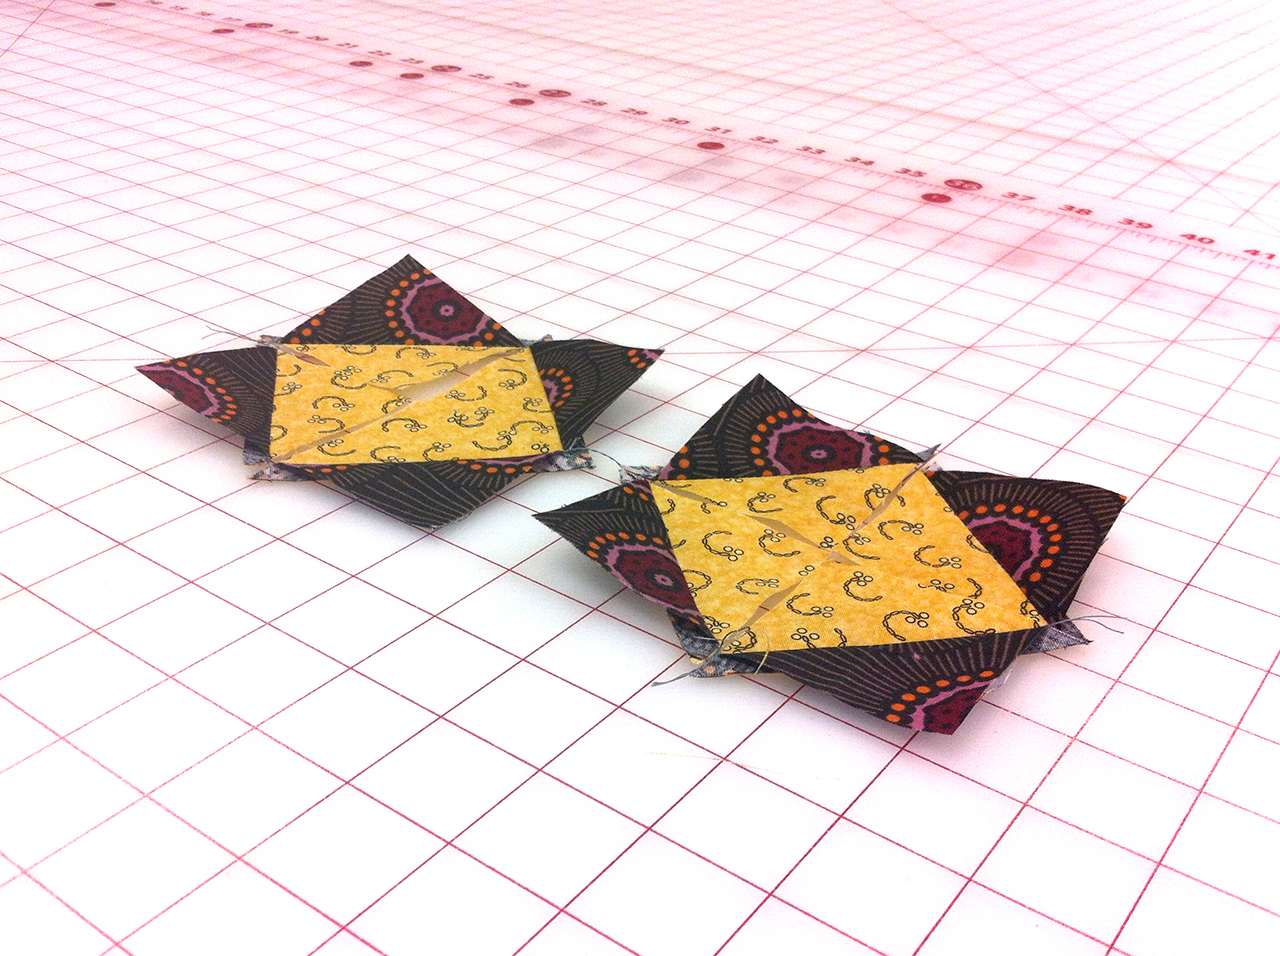

In this tutorial we’ll show you an easy way to make 8 half square triangles at once. The cool thing about this method in comparison to the 4 at a time method is that the bias is where it’s supposed to be. Plus, your final edges are on the straight of grain.
Good ole math! Start with 5” squares and the half-square triangles are a bit over 2” and will end up being 1 1/2” once in the quilt. About 1” will be loss using this method.
Simply place two squares right side together and draw two lines diagonally on one of them like in the example above. Next sew 1/4” on both sides of each line, that’s four seams total.
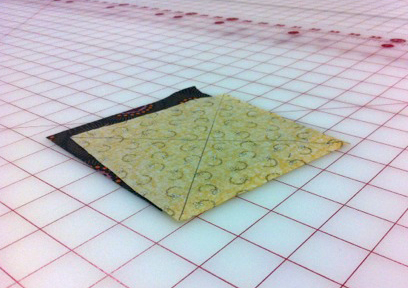
Now, use the center line as a guide to cut a horizontal and vertical line.
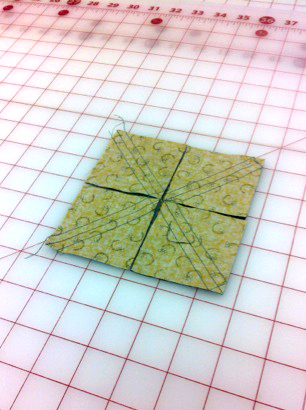

Cut along the pencil lines and there you have it, a half-square triangle.
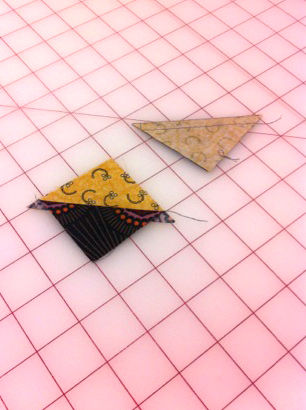
All there is left to do is trim to size if needed.

Stay tuned for more great tutorials, tips and tricks from AllBrands.com!
![]()
Easy Embellishments with Ordinary Ribbons- Part One


About the author: Joanne Banko is a freelance sewing educator and a self proclaimed sewing cheerleader. She is a frequent contributor to Designs in Machine Embroidery magazine and author of the book Wrapped in Embroidery available at AllBrands.com. You can see Joanne’s online teaching segments broadcast on the popular PBS TV show, It’s Sew Easy, and online at www.itsseweasytv.com. Visit Joanne and read her blog posts at http://www.letsgosew.com/.
The sewing tools we have at our fingertips these days make it easy and effortless to create embellishments for garments, crafts, home decor, and more! From incredible machine features to fantastic presser feet and helpful accessories, there is so much to love about sewing these days! Beginning with this article I’d like to share a few of my favorite techniques for creating embellishments with ribbons.
Since this is my first article for the ALLBRANDS newsletter I’d thought I’d give you a bit of background. I believe I was born with sewing in my genes. You may say I inherited the “tendency” to sew but I view it as a gift from my Creator. My Grandmother and Mother were both accomplished seamstresses but ironically, I was not taught by either of them. I was the last of five children, with a long gap in between. By the time I arrived on the scene my Mom had stopped sewing. My first stitch was in a Junior High Home Economics class. I remember taking that very first stitch and was hooked from the beginning! My wonderful, wise Mother saw the spark that first stitch created and at the beginning of the following school year she offered me a choice between ready-made clothes or a new zig-zag sewing machine and fabric. I chose the machine and have been sewing ever since! Seeing my enthusiasm my Mom started to sew again herself. We had so much fun shopping for supplies and sewing together. She stitched in the living room on her machine, while I sewed on my very own machine in my bedroom. I zig-zagged my way through junior high and high school making almost all of my own clothes.
We’ve come a long way since the days when we thought an ordinary zig-zag stitch was a big deal. Now we can choose from literally hundreds of decorative stitches built-in to the sewing side of our machines. Beyond that, we can stitch multitudes of embroidery designs with “hoop” capability. Yes, sewing today is better than ever and I love to do it all… sew, embroider, quilt, and craft! In this article I’d like to share a simple technique for creating decorative ribbon using your serger and your sewing machine. Are you ready? Let’s go sew!
Here are the supplies you will need:
- Serger with rolled hem capability.
- Sewing machine with decorative stitch capability. Recommended presser feet for this project include a clear foot for decorative stitching and an adjustable blind hem foot for stitching the ribbon on your chosen item.
- Ordinary grosgrain ribbon measuring approximately 1-inch wide. Note: Cut a length of ribbon measuring twice the amount needed for your finished project so you have enough to test your rolled hem stitching and your decorative stitching.
- Serger Thread to contrast with your ribbon.
- Embroidery Thread to match your serger thread.
- Size 11 embroidery needle.
- Strips of stabilizer – Use tear away stabilizer if you don’t need reversible ribbon. Use water soluble mesh stabilizer for reversible ribbon.
- Seam sealant to treat ribbon ends.

Here is how to decorate your ribbon:
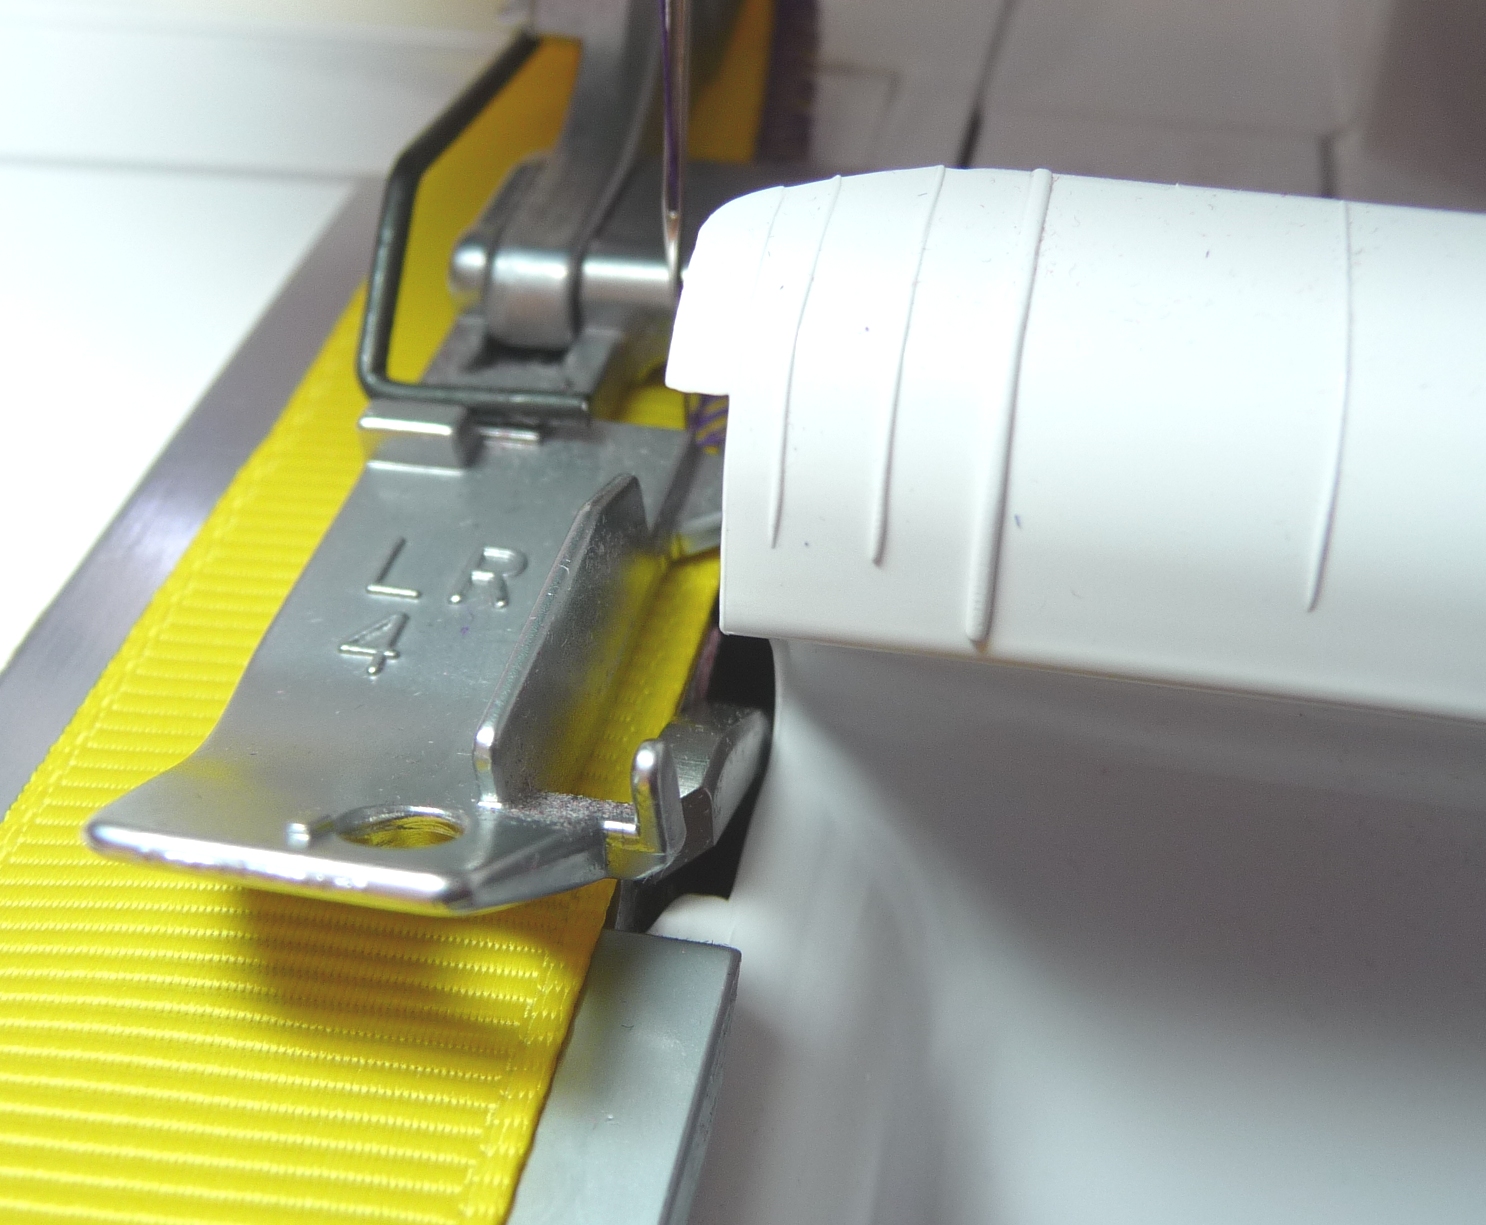
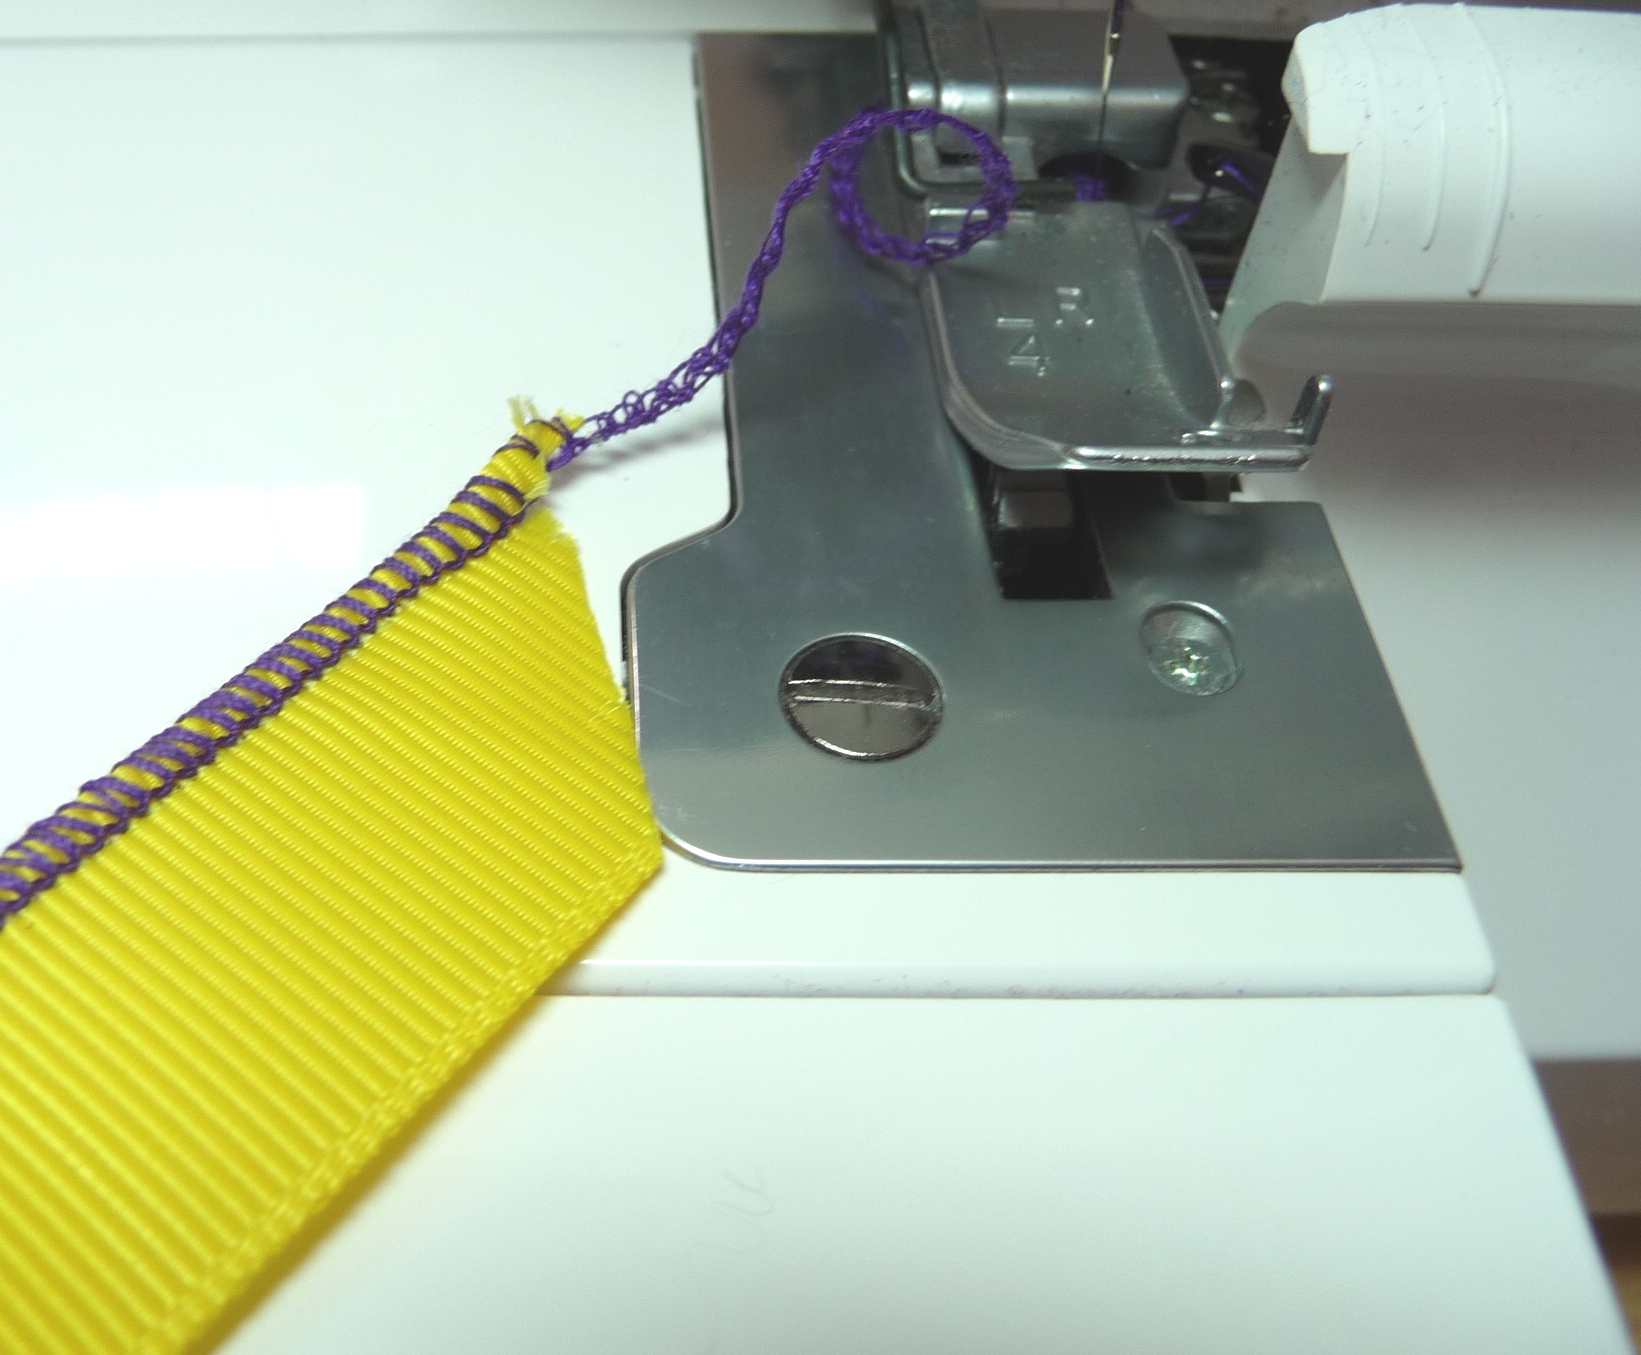
Set up your Serger for a two or three thread rolled hem.

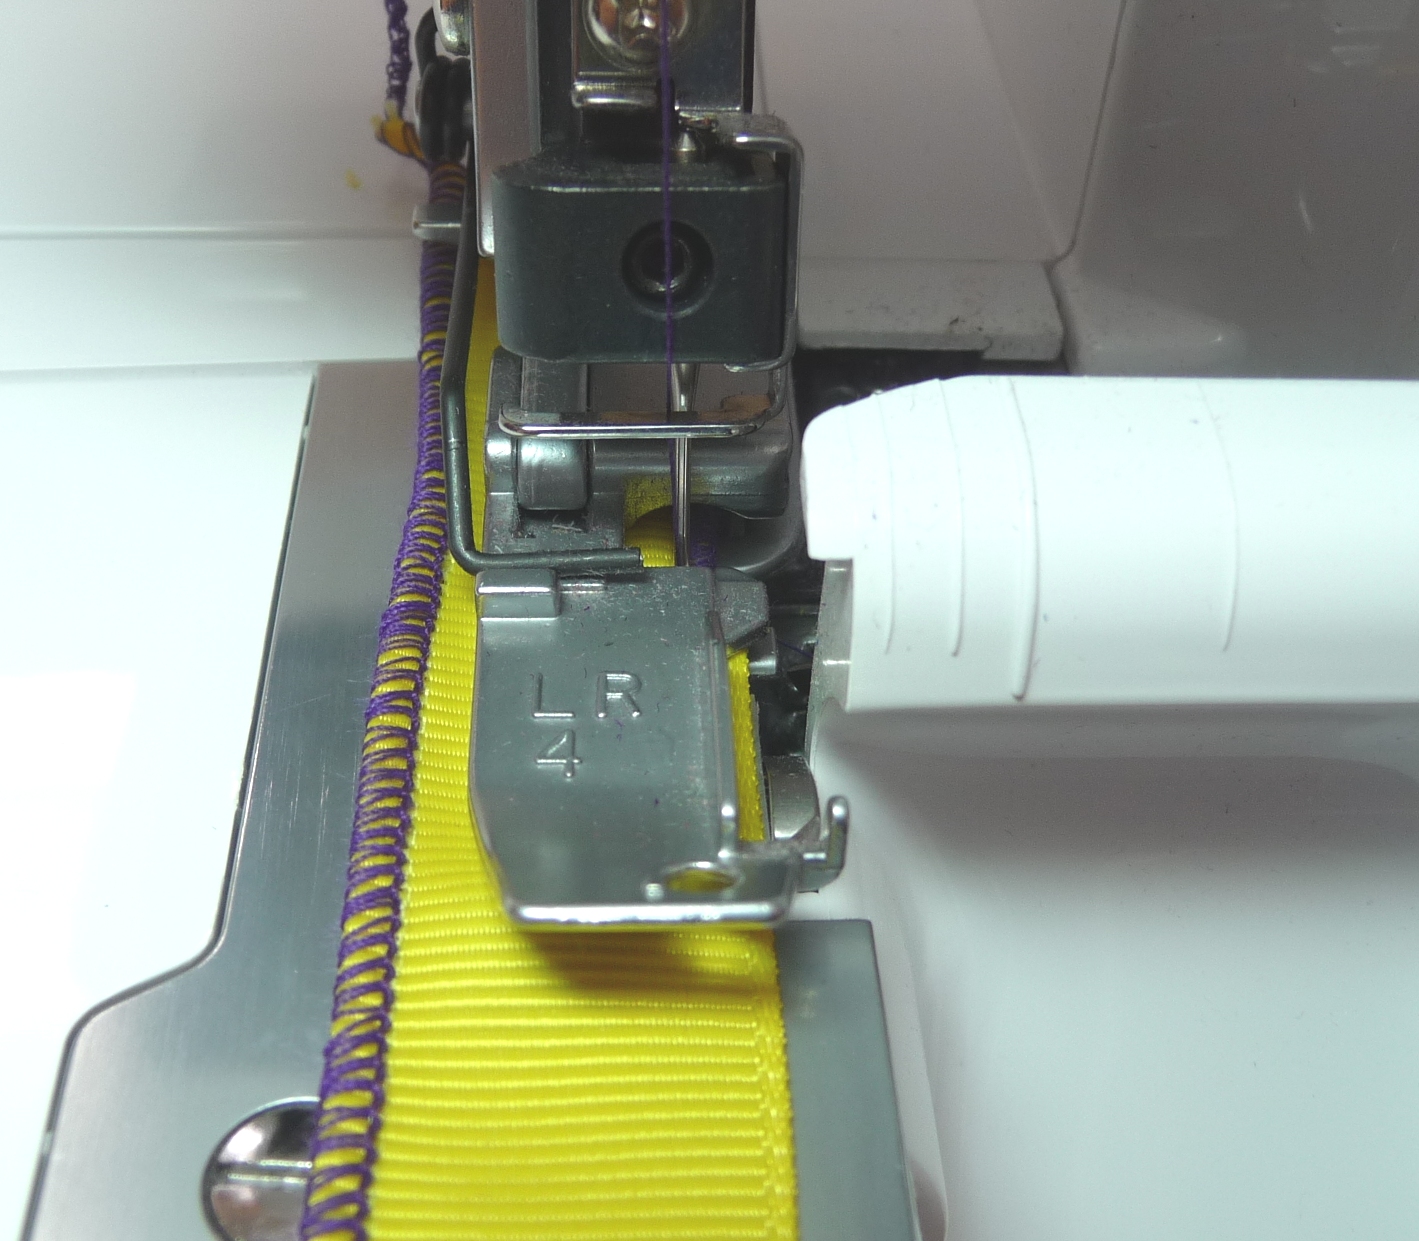
Disengage the cutting blade and serge along each finished edge of the grosgrain ribbon. Note: You are not actually rolling the edge of the ribbon. You are simply using the rolled hem stitch to accent the edge of the ribbon. When stitching, be sure to guide the ribbon evenly so that the rolled hem stitch forms right along the finished edge.
Press ribbon. I like to use Mary Ellen’s Best Press to smooth out the ribbon in preparation for decorative stitching. Set up your sewing machine for decorative stitching. Thread your machine with Embroidery Thread that matches your rolled hem, threading top and bobbin with the same thread. It is important to use a Presser Foot designed specifically for decorative sewing. In addition, you want your presser foot to be the same size, or slightly smaller than your ribbon. If your particular decorative foot is wide, then you will want to use ribbon that is slightly wider as well. Prior to stitching on the ribbon you need to cut stabilizer strips to equal twice the width of the ribbon.
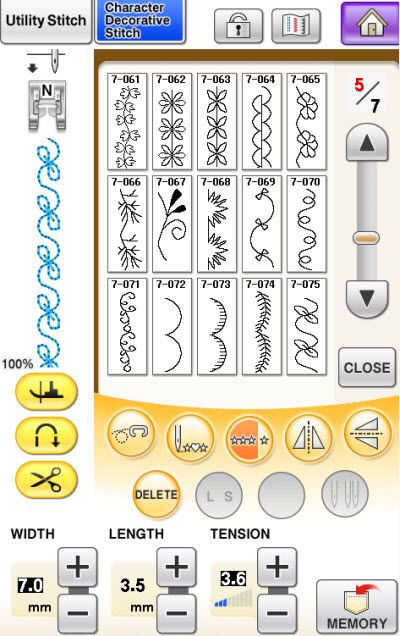
Select a decorative stitch to fit the ribbon. I used a stitch measuring 7mm wide and I increased the length of the stitch. It’s likely you have many built in stitches to choose from. I recommend testing several stitches until you find one that works well on your machine.
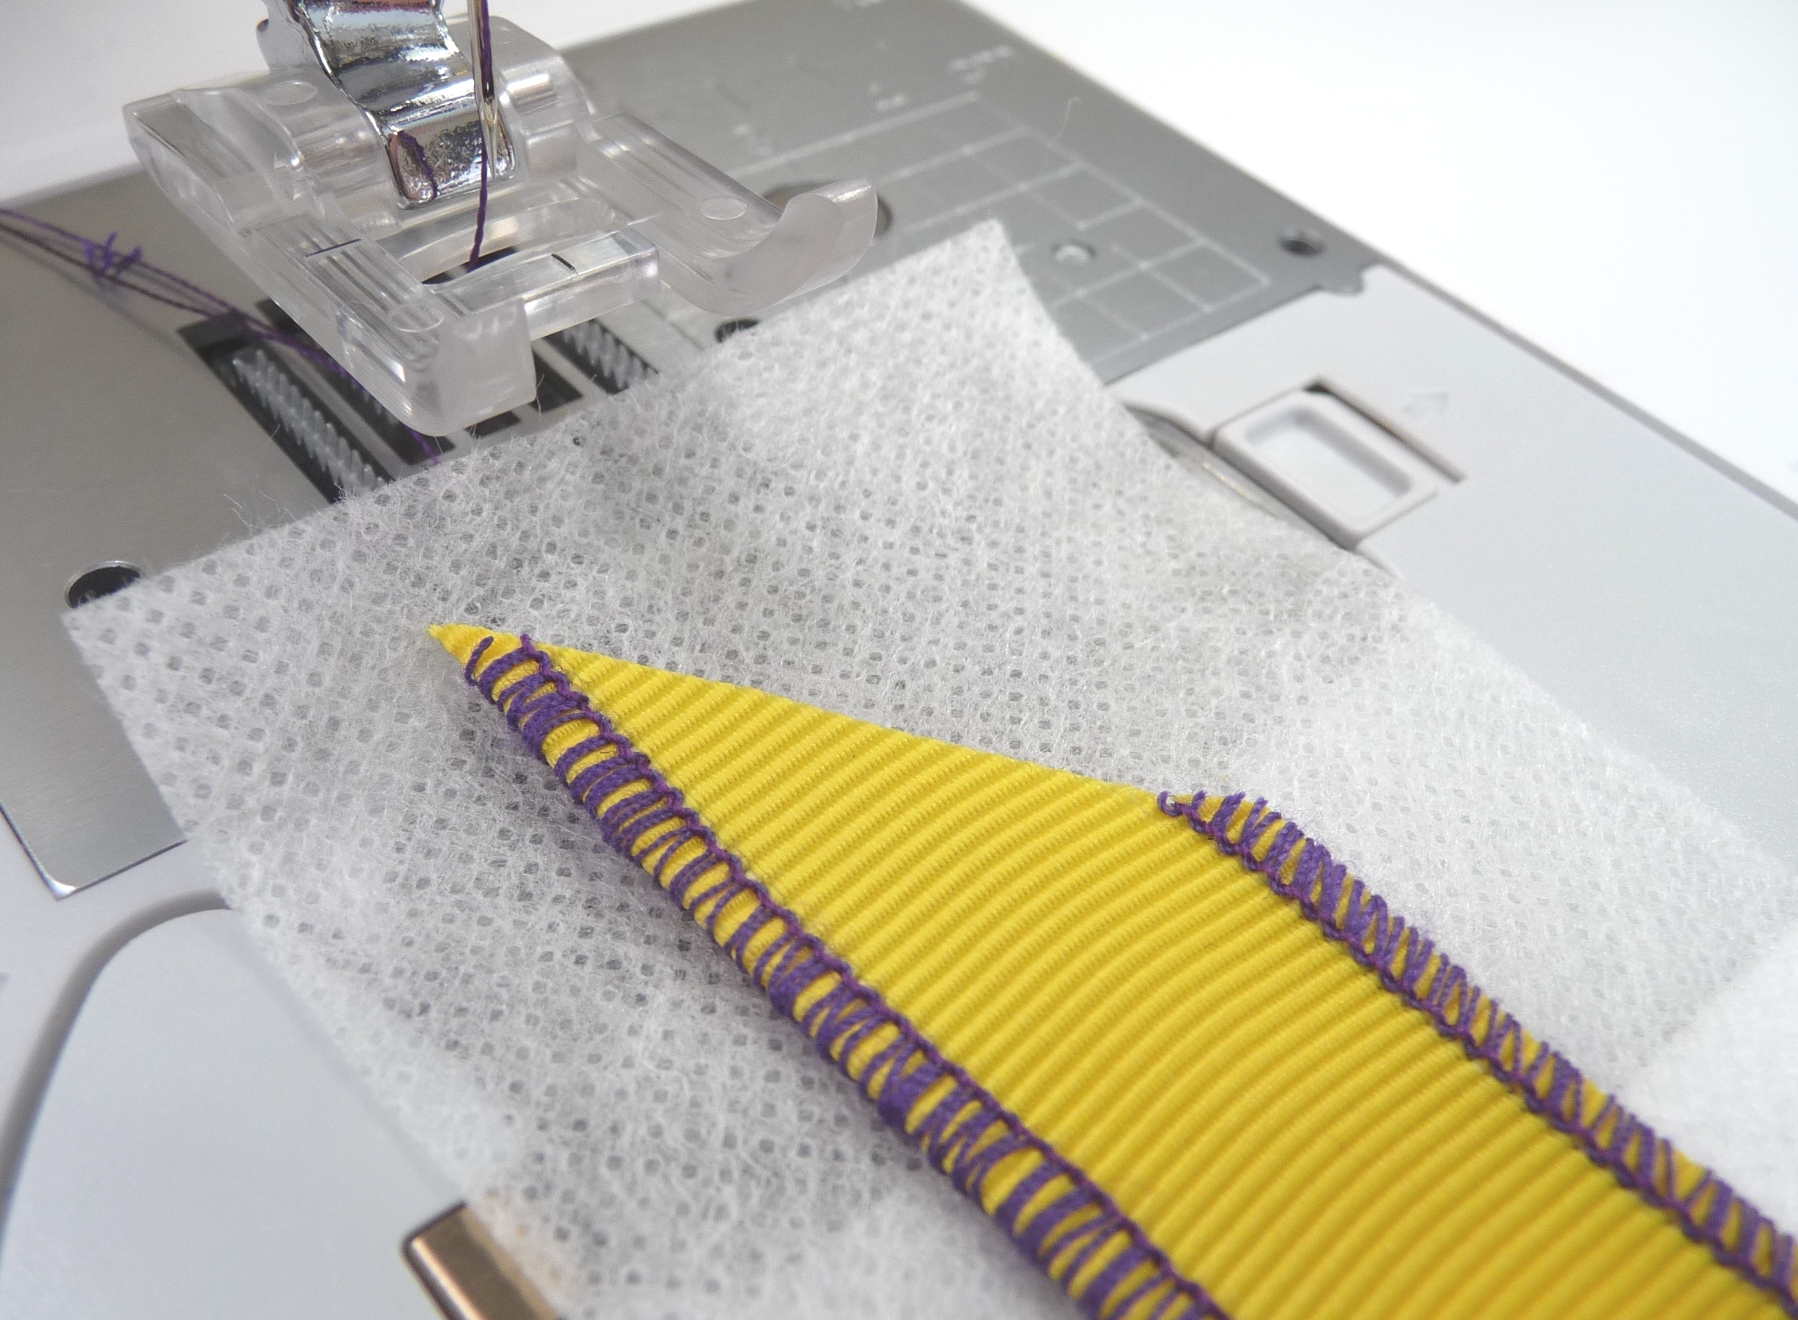
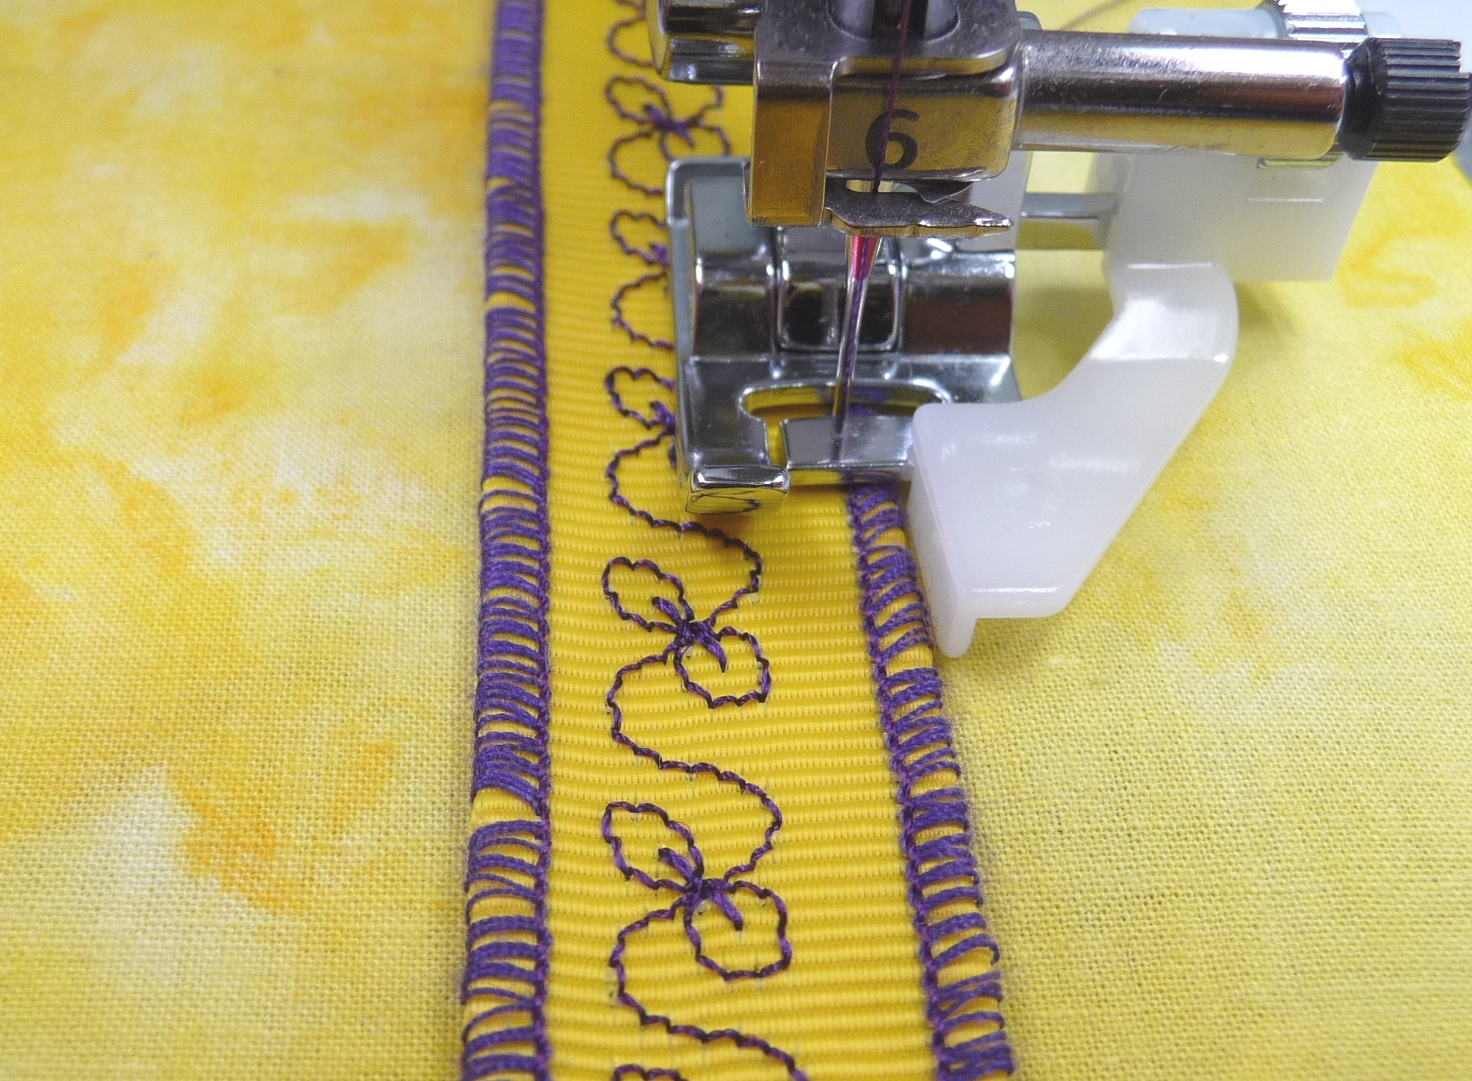
Stitch a row of decorative stitches down the center of the ribbon placing stabilizer underneath as you stitch.

Remove stabilizer according to the package directions. Trim ends at an angle and treat with seam sealant.

Attach the ribbon to your project using a straight stitch, stitching just along the edge of the rolled hem stitching. Tip: The adjustable blind hem foot is perfect for this task. Adjust the guide to line up with the edge of the ribbon, having the needle pierce along the rolled hem stitching. While stitching, keep your eye following the guide to maintain even and consistent edge-stitching.
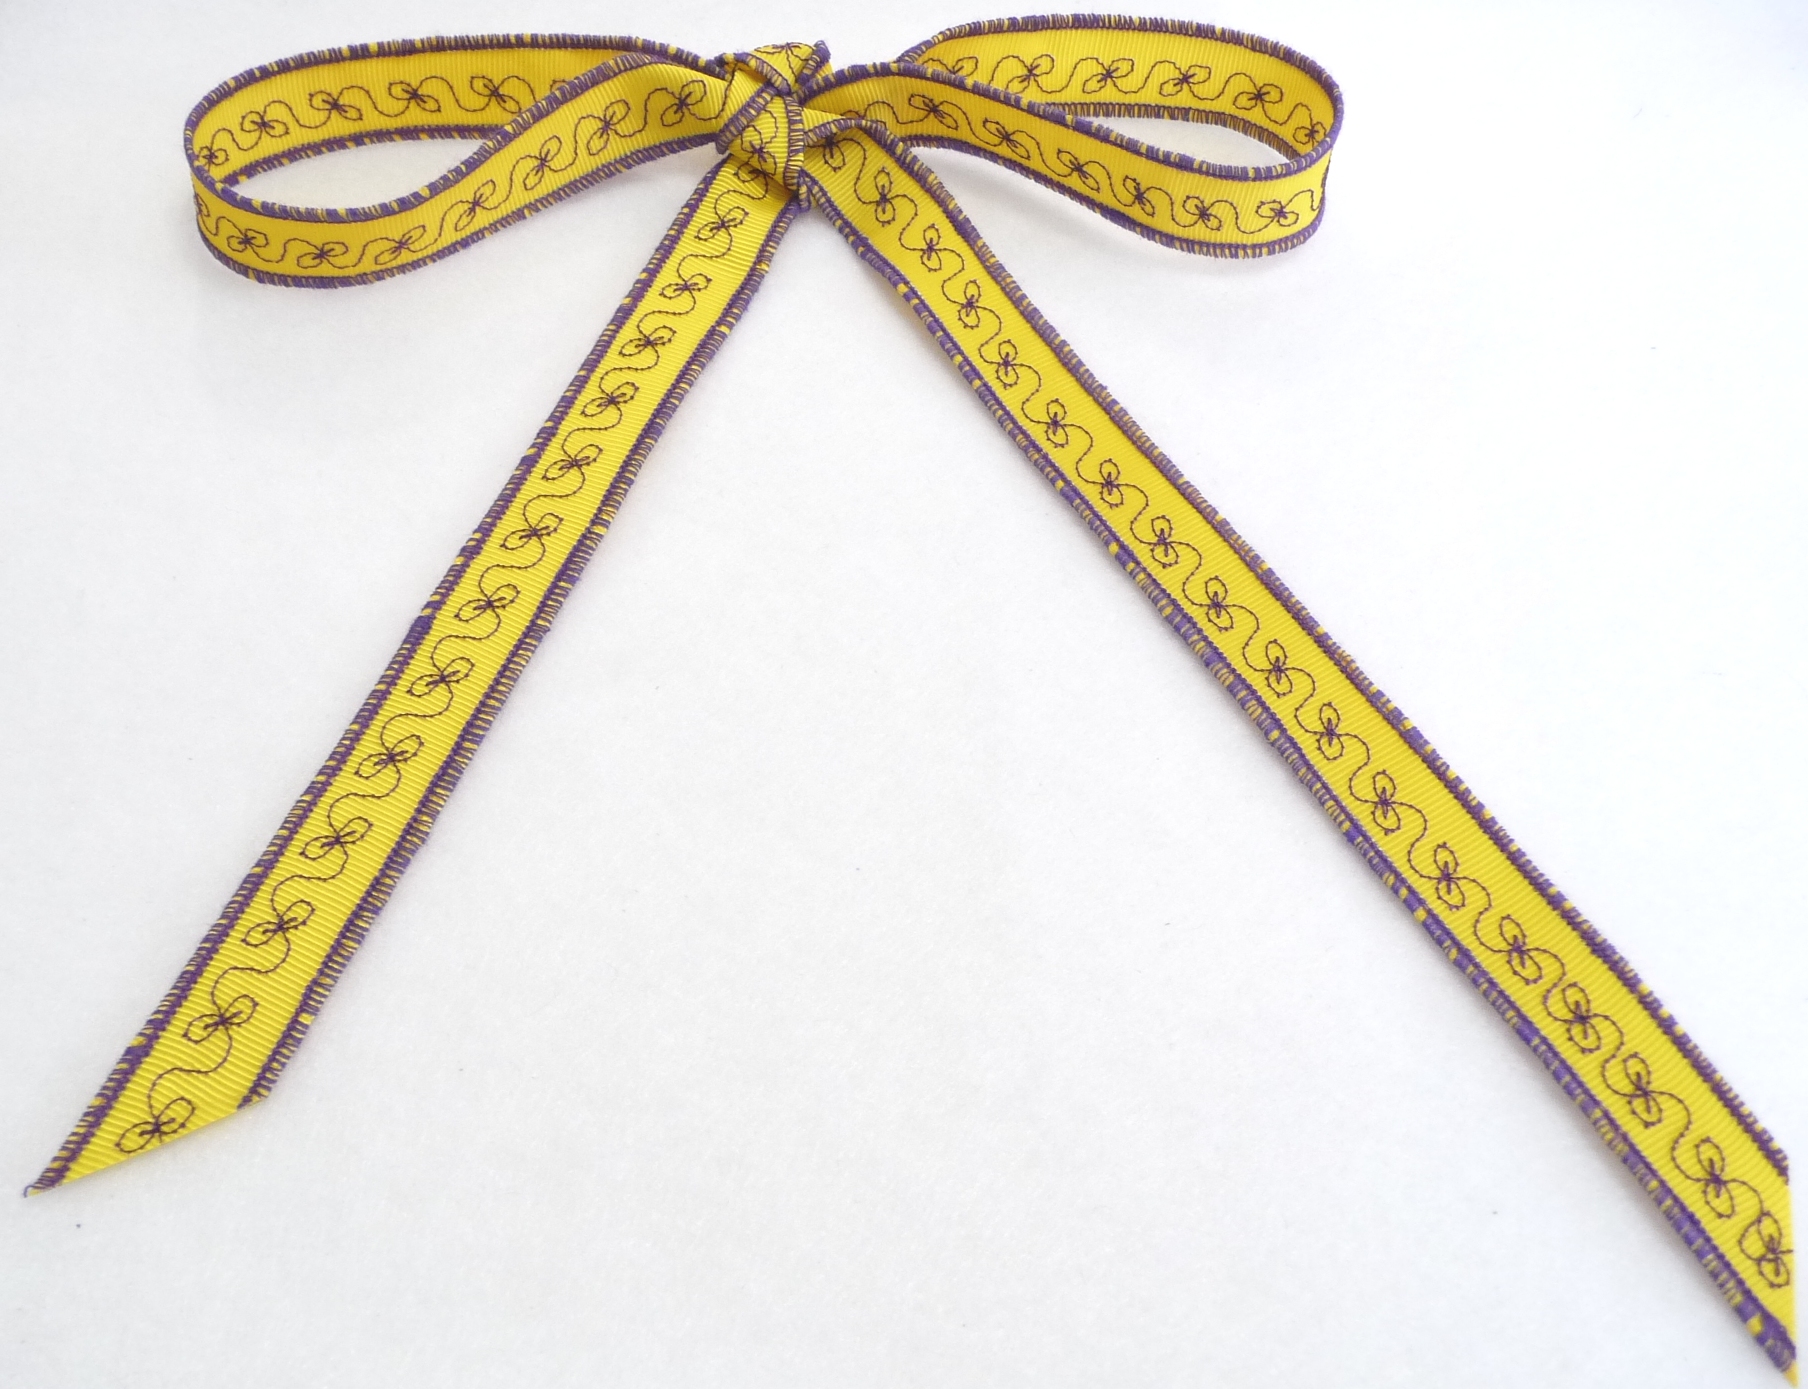
Ideas for using your ribbon: Use lengths of ribbon to trim a pillowcase, accent the hem of a little girl’s dress, decorate ready-made placemats, trim baskets and flower pots, decorate gift packages and more! Because this ribbon looks good on both the right and wrong sides, you can tie it into a bow and use it to accent any garment or craft project you like!
Next time . . . I’ll show you to use plain ribbons to enhance your embroidery designs. Until then, happy sewing from your sewing friend,
About the author: Joanne Banko is a freelance sewing educator and a self proclaimed sewing cheerleader. She is a frequent contributor to Designs in Machine Embroidery magazine and author of the book Wrapped in Embroidery available at AllBrands.com. You can see Joanne’s online teaching segments broadcast on the popular PBS TV show, It’s Sew Easy, and online at www.itsseweasytv.com. Visit Joanne and read her blog posts at http://www.letsgosew.com/.
Join Our Newsletter

Be sure you sign up for our newsletter so that you can receive special offer, our latest news, and tips and tricks. Sign up after the jump!
Sign up for our newsletter here
The Anita Goodesign Event

Come see the latest embroidery releases and learn the latest techniques in embroidery while you work on all-new hands-on embroidery projects! No matter your skill or experience level, you will absolutely enjoy these two fun-filled days of embroidery education! This is a great way to “try out” embroidery to see if it’s for you! All projects are created in a team environment, so you will feel comfortable learning and sharing in a party atmosphere! All materials, including embroidery machines, designs, etc., will be provided. We’ll have plenty of specials, door prizes and giveaways. – See more at: Anita Goodesign Event
When: March 21st & 22nd 2014
Where: Baton Rouge River Center
Sign up: Click Here
Welcome To Our Blog

Welcome to the AllBrands.com Blog! We’re glad you stopped by to visit.
If you’re new to Sewing, Embroidery or Quilting, you might be wondering… who is AllBrands? We operate a multi-million dollar online business selling sewing machines, vacuums, small appliances, and more. We made history in 1996 as the first sewing and vacuum business on the Internet. Besides our internet business, we operate 5 retail locations in Louisiana. Our owners, John and Annette Douthat have been in the sewing & fabric business since 1976. We only hire people with passion about the sewing business so it really sets our company apart from any other company out there. We want to share our passion and wealth of knowledge to our customers. This along with the idea of giving inspiration and helpful tips from our staff of experts was the motivation to start the AllBrands.com Blog.
Sincerely,
Blaine Austin
CEO