Transform a T-shirt in 60-minutes or less!

Guest blog by Joanne Banko

Hello to all my Allbrands friends!

It was great to be back in Baton Rouge for the recent Allbrands Embroidery Garden Party event with Reen Wilcoxson and Angela Wolf! I got to see friends from previous trips to Louisiana and I had the opportunity to make many new friends too!!!

If you’ve had the chance to attend one of these amazing ALLBRANDS events you know that on day one each attendee receives a commemorative T-Shirt. On day two many of us don our shirts and have fun with photo ops and selfies posted to the ALLBRANDS Facebook page.

EG_BatonRouge_2016_group

By now I’ve got quite a collection of these shirts. These shirts are colorful and fun to wear. Each one brings back special memories of time spent with fellow sewing and embroidery enthusiasts. However, I am fond of customizing my T-shirts so I took a tiny bit of time to transform the pretty pink Tee from our Sulphur LA party with a minor makeover before packing it for the trip. When I wore it on day two in Baton Rouge it created quite a buzz of curiosity! Many attendees wanted to repeat my embellishment techniques. Thus, the Transform Your T-shirt Tutorial was hatched! You can CLICK HERE to read my recent blog post about T-shirt re-styling. At the end of the post you’ll find a link with instructions for taking a standard crew neck T-shirt and turning it into a top with added flair and a few feminine details.


Enjoy!

P.S. The next ALLBRANDS Embroidery Garden event is scheduled for September in San Antonio Texas. CLICK HERE for more details!

JoanneBanko_photo

JoanneBanko_signature

Joanne Banko is a freelance sewing educator and a self-proclaimed sewing cheerleader. You can see Joanne’s online teaching segments broadcast on the popular PBS TV show, It’s Sew Easy, and online at www.itsseweasytv.com. She is a frequent contributor to Designs in Machine Embroidery magazine and author of the book Wrapped in Embroidery. The book is available at AllBrands.com. Visit Joanne at her Sewing and Embroidery website, www.letsgosew.com.


Machine Embroidery – Western Style (Guest blog by . . . Joanne Banko)

JoanneBanko_It's Sew Easy TV_Jacketback JoanneBanko on It's Sew Easy TV _Jacketfront

Hello to all my Allbrands friends!

ISE_1008_1

I’m beginning to feel like Louisiana is almost like home away from home for me! Soon, I’ll be in beautiful Baton Rouge and I hope to see many of you at the ALLBRANDS.COM sold out Embroidery Garden Party. I’ll be there along with Angela Wolf and Reen Wilcoxon as we join together for two days of unbelievable embroidery fun!!! I know I speak for all of us in saying that we’re excited to see you all! We’ll stitch six fabulous in-the-hoop embroidery projects, make new friends, eat great southern food, and have more fun than a cowpoke at a western rodeo!

So, what does a rodeo have to do with an Embroidery Garden party? Nothing really, but I’m also writing today to remind you to watch the online version of the popular It’s Sew Easy PBS TV show. Episode 1008, aptly titled Stepping Out will air on the It’s Sew Easy TV website from now until noon on Friday, May 20th, 2016. The show begins with my version of a Rodeo Cowgirl Jacket. Watch the show and you are sure to see that I love western style clothing!!! How about you?

This denim jacket features embroidery designs from my book Wrapped in Embroidery along with built in designs from the Brother Dream Machine. Although the theme is classy, classic western inspired clothing, this segment is all about how to accomplish perfect placement with templates and create continuous border style stitching using a combination of high tech Brother embroidery innovations.

Would perfect embroidery placement on garments be a dream come true for you? Have you ever wanted to embroider from here to the moon and create continuous embroidery designs that are perfectly matched from end to end? Both of these embroidery challenges are possible on any machine when you know the tricks for precise placement.

On the show you will see me use the Brother Dream Machine to accomplish perfect placement with templates and stitch continuous borders by using a basting box and the Droplight® laser. If you own this machine you will love the easy, accurate methods presented in this show. In fact this process will work on many different Brother models. Depending on your Brother machine model, you’ll find there are many more ways to create the same effect.


So, what if you have a machine without these high tech toots and whistles. There is a solution for that! In the second chapter of Wrapped in Embroidery I outline three methods for perfect placement and stitching continuous, endless embroidery on any machine! You are sure to find one or more methods that work for you, no matter what level of capability your current embroidery machine has.

Now, why not make yourself comfortable and CLICK HERE to watch It’s Sew Easy TV episode 1008? In this show you’ll also be treated to an accessory lesson presented by Angela Wolf.

Enjoy the show and I’ll talk to you again soon. Until then, I wish you Happy Sewing!


JoanneBanko_photo

JoanneBanko_signature

Joanne Banko is a freelance sewing educator and a self-proclaimed sewing cheerleader. You can see Joanne’s online teaching segments broadcast on the popular PBS TV show, It’s Sew Easy, and online at www.itsseweasytv.com. She is a frequent contributor to Designs in Machine Embroidery magazine and author of the book Wrapped in Embroidery, available at AllBrands.com.

Visit Joanne at her Sewing and Embroidery website, www.letsgosew.com and on Facebook at https://www.facebook.com/letsgosew

It’s Sew Easy TV 900 series ( Joanne Banko)

Hello to all my Allbrands.com friends! Joanne Banko here with some news about the It’s Sew Easy TV 900 series, beginning this weekend on your local PBS Station. Can you believe this show is in it’s ninth  season?!?

PBS_Opt (1)

Once again Brother International Sewing Machine Company is sponsoring the show. That means the products and creative sewing tools you see each week can be found at Allbrands.com or your favorite allbrands.com retail stores.

Get ready to put the  “Do Not Disturb” sign on the door of your sewing space. The latest series, Timeless Techniques for Today’s Fashions will make you want to run to your sewing machines! After each and every show you are going to gain inspiring tips for creating custom clothing, accessories, and home décor. You can CLICK HERE to read more about the show on my personal blog. I’ll stay in touch with you during the next several weeks with updates and additional tips.

I’ve included a press release directly from the studio where the show is produced. Talk to you again soon . . . in the meantime, enjoy the show!


It’s Sew Easy, Series 900:  Timeless Techniques for Today’s Fashions • Traditional sewing meets today’s technology

This season, It’s Sew Easy continues to trace fashion and sewing through the historical events, cultural influences and trends of the 20th century. New attitudes, new lifestyles and new technology changed what women were doing and wearing.

Our sewing experts show how fashion fit, necklines, hemlines, accessories and embellishments all changed through times of war and economic ups and downs.

Each week, sewing and design experts, featuring Angela Wolf, show how to use time-honored techniques together with the latest sewing tools and technology to create today’s hottest fashions.

Enhance your sewing skills. Whatever our sewing skill level, enjoy sewing along with our experts as they show you why, It’s Sew Easy!

 It’s Sew Easy, Series 900 is sponsored in part by:

Brother International Corp., Havel’s Sewing, Coats and Clark,

Prym Consumer USA, The Warm Company, Kaleidoscope Collections LLC,

Horn of America, Inc. and Stitch Magazine

JoanneBanko_signature

JoanneBanko_photo

Joanne Banko is a freelance sewing educator and a self-proclaimed sewing cheerleader. You can see Joanne’s online teaching segments broadcast on the popular PBS TV show, It’s Sew Easy, and online at www.itsseweasytv.com. She is a frequent contributor to Designs in Machine Embroidery magazine and author of the book Wrapped in Embroidery. The book is available at AllBrands.com. CLICK HERE for a preview. You can visit Joanne at www.letsgosew.com.


The Bayou Embroidery University

AllBrands.com is excited to announce our second Bayou Embroidery University. Come join us at the Baton Rouge River Center for two days of hands on embroidery in our Interactive Workshop. We have assembled two of the Best educators in the business to instruct you. Come meet Embroidery Expert, Angela Wolf, host of the television show It’s Sew Easy, and also Embroidery Expert, Joanne Banko. We will also have in attendance National Educators Coleen Swettman, Barb Mikolajczyk, Jude Spanski, and Brenda Anderson. Join us for some very unique tips and tricks to help you create your one of a kind master piece. Don’t miss this exciting opportunity to spend two days of embroidery, education, and fun. Gain valuable knowledge and experience. Leave inspired with new unique techniques, projects, memories, and most of all, make new friends. You’ll learn the secrets and tips to stitch like a pro. Learn how to use embroidery to transform everyday items into money making projects with your hobby. You will be inspired with embroidery techniques and projects that are easy, exciting, fabulous, and fun. You will be part of a very special event like none that you’ve ever experienced. Click Here To Learn More

Dress Up with Decorative Stitches – Joanne Banko

Dress Up with Decorative Stitches – Part Three of Easy Embellishments

by Joanne Banko

JoanneBanko


 Let’s Get Started

Image1_meanddress

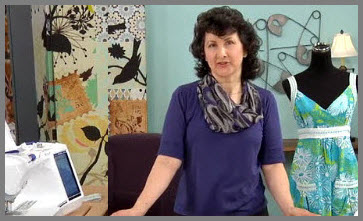
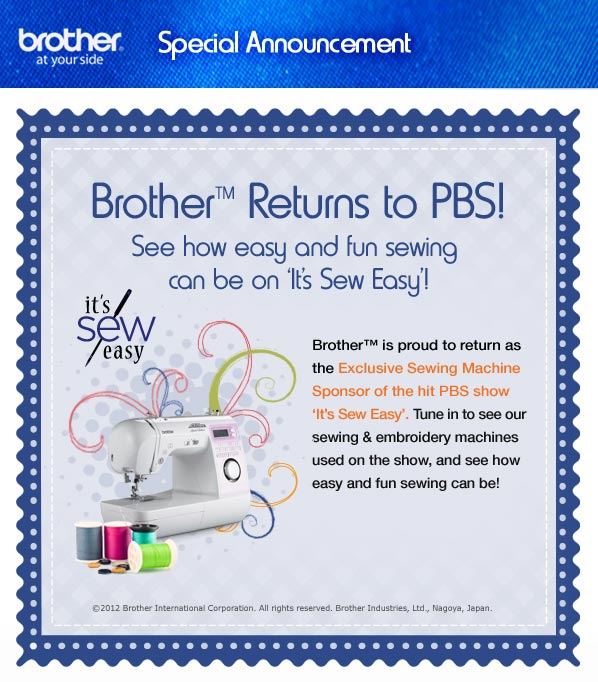
Today I’d like to share some embellishment techniques I used for a group of dresses featured on the popular PBS TV show, It’s Sew Easy. This informative sewing show is produced by KS Productions Inc. and airs all over the country. Check local PBS listings for show times in your area. Designers and teachers involved in every aspect of the sewing and embroidery industry are featured on this show. It’s Sew Easy will help you enhance your sewing skills and have more fun in your own sewing space!

In addition to watching the PBS TV show, you can view segments on itsseweasytv.com. Each week a new episode is uploaded and remains online for a full week. Visit the site this Friday, May 16, 2014 you will see me demonstrate decorative techniques for dresses on Episode 608, titled Classic Use of Ribbons and TrimsJoin the website and you’ll gain access to the entire archive of free project downloads, which includes valuable tips and a helpful supply list for the dresses seen on episode 608.

You’ll get lots of information and inspiration by watching the show but in this post I’d like to share some additional insider tips, techniques, and ideas with my Allbrands blog friends.

Image2_fourdresses

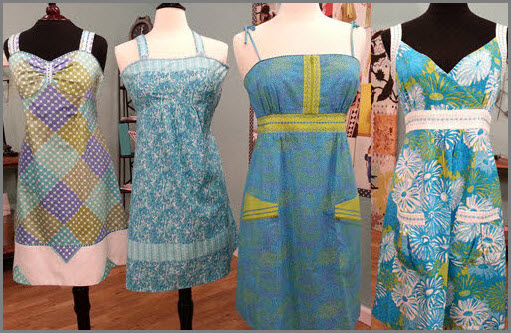
I love to sew garments and I had a lot of fun creating each of these dresses “from scratch.” Using a couple simply styled sundress patterns as my starting point, I added contrasting fabric bands in strategic places on four different dresses. Dress patterns are abundant right now so you’re sure to find something that suits your taste. Of course these same ideas will work for dresses with sleeves as well as many other garments.

Image3_patterns

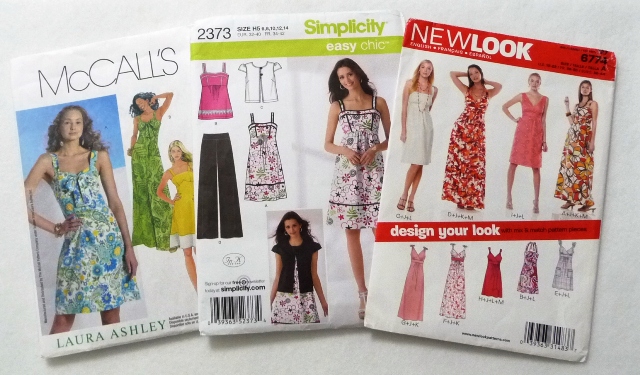
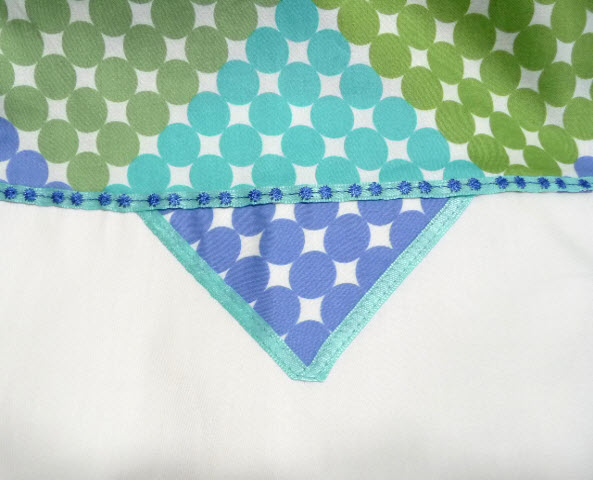
Deciding where to add decorative dress bands is up to you. You may find dress patterns that already include a separate pattern for a band at the waist, hemline, etc. In addition, pocket tops, sundress straps, and bodice bands are perfect places for rows of decorative stitching. Feel free to add bands of fabric in other areas too! If you have a favorite pattern without a separate pattern piece, it’s easy to add a band by drawing a line, cutting the pattern, and adding seam allowance to each cut edge. When you sew the pieces back together you’ll end up with the same size piece you started with. You can cut apart most any pattern piece as long as you remember to add appropriate seam allowance. I like to trace the original pattern onto paper or tracing cloth, draw lines for placement of contrasting pieces, and then trace off new patterns to use for cutting my fabric. Consider inserting zippers for a fun and functional accent. I took a plain pocket piece and did just that for one of my sundresses.

Image4_pocket

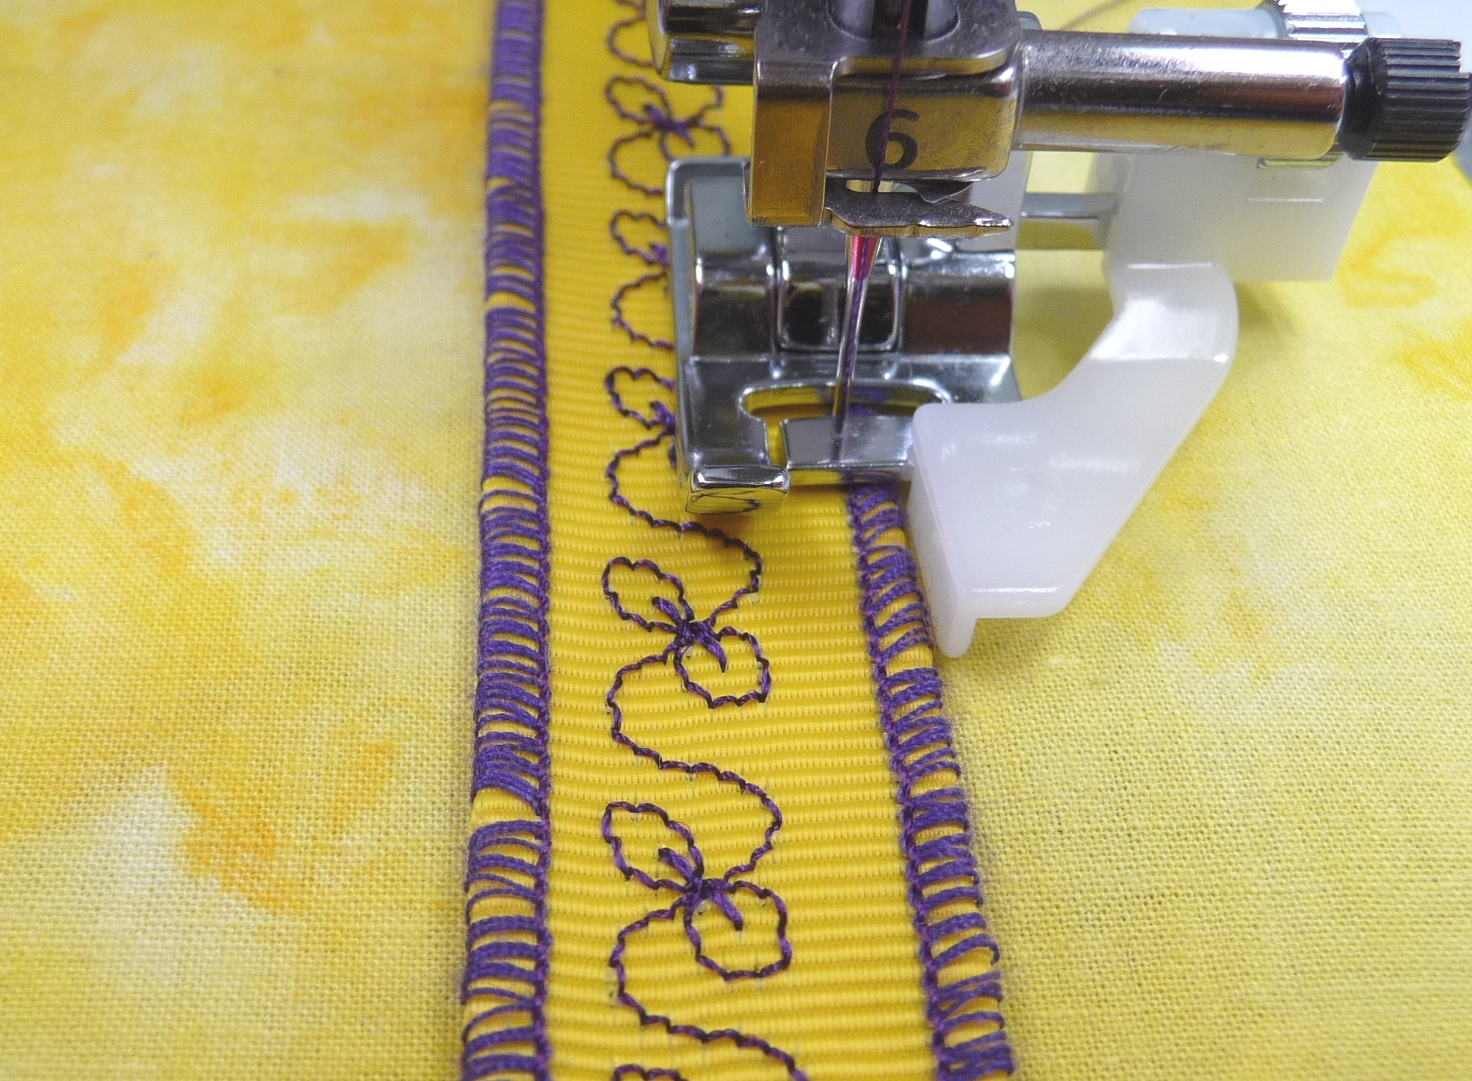
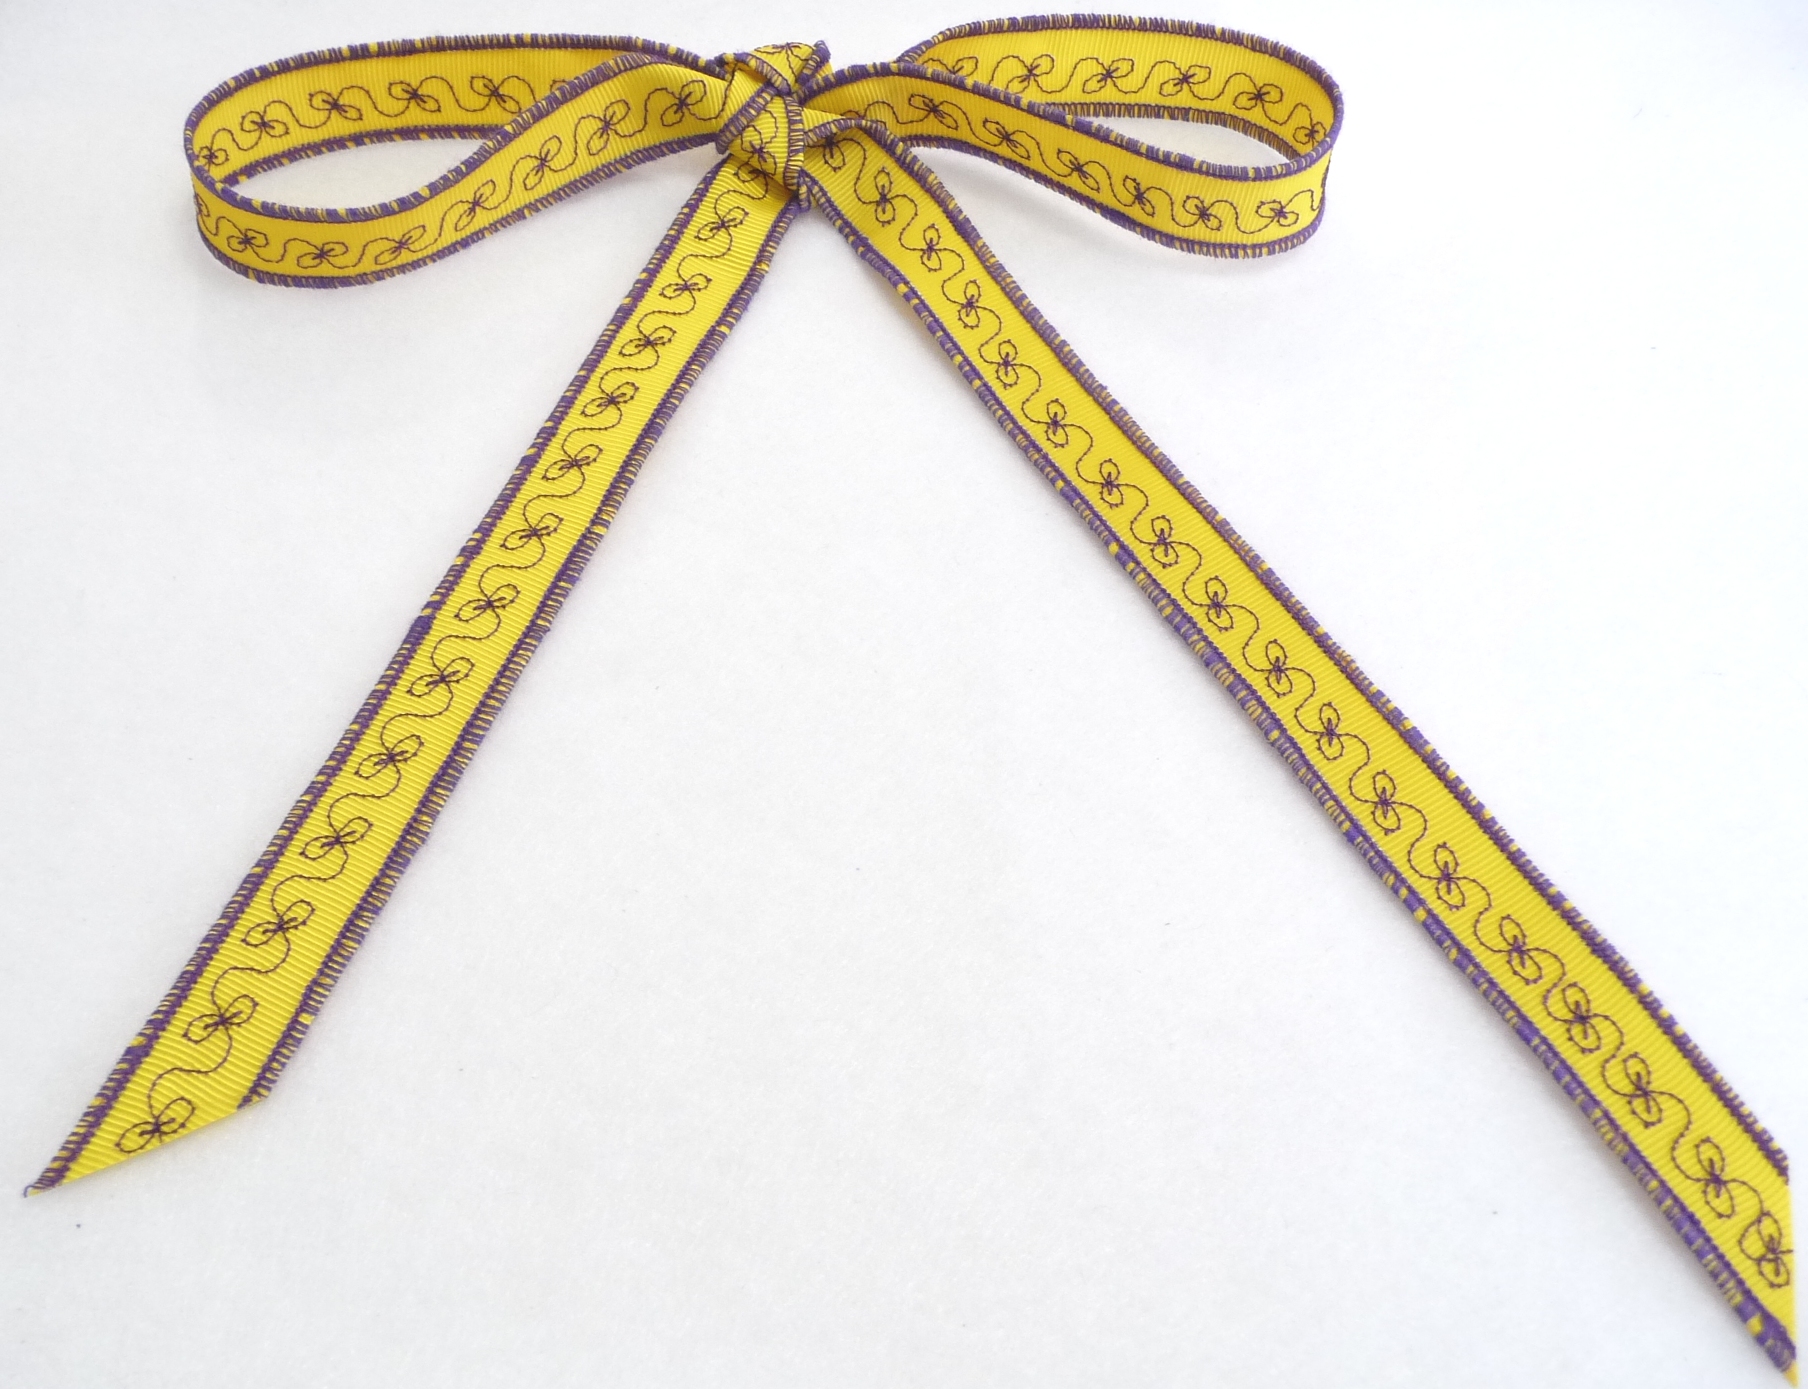
In the show I talk about preparing your pattern and your fabric for the decorative stitching. In most cases I stitched multiple rows of decorative prior to constructing the garment. Ribbons add to the mix of dress embellishments. Decorative stitches combined with ribbons create a colorful, coordinated look.  I used decorative stitches on ordinary ribbons in a recent blog for Allbrands. I invite you to CLICK HERE and read this post for a few additional basic ribbon stitching tips, including some needle, thread, and stabilizer guidelines.

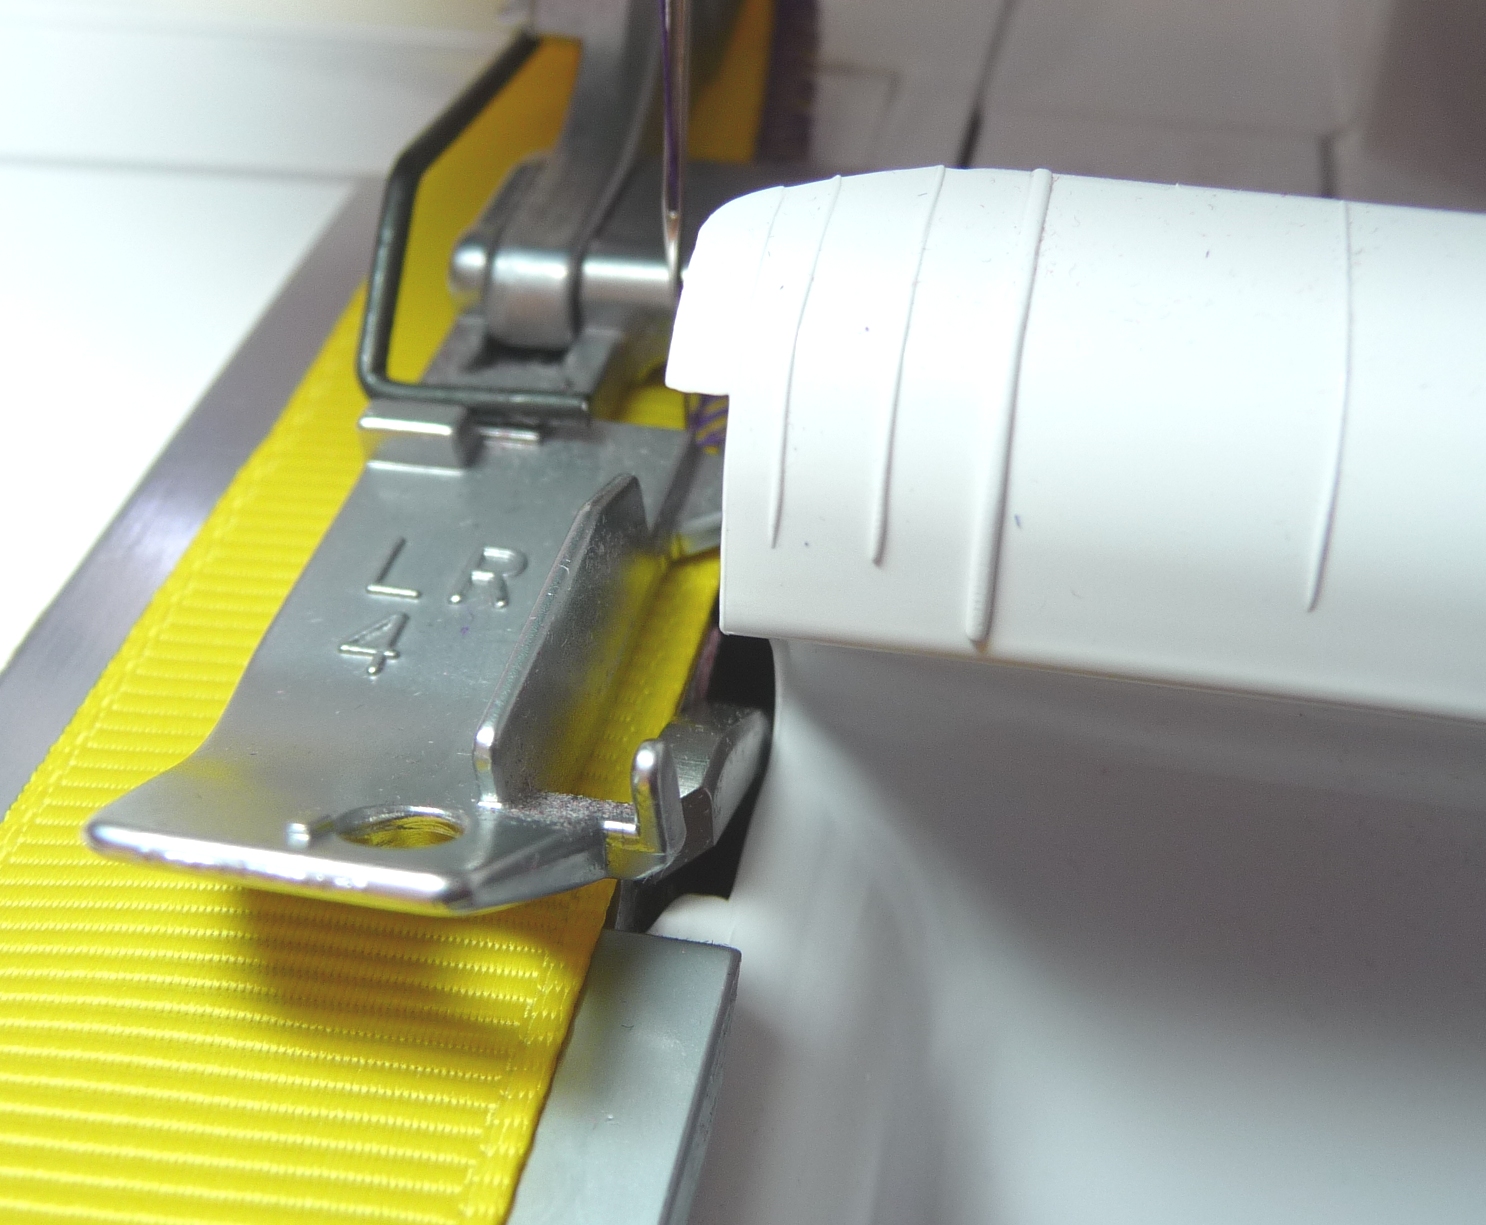
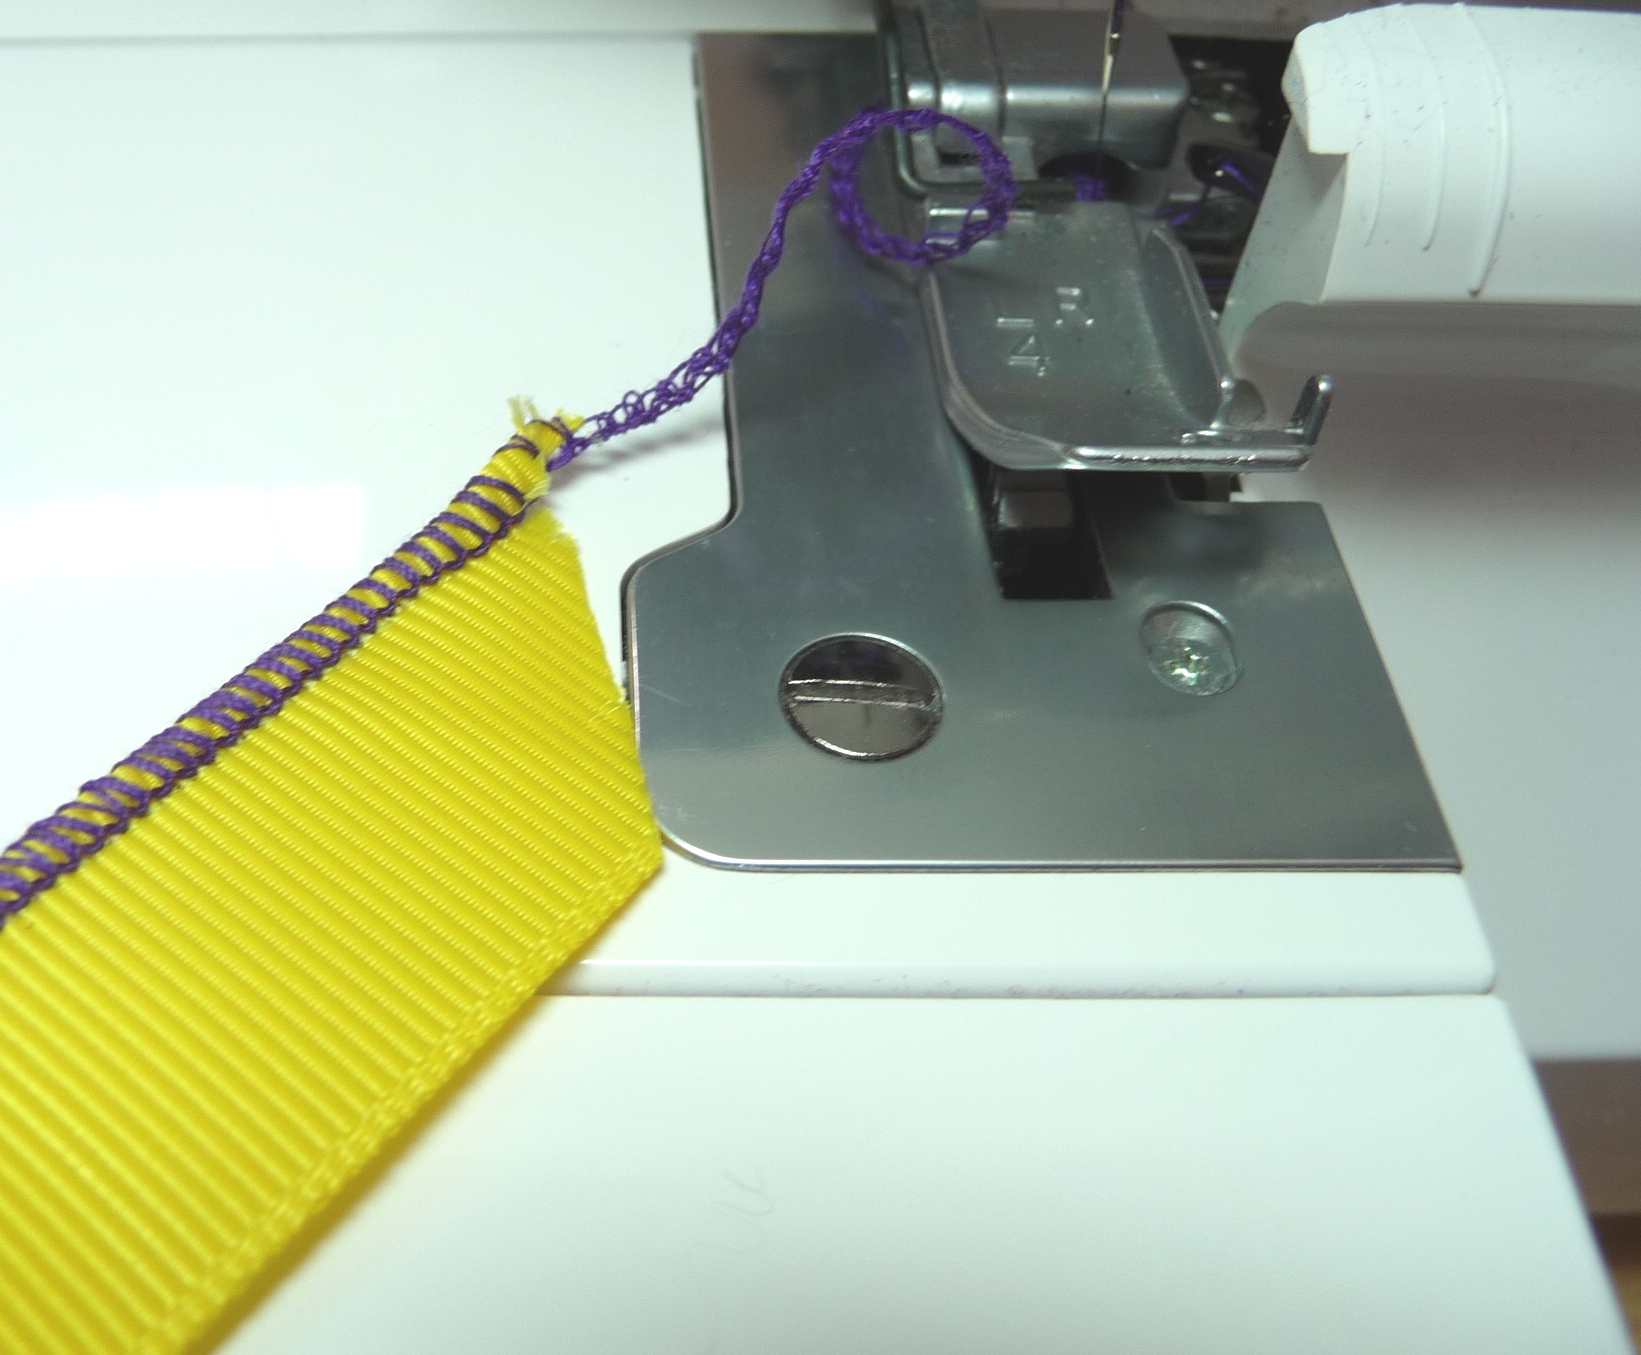
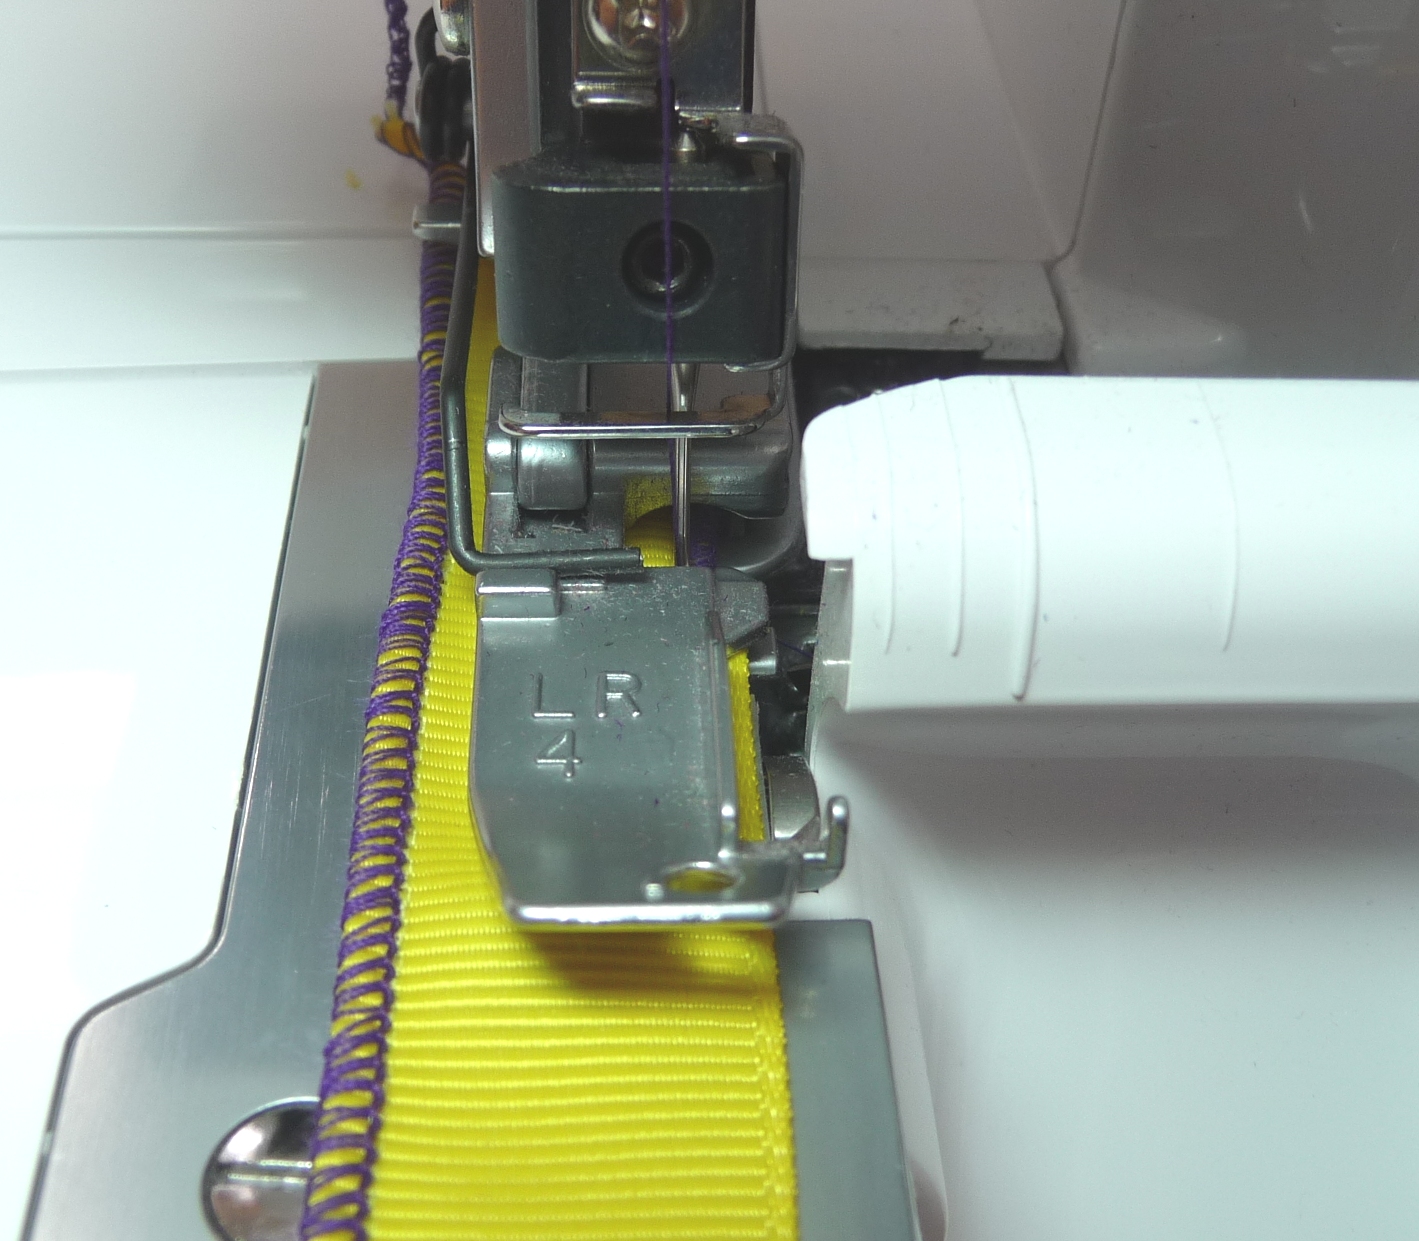
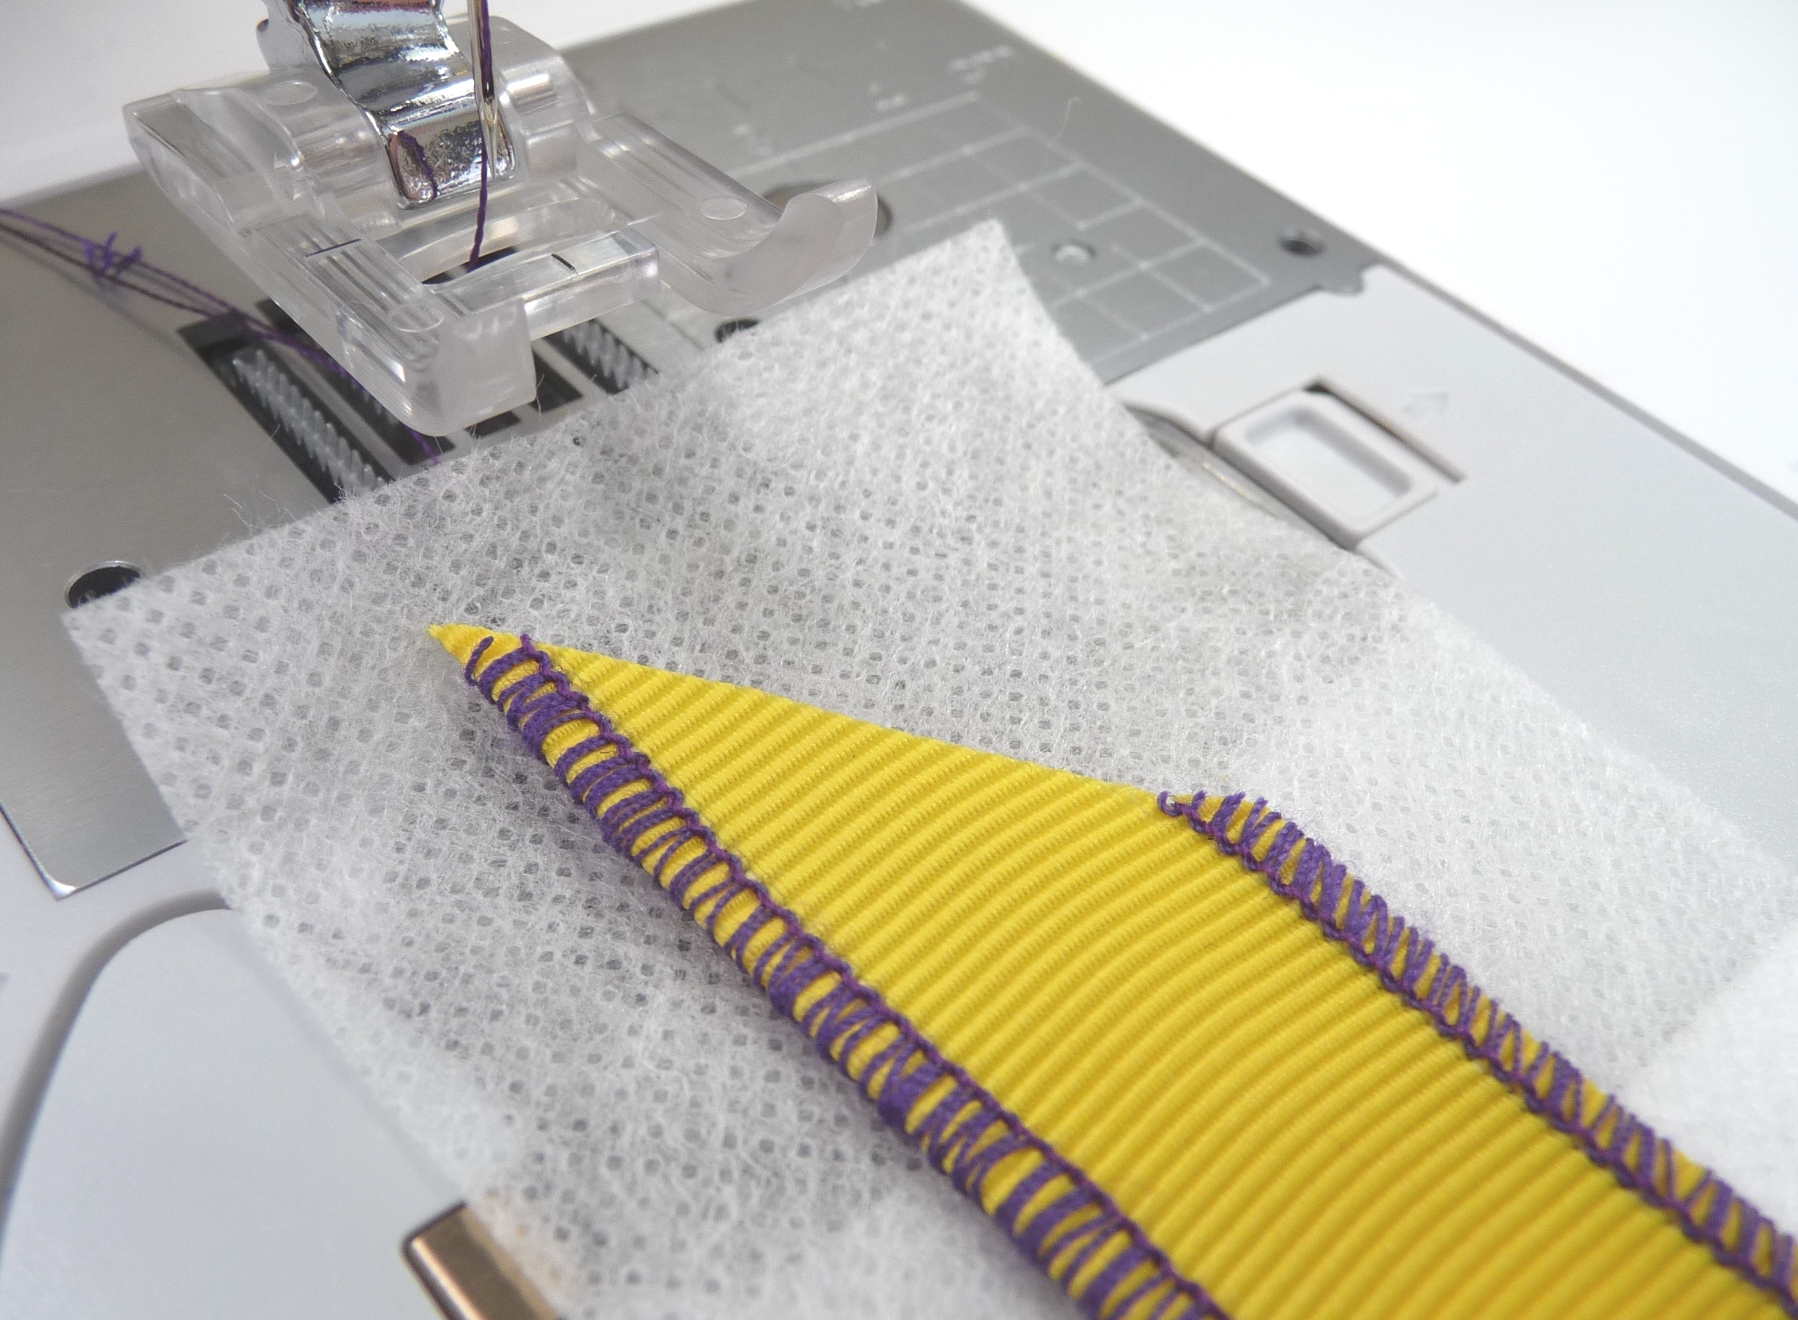
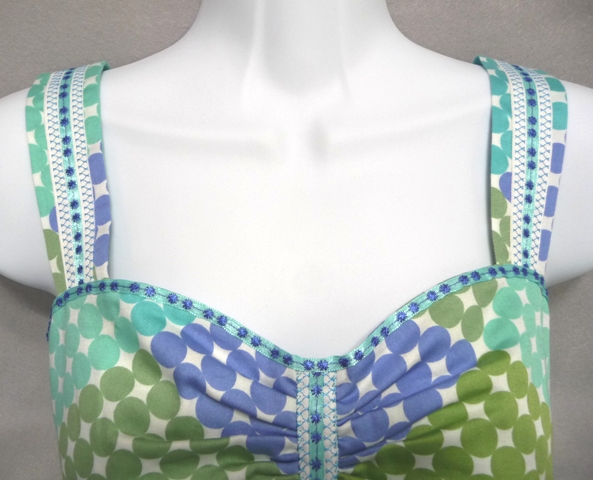
To add ribbon to the sundress straps I placed my ribbon on top of the fabric piece and stitched through all the layers, anchoring the ribbon in place as I added the decorative stitches. Sundress straps become a focal point on the garment with a decorative ribbon stitched down the center. By repeating the technique on the bodice and the banded hem this dress gets a designer style touch that makes it unique. For the banded hem and the bodice I chose to stitch the ribbon separately on a base of stabilizer. Then I used a fine fusible webbing to attach the ribbon to the dress.

Image5_dress1bodiceImage6_dress1hem

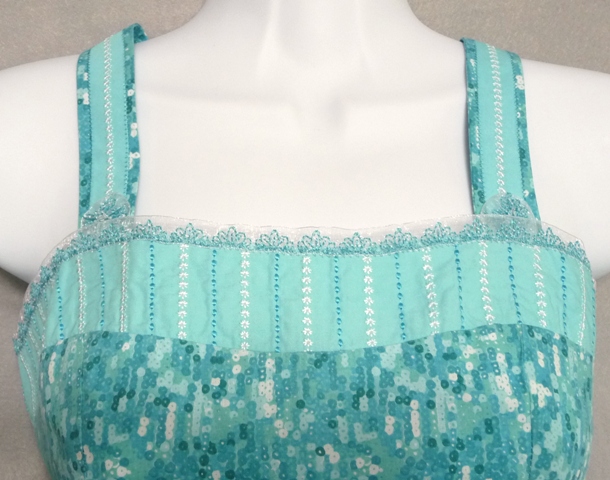
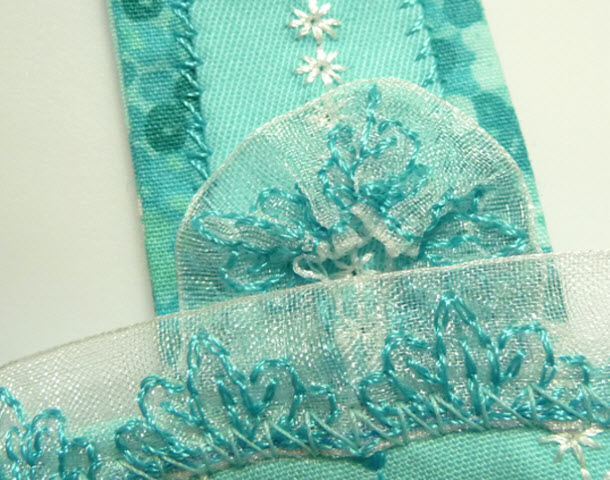
On another dress I selected a sheer ribbon and sewed a light weight decorative stitch down the center. To stitch on this soft sheer ribbon I opted for a light weight fibrous type of water soluble stabilizer, instead of my usual tear away stabilizer. I use this type whenever I need stabilizer to totally disappear when I’m finished. For added stability I layered a strip of stabilizer over the top and bottom of the ribbon. After washing out the stabilizer I used a narrow zig-zag stitch to attach the ribbon to the upper embellished band. I had a bit of leftover ribbon so I gathered the edge of two small pieces and formed little rosettes to decorate the straps. The resulting trim is subtle but pretty.

Image7_dress2bodiceImage8_rosette
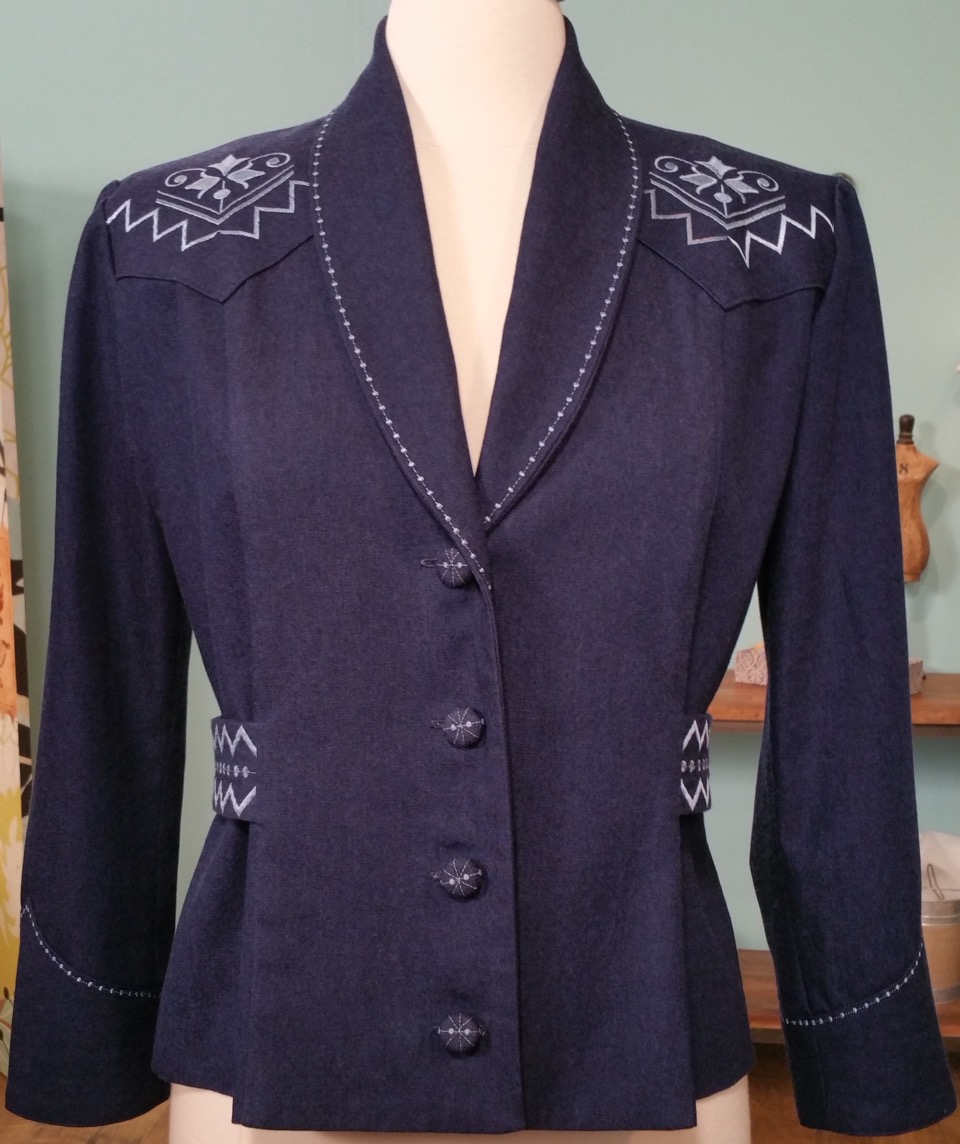
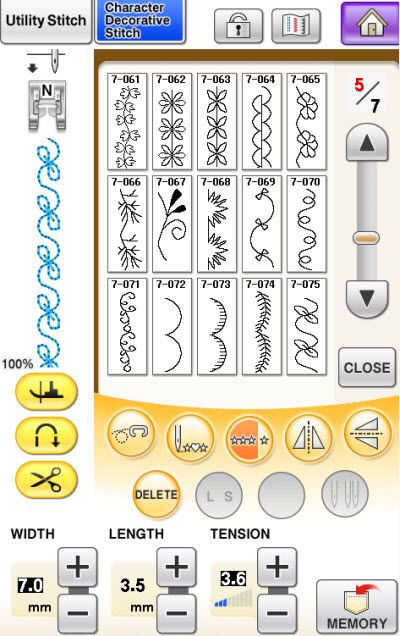
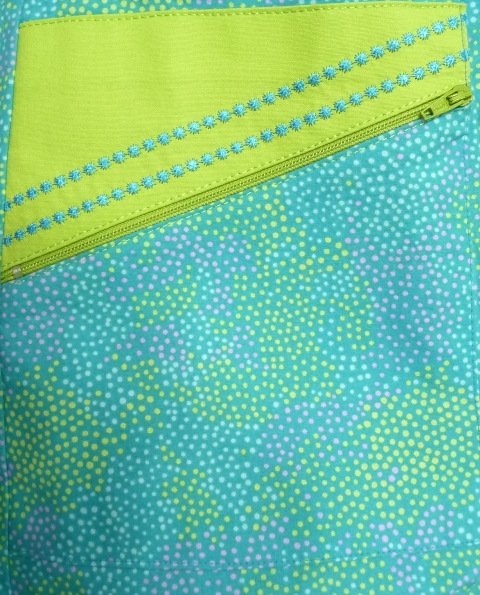
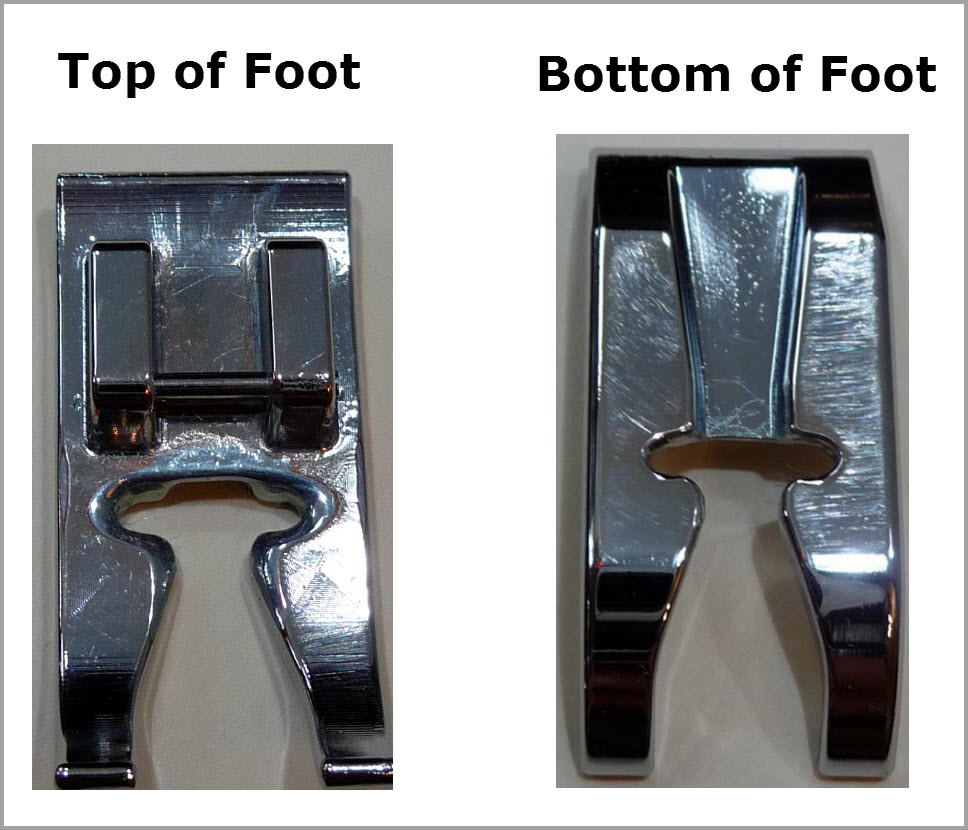
While creating the dresses I had fun playing with different decorative stitches. Some of the bands feature candlewick style stitches. You may have a stitch like this built in to your machine. Candlewick stitches are usually defined as a stitch that resembles a hand sewn French knot, or a little star like stitch that produces a heavy bump, almost like a bead. The dress in the photo above has alternating rows of the French knot style stitch, shown in turquoise thread. My zippered pocket shows an example of the star style candlewick stitch on the lime green accent piece. There are quite a few variations of this stitch found on different machines. It is likely you’ll need a Candlewicking presser foot to successfully sew these bulky stitches. This foot has a deep groove running the full length of the foot, gliding over the bumps formed by candlewick stitches.

Image9_candlewickfoot

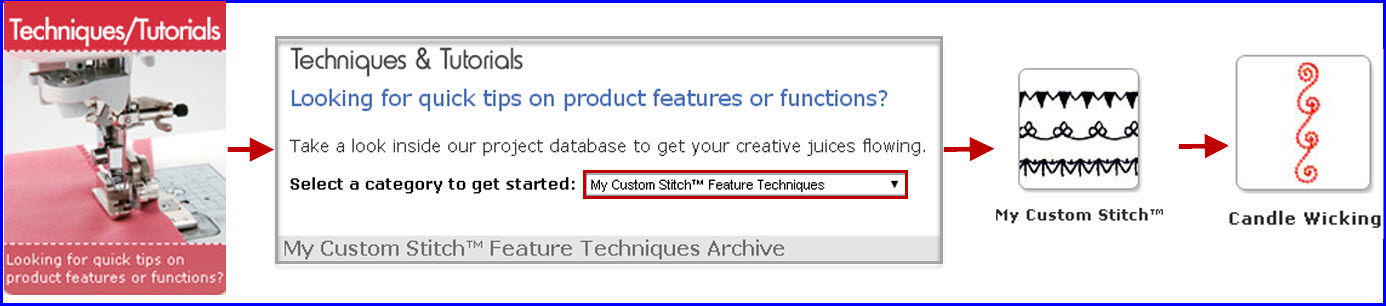
If you have a Brother Model machine with the My Custom Stitch™ feature you can create candlewick stitches right on the screen of the machine. It’s a simple matter of plotting stitch points along a special gridline. These stitch points then serve as coordinates telling the machine how to form the stitch. There is an entire book aptly titled My Custom Stitch™ written to guide you in creating your own special stitches. CLICK HERE to research Brother Model machines that include the My Custom Stitch™ feature. On this same page you will find a link from Allbrands to the Brother Design Studio where you will discover many free My Custom Stitch™ design coordinates, including the French knot style candlewick stitch. Follow the path outlined below to locate this stitch, along with many more My Custom Stitch™ coordinates available from Brother.

Image10_mycustomstitchmap

These dresses are perfect for making use of the many decorative stitches available for your particular machine. To use decorative stitches to the fullest, I encourage you to consider making a sampler of the stitches built in to your machine. If you add a new My Custom Stitch™ to your repertoire you will want to stitch a sample of that stitch too. To make your sampler, select a firm woven fabric in a light color, adding medium weight fusible interfacing to the wrong side. Place an additional layer of tear away underneath. Use contrasting thread to sew out each stitch in your entire stitch menu, from beginning to end. I’m sure you’ll see many stitches that are far more beautiful in thread than they are on the screen of your machine or printed in the instruction manual. Keep your sampler handy and it will inspire you to use those pretty stitches more often. I hope these ideas empower you with motivation to make your own summer sundress or apply these decorative techniques to other garments and crafts.

For those of you have been following this series you may recall that last time I said I would talk about embellishing ribbons with bobbin work decorative stitching. Bobbin Work stitchery isyet another of my all time favorite embellishment techniques. I promise to cover that subject next time as I finish up this series. Until then, happy sewing from your sewing friend,


JoanneBanko

JoanneBanko_signature

About the author: Joanne Banko is a freelance sewing educator and a self proclaimed sewing cheerleader. You can see Joanne’s online teaching segments broadcast on the popular PBS TV show, It’s Sew Easy, and online at www.itsseweasytv.com. She is a frequent contributor to Designs in Machine Embroidery magazine and author of the book Wrapped in Embroidery. The book is available at AllBrands.com. CLICK HERE for a preview. Visit Joanne at http://www.letsgosew.com/.


Easy Embellishments with Ordinary Ribbons- Part One

JoanneBanko

JoanneBanko_signature

About the author: Joanne Banko is a freelance sewing educator and a self proclaimed sewing cheerleader. She is a frequent contributor to Designs in Machine Embroidery magazine and author of the book Wrapped in Embroidery available at AllBrands.com. You can see Joanne’s online teaching segments broadcast on the popular PBS TV show, It’s Sew Easy, and online at www.itsseweasytv.com. Visit Joanne and read her blog posts at http://www.letsgosew.com/.


The sewing tools we have at our fingertips these days make it easy and effortless to create embellishments for garments, crafts, home decor, and more! From incredible machine features to fantastic presser feet and helpful accessories, there is so much to love about sewing these days! Beginning with this article I’d like to share a few of my favorite techniques for creating embellishments with ribbons.

Since this is my first article for the ALLBRANDS newsletter I’d thought I’d give you a bit of background. I believe I was born with sewing in my genes. You may say I inherited the “tendency” to sew but I view it as a gift from my Creator. My Grandmother and Mother were both accomplished seamstresses but ironically, I was not taught by either of them. I was the last of five children, with a long gap in between. By the time I arrived on the scene my Mom had stopped sewing. My first stitch was in a Junior High Home Economics class. I remember taking that very first stitch and was hooked from the beginning! My wonderful, wise Mother saw the spark that first stitch created and at the beginning of the following school year she offered me a choice between ready-made clothes or a new zig-zag sewing machine and fabric. I chose the machine and have been sewing ever since!  Seeing my enthusiasm my Mom started to sew again herself. We had so much fun shopping for supplies and sewing together. She stitched in the living room on her machine, while I sewed on my very own machine in my bedroom. I zig-zagged my way through junior high and high school making almost all of my own clothes.

We’ve come a long way since the days when we thought an ordinary zig-zag stitch was a big deal. Now we can choose from literally hundreds of decorative stitches built-in to the sewing side of our machines. Beyond that, we can stitch multitudes of embroidery designs with “hoop” capability. Yes, sewing today is better than ever and I love to do it all… sew, embroider, quilt, and craft! In this article I’d like to share a simple technique for creating decorative ribbon using your serger and your sewing machine. Are you ready? Let’s go sew!

Here are the supplies you will need:
  1. Serger with rolled hem capability.
  2. Sewing machine with decorative stitch capability. Recommended presser feet for this project include a clear foot for decorative stitching and an adjustable blind hem foot for stitching the ribbon on your chosen item.
  3. Ordinary grosgrain ribbon measuring approximately 1-inch wide. Note: Cut a length of ribbon measuring twice the amount needed for your finished project so you have enough to test your rolled hem stitching and your decorative stitching.
  4. Serger Thread to contrast with your ribbon.
  5. Embroidery Thread to match your serger thread.
  6. Size 11 embroidery needle.
  7. Strips of stabilizer – Use tear away stabilizer if you don’t need reversible ribbon. Use water soluble mesh stabilizer for reversible ribbon.
  8. Seam sealant to treat ribbon ends.

No1_Notions

 Here is how to decorate your ribbon:

Set up your Serger for a two or three thread rolled hem.

No2_sergersetup

Disengage the cutting blade and serge along each finished edge of the grosgrain ribbon. Note: You are not actually rolling the edge of the ribbon. You are simply using the rolled hem stitch to accent the edge of the ribbon. When stitching, be sure to guide the ribbon evenly so that the rolled hem stitch forms right along the finished edge.

No3_sergersetupOne

No4_sergersetupTwo

No5_sergersetupThree

Press ribbon. I like to use Mary Ellen’s Best Press to smooth out the ribbon in preparation for decorative stitching. Set up your sewing machine for decorative stitching. Thread your machine with Embroidery Thread that matches your rolled hem, threading top and bobbin with the same thread. It is important to use a Presser Foot designed specifically for decorative sewing. In addition, you want your presser foot to be the same size, or slightly smaller than your ribbon. If your particular decorative foot is wide, then you will want to use ribbon that is slightly wider as well. Prior to stitching on the ribbon you need to cut stabilizer strips to equal twice the width of the ribbon.

No6_decorativestepOne

Select a decorative stitch to fit the ribbon. I used a stitch measuring 7mm wide and I increased the length of the stitch. It’s likely you have many built in stitches to choose from. I recommend testing several stitches until you find one that works well on your machine.

No6B_decorativeStitchMenu


Stitch a row of decorative stitches down the center of the ribbon placing stabilizer underneath as you stitch.

No7_decorativestepTwo

Remove stabilizer according to the package directions. Trim ends at an angle and treat with seam sealant.

No8_seamSealant

Attach the ribbon to your project using a straight stitch, stitching just along the edge of the rolled hem stitching. Tip: The adjustable blind hem foot is perfect for this task. Adjust the guide to line up with the edge of the ribbon, having the needle pierce along the rolled hem stitching. While stitching, keep your eye following the guide to maintain even and consistent edge-stitching.

No9_edgestitching

Ideas for using your ribbon: Use lengths of ribbon to trim a pillowcase, accent the hem of a little girl’s dress, decorate ready-made placemats, trim baskets and flower pots, decorate gift packages and more! Because this ribbon looks good on both the right and wrong sides, you can tie it into a bow and use it to accent any garment or craft project you like!

No10_finalpic

Next time . . . I’ll show you to use plain ribbons to enhance your embroidery designs. Until then, happy sewing from your sewing friend,

JoanneBanko

JoanneBanko_signature

About the author: Joanne Banko is a freelance sewing educator and a self proclaimed sewing cheerleader. She is a frequent contributor to Designs in Machine Embroidery magazine and author of the book Wrapped in Embroidery available at AllBrands.com. You can see Joanne’s online teaching segments broadcast on the popular PBS TV show, It’s Sew Easy, and online at www.itsseweasytv.com. Visit Joanne and read her blog posts at http://www.letsgosew.com/.